Blackberry Auto Cannabis Strain Week-by-Week Guide

- 1. Grow specification
- 2. Grow set up
- 3. Germination and seedling stage | week 1
- 4. Early veg | week 2
- 5. Mid veg | weeks 3-4
- 6. Transition (pre-flower) | week 5
- 7. Early flower | weeks 6-7
- 8. Mid flower (bulk phase) | weeks 8-9
- 9. Ripening and harvest | week 10 (and beyond)
- 10. The outcome
- 10. a. Blackberry auto yield
- 10. b. Blackberry auto smoke report
- 11. In conclusion
Blackberry Auto is a strain that offers an exceptional experience from seed to smoke. For growers, this strain presents a dream come true with its robust and vigorous growth. It flourishes with ease, displaying resilience throughout its lifecycle and impressive yields at the end of it. With its striking looks and exquisite berry-like aroma, Blackberry entices the senses and promises a flavorful smoke that never disappoints your palate but also offers amazing potency.
Achieving the highest quality with Blackberry Auto doesn't require much expertise. Nevertheless, we hope that our week-by-week growing guide will help you be at your best game. With valuable insights into its timeline and progress from seed to harvest, you'll be equipped to cultivate this weed like a seasoned pro.
1. Grow Specification
Prepare to be captivated by this extraordinary Blackberry strain, a true gem in the world of autoflowering cannabis. With a delightful Sativa 25% / Indica 75% composition, this exquisite plant offers a harmonious balance of uplifting and soothing effects. Cultivating Blackberry is a rewarding experience, thanks to its impressive size and height ranging from 70 to 120 cm, showcasing its XL stature. Indoors, you can expect a bountiful yield of 450-600 g/m2, while outdoor growers will be rewarded with 50 to 250 grams per plant.
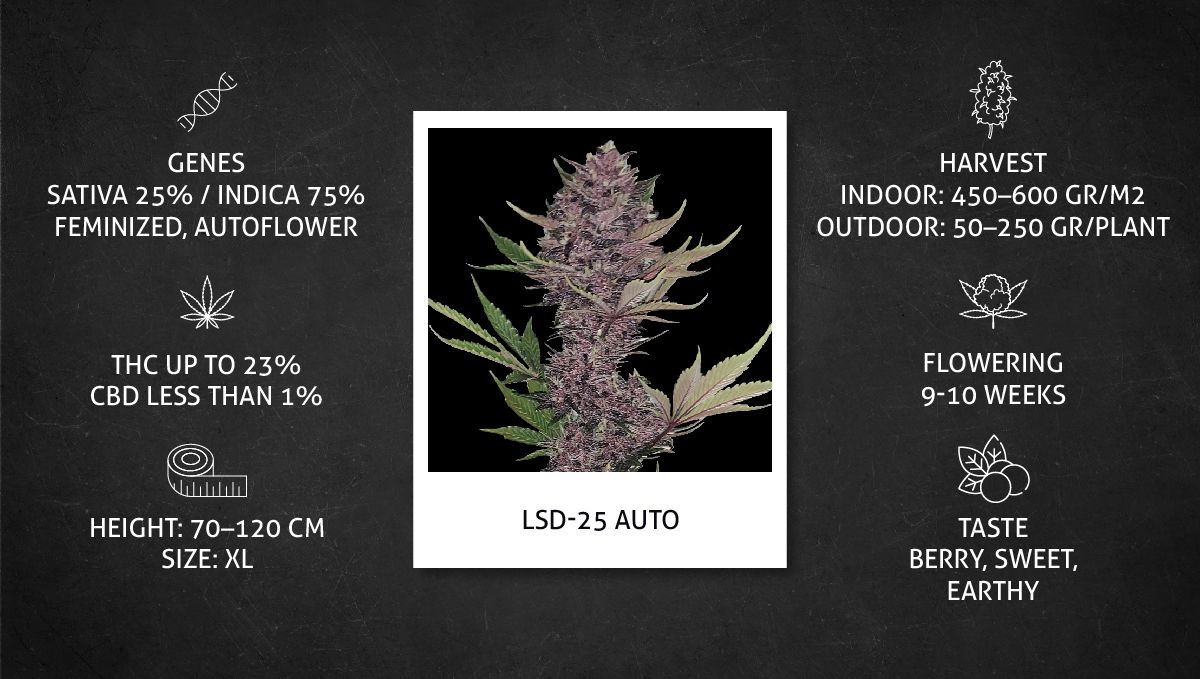
Blackberry's THC content reaches an impressive 23%, ensuring a potent and exhilarating experience for enthusiasts seeking a powerful high. The taste profile of Blackberry is a symphony of flavors, where succulent berries, tantalizing sweetness, and earthy undertones blend harmoniously. Each inhale and exhale will leave you enchanted by its delectable combination.
2. Grow Set Up
Blackberry Auto, a delightful strain from Fast Buds, has long been cherished by growers worldwide. The good news is that if you're interested in cultivating this autoflowering gem yourself, you'll find a treasure trove of valuable information online. In this comprehensive guide, we have thoughtfully selected four grow diaries from the plethora available. Our focus was on diaries that showcased growers implementing top-notch cultivation techniques, ensuring you can confidently follow in their footsteps and achieve exceptional results.
| Grow Space | Light | Medium | |
|---|---|---|---|
| A | 0.8 m2 | 360W LED | Soil |
| B | 0.72 m2 | 630W LED | Soil/Perlite |
| C | 1.52 m2 | 150W LED | DWC |
| D | 1.22 m2 | 150W LED | Coco |
Furthermore, we made a conscious effort to present Blackberry Auto in a variety of scenarios and setups to provide you with diverse perspectives. Our goal is to assist you in adapting this autoflower to suit your unique growing style. However, rest assured that Blackberry Auto has consistently proven its versatility, yielding remarkable results in any growing conditions. Whether you're an experienced cultivator or a novice, this strain promises a rewarding and satisfying cultivation journey.
3. Germination And Seedling Stage | Week 1
Creating the perfect environment in your indoor grow space is crucial for a successful cannabis cultivation adventure, especially during those early weeks when your precious seedlings are still fragile. It's important to pay extra attention to the temperature, keeping it on the warmer side, and ensuring the air is nice and humid to give your little green babies the best start.
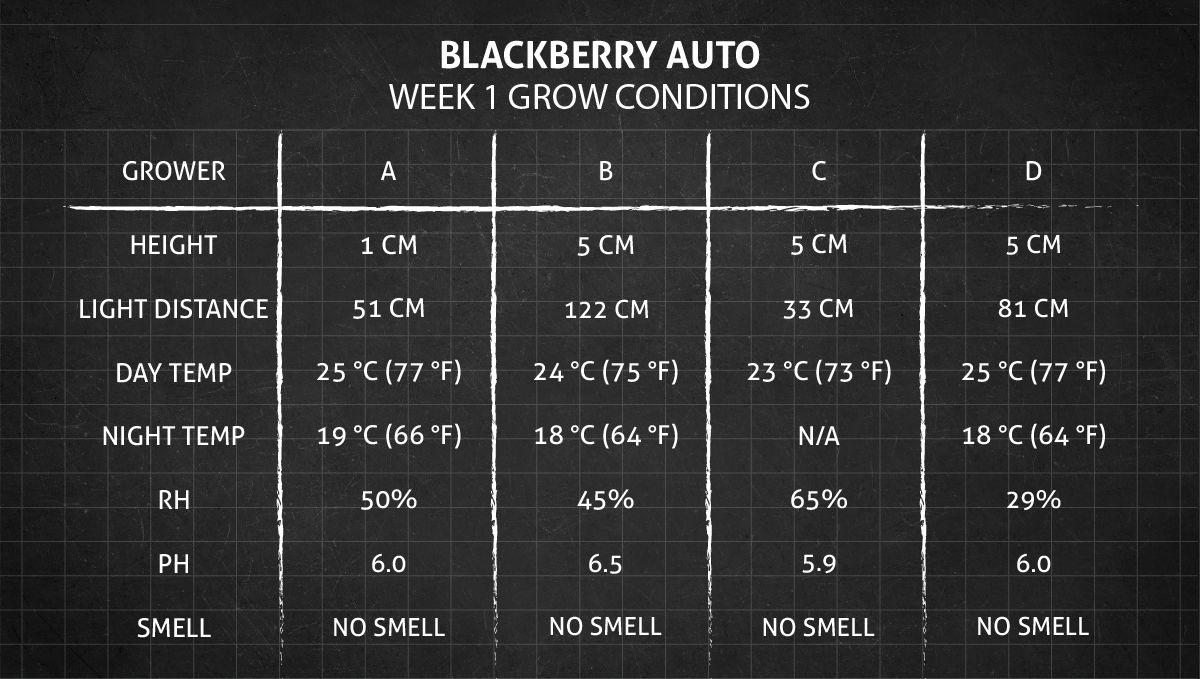
Now, for all you beginner gardeners out there, we know germinating cannabis seeds can feel like a nerve-wracking experience. You don't want to mess up those pricey seeds, right? But don't worry. Good-quality seeds from trusted breeders, Fast Buds included, are surprisingly resilient, and bringing them to life is nowhere near rocket science.
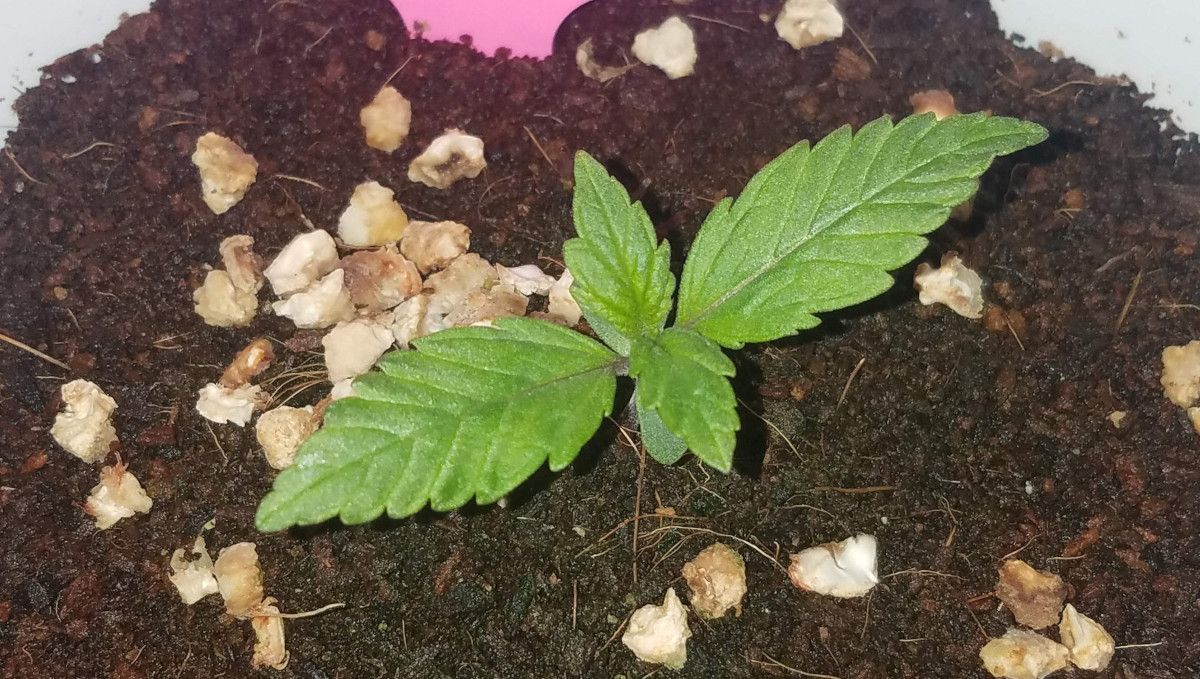
Let us break it down for you. There are just three things you need: a cozy warm environment (think springtime weather), some moisture, and a touch of darkness. With these conditions, your seeds will sprout in no time, usually within 1-3 days. There are plenty of methods out there, but one of the simplest is placing the seeds between damp paper towels, then sandwiching them between plates and keeping them in a dark and warm spot.
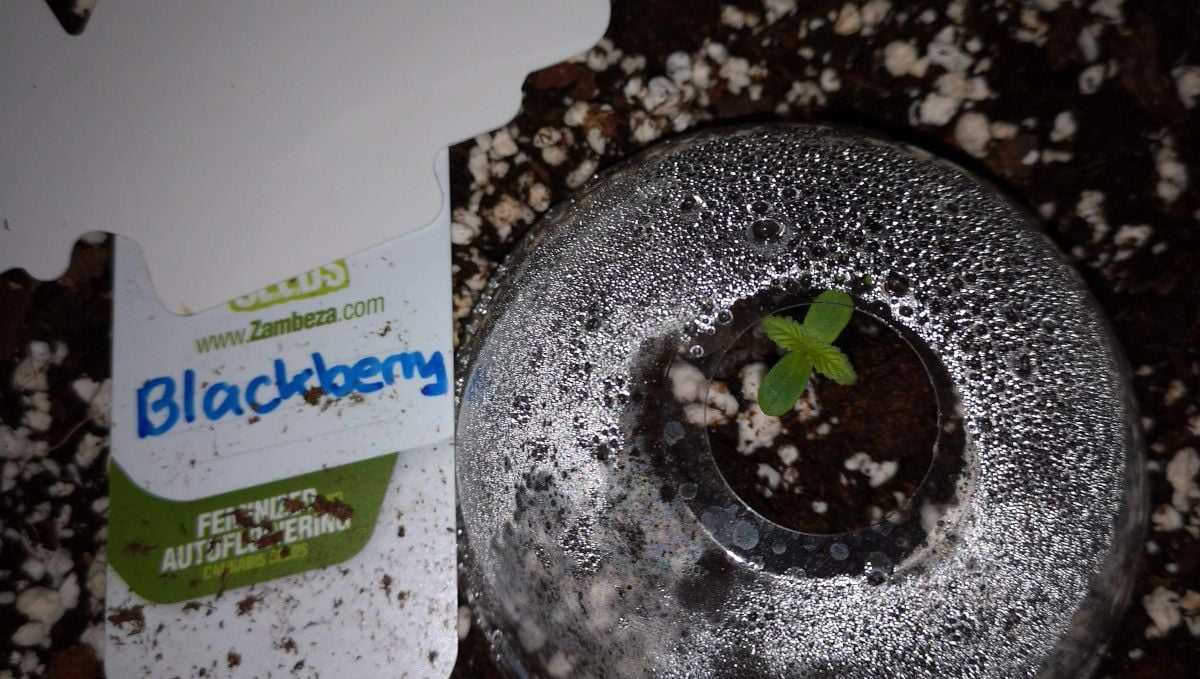
Now, we know some growers like to give their seeds a little pre-soak in a glass of water. Some even let them float on the surface until they crack open and show off their taproot. It's a legit way to germinate cannabis too, as well as many others, but no matter which one you choose, remember that warmth, moisture, and darkness are the magic combo they all need.
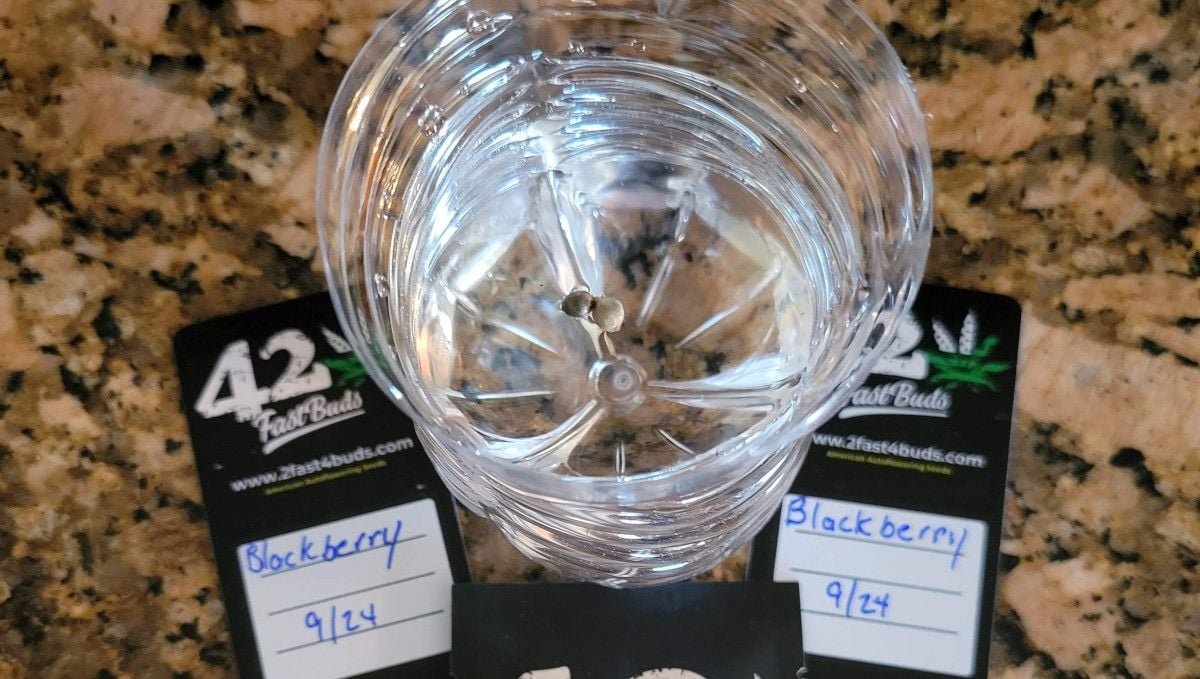
Once your seed has popped and the taproot has grown to about half an inch (a little over 1 cm), it's time to give it a new home in your chosen growing medium. Now, when it comes to growing autoflowers, we highly recommend using the final (and bigger) pot right from the get-go. Trust us, it's the best way to avoid the risks of transplanting. But hey, if you're feeling confident and have a steady hand, you can also start your autos in smaller containers like those solo cups. They have their own perks, including easier handling and watering.
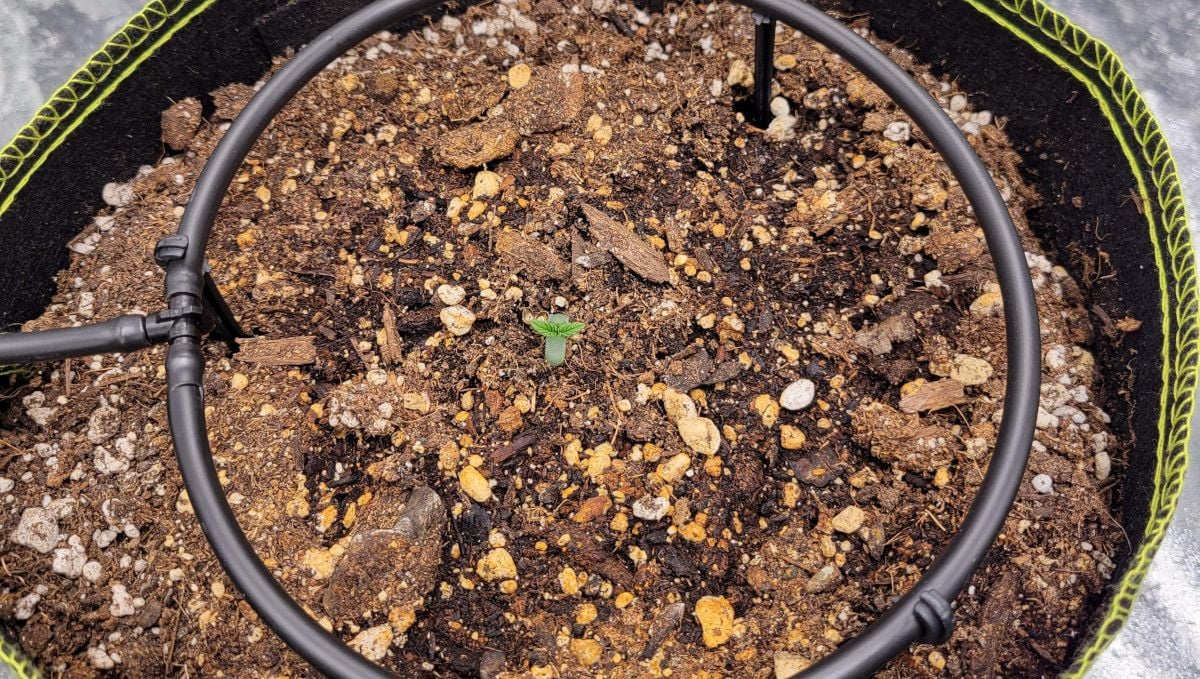
One more tip: please resist the urge to shower your little seedlings with nutrients right from day one. They're still tiny and delicate, and overfeeding them can do more harm than good. Be patient and wait until they grow a bit more before introducing them to the nutrient game. They'll let you know when they're ready for that extra boost.
4. Early Veg | Week 2
Creating the perfect environment for your seedling during the second week is key. Pay attention to temperature and humidity, ensuring they're in the right range. Also, keep an eye on the distance between your light source and the plant, making sure it's not too close to cause the burning of those delicate leaves. And not too far to cause stretching.

As your seedling enters this stage, get ready to witness some exciting developments. The leaves are getting bigger, and that's a clear sign of growth. But here's the fun part: you may also start noticing tiny side branches emerging, especially if you're growing a bushier strain. It's like the plant is preparing itself to become a leafy masterpiece.
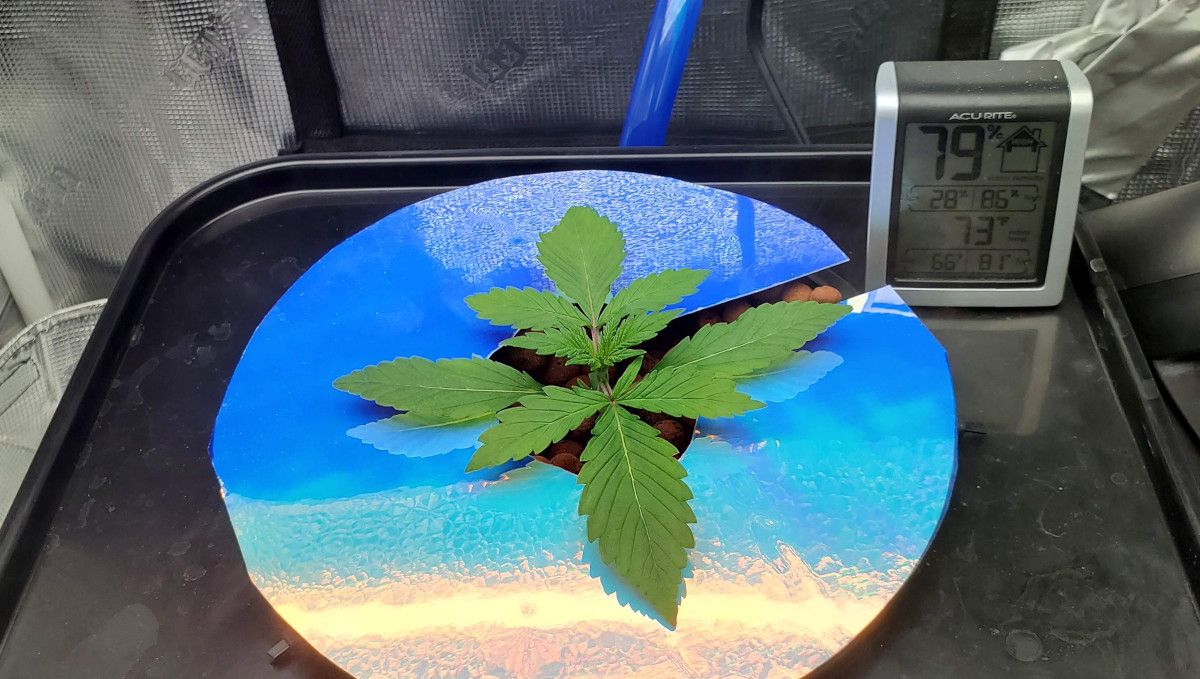
Now, let's talk about training. This is where you can guide your plant's growth and encourage it to bush out even more. While some growers might start training as early as this stage, it's important to choose lower-stress techniques for autoflowers. Gently bending and securing the main stem is a safe option. Save the high-stress methods like topping or FIMing for more experienced hands.
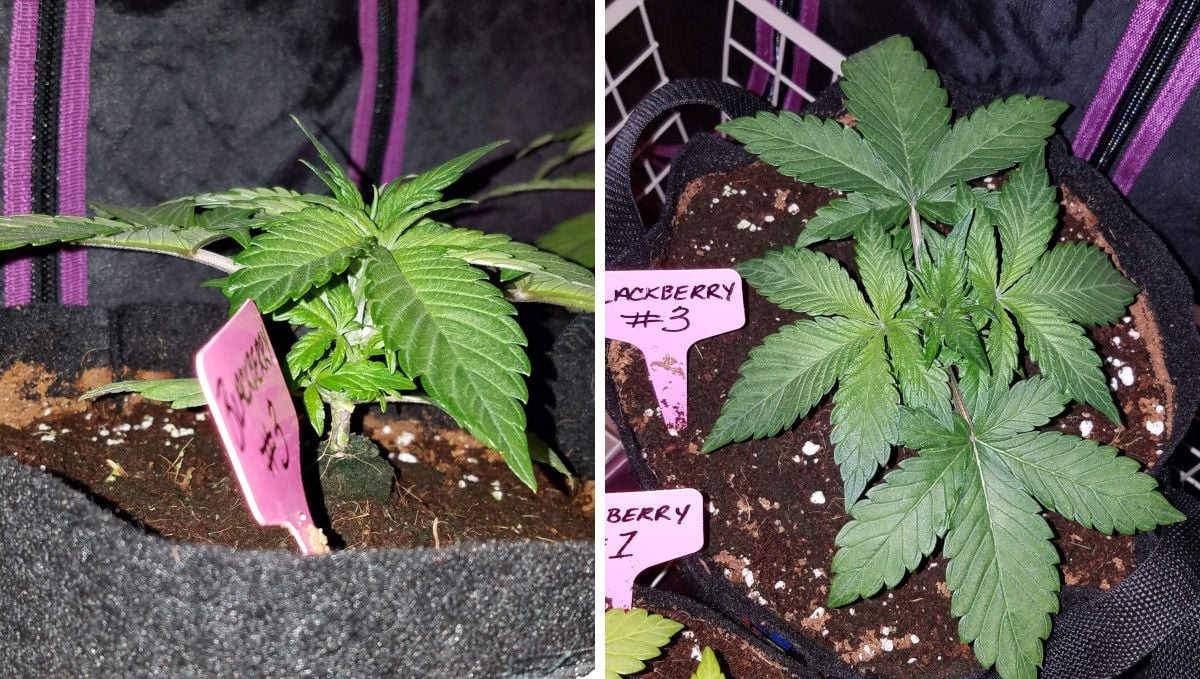
When it comes to watering, precision is key. You want to provide just the right amount at the right intervals to avoid water stress. Overwatering can suffocate the roots, while underwatering can cause stress and stunted growth. Strike a balance and let the soil dry out slightly between waterings to promote healthy root development.
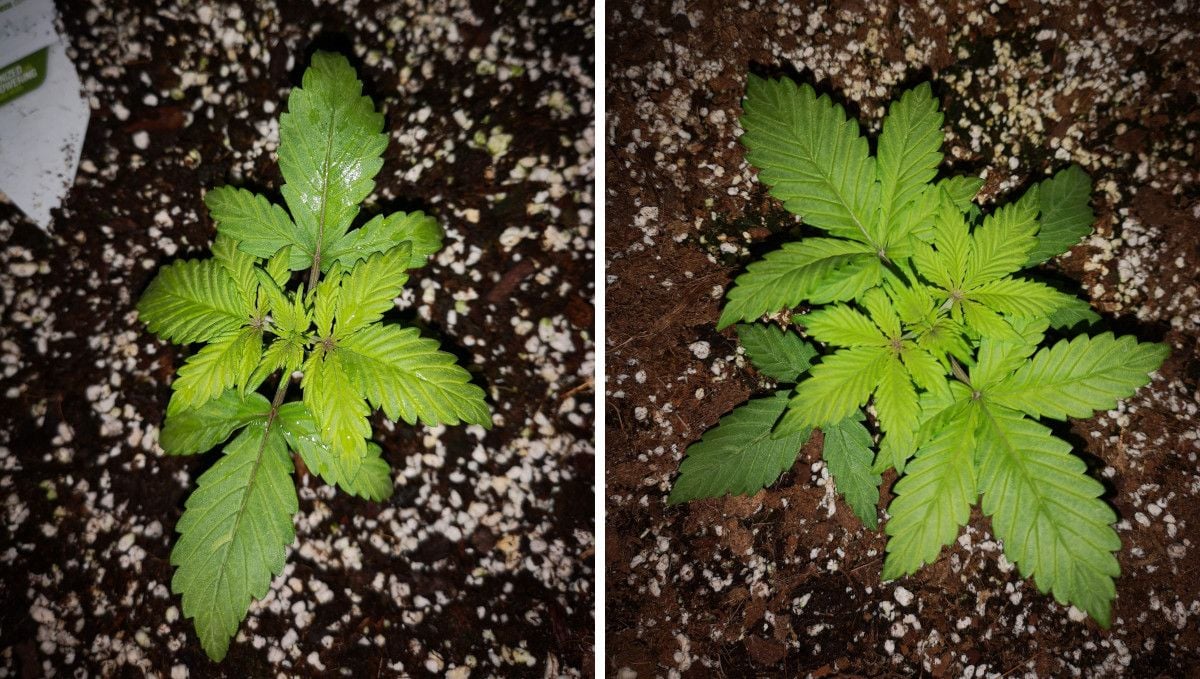
Now, let's talk about nutrients. If you're growing in soil, your plants may benefit from some extra nutrients starting from week 2. The stored nutrients in the medium will start to deplete, and your little seedling might need a boost. On the other hand, if you're growing in hydroponic systems or coco coir, nutrients are necessary right from day one. They provide the essential elements for your plant's growth and development.
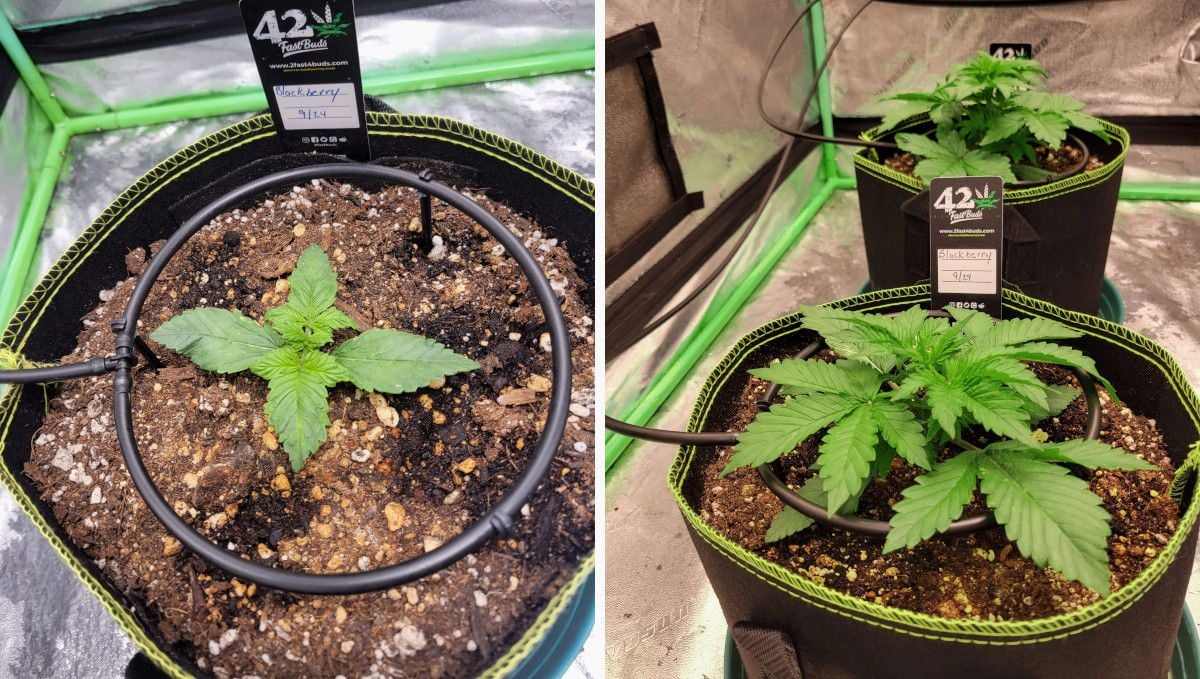
For those new to cannabis cultivation, using organic methods can be the safest option. Organic practices rely on the use of natural amendments and beneficial microorganisms to create a healthy growing environment. Consider inoculating your medium with beneficial microbes to promote nutrient uptake and overall plant health. Then, start to introduce the organic plant food, using not more than 1/4 of what the manufacturer recommends and gradually working your way up.
5. Mid Veg | Weeks 3-4
During weeks 3 and 4, get ready to witness the vibrant vegetative growth of your Blackberry Auto! Don't fret too much about maintaining precise temperature and humidity levels as your plant has reached a mature stage and can handle a broader range of conditions.
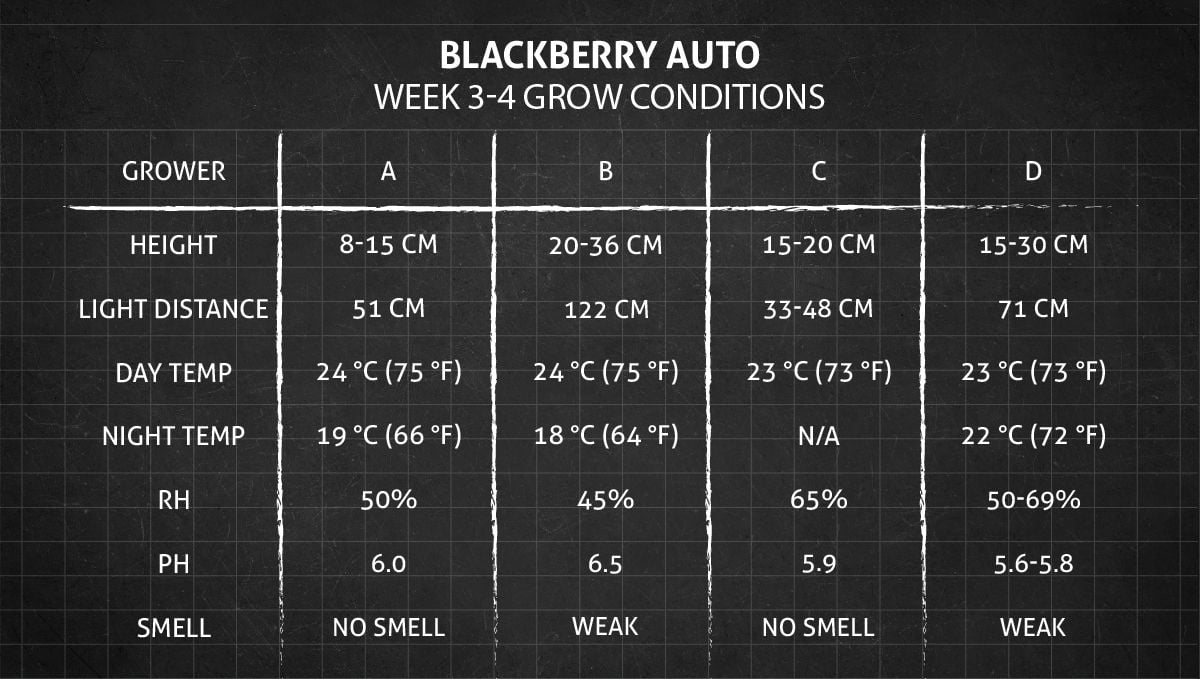
This Indica-dominant beauty won't be reaching for the stars like some Sativa strains. Its compact structure keeps it low and manageable, allowing you to focus more on optimizing its health and vitality.
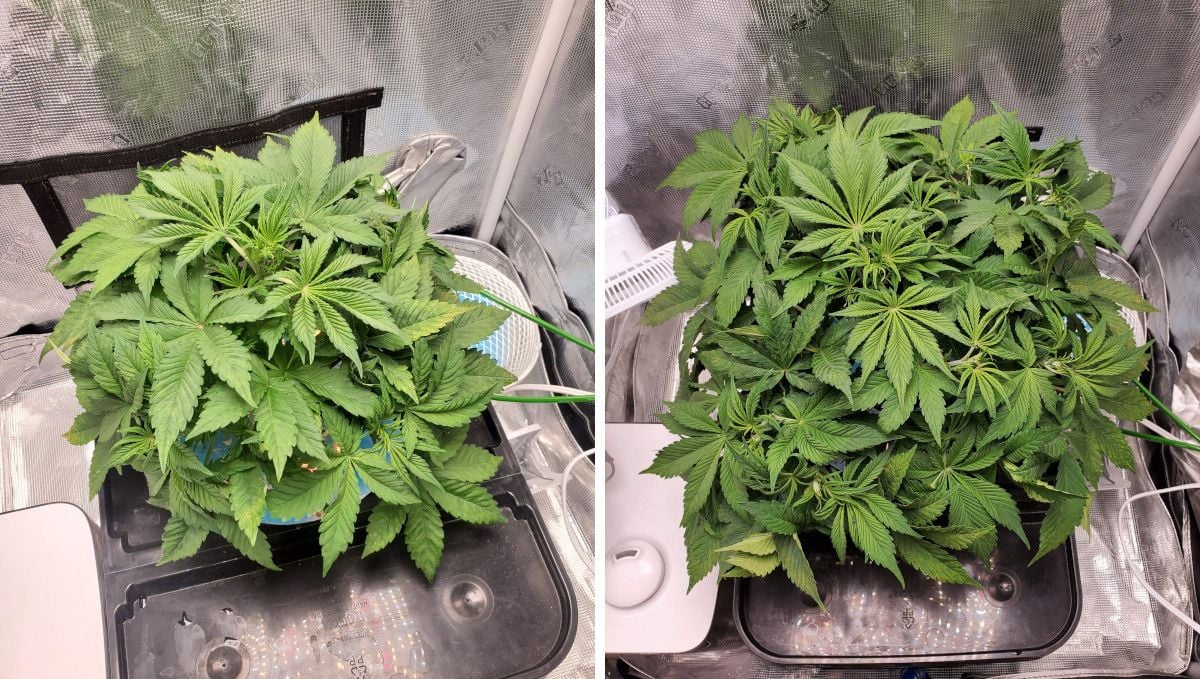
When it comes to training, shorter and bushier autos like the Blackberry Auto often thrive without any interventions. Their natural growth pattern keeps them low-profile and well-balanced. So, sit back and let your plant flourish without the need for additional training techniques.
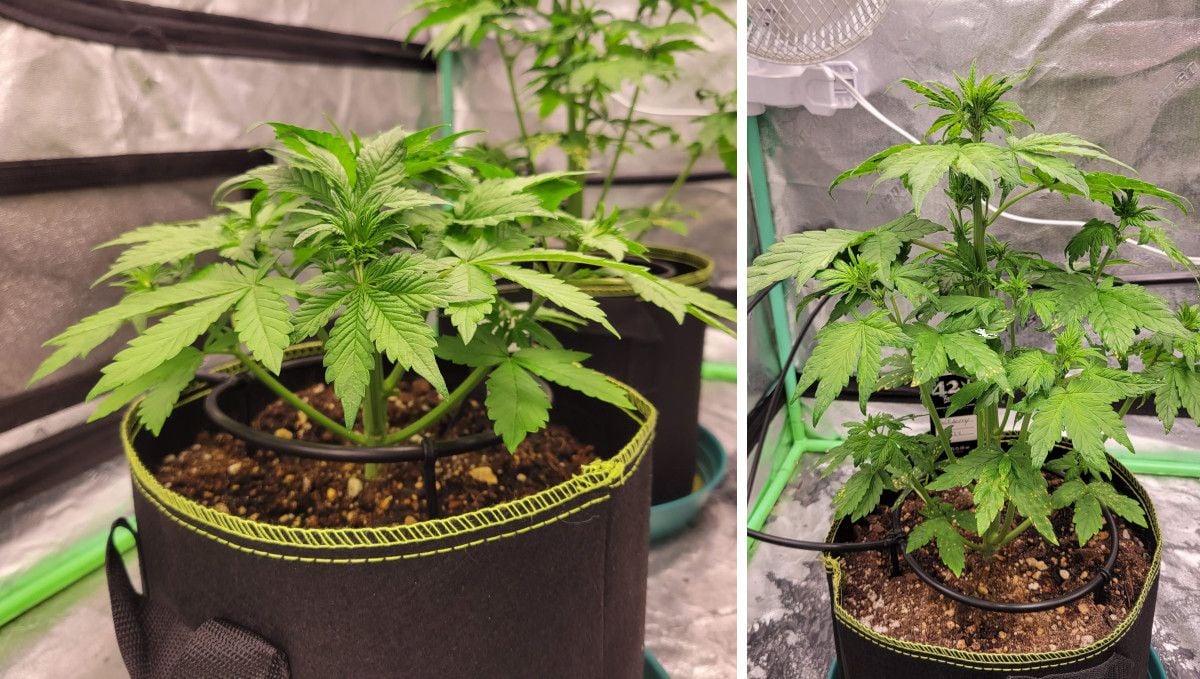
If you're so used to training your plants that you want to do something about Blackberry Auto too, we don't recommend anything as invasive as HST. You can achieve all your canopy-management goals with the simples form of training -- the tie-down method.
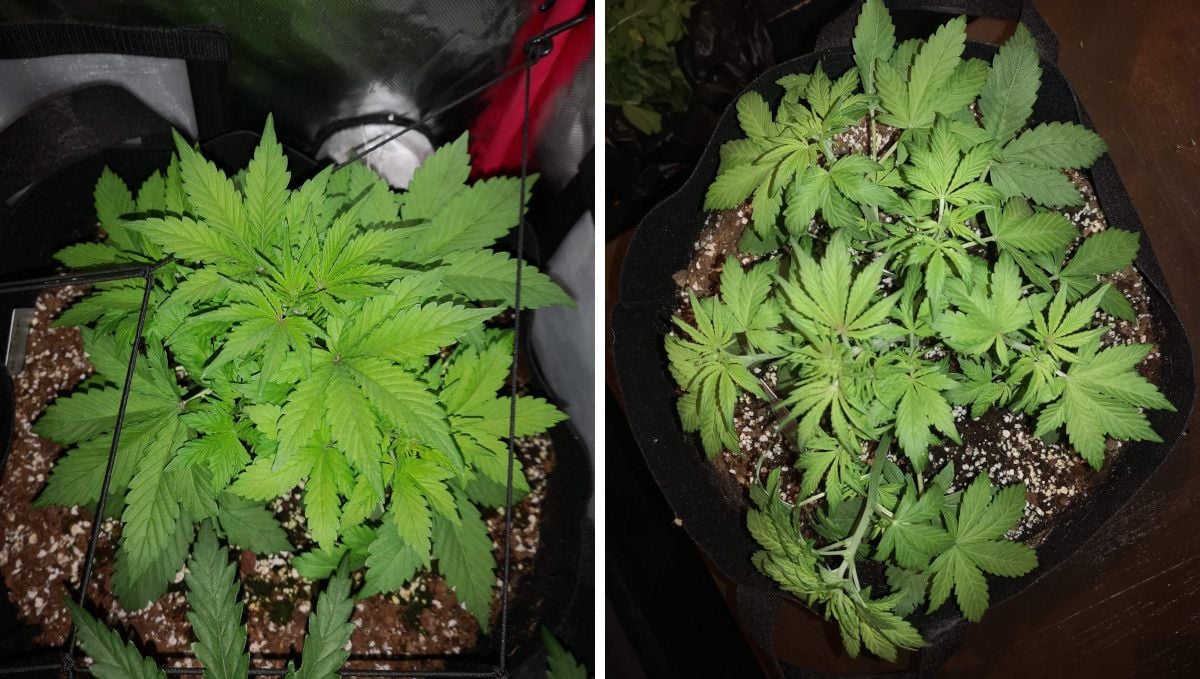
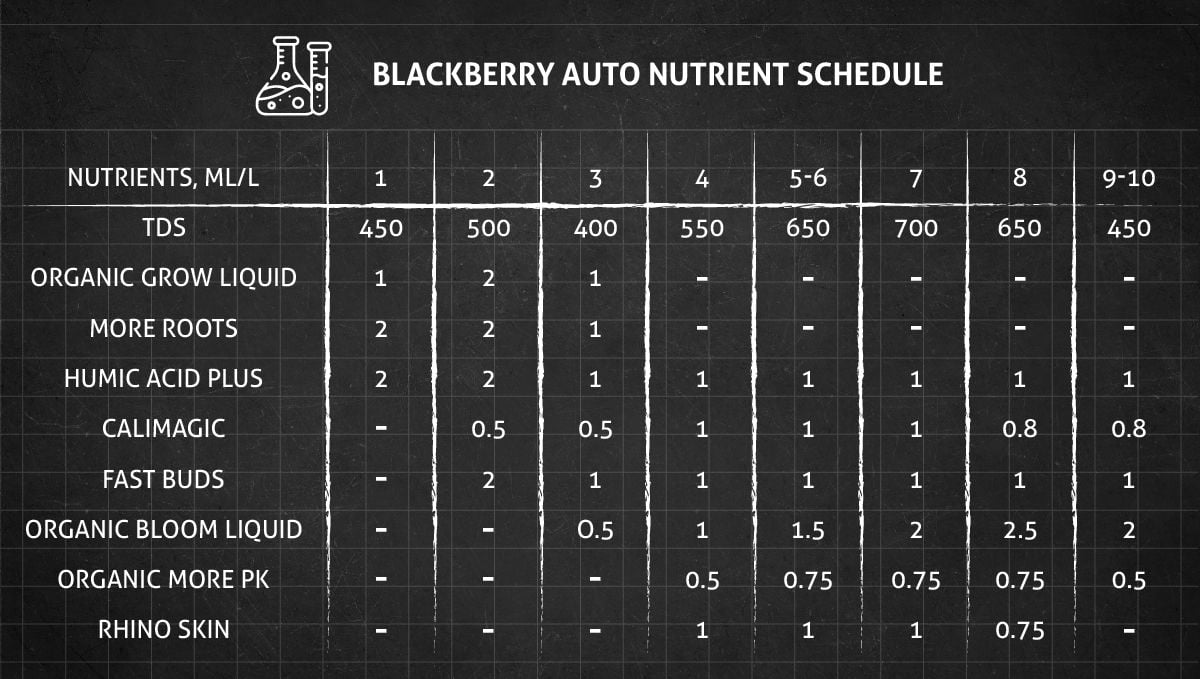
As your plant continues its vigorous growth, feeding it with the right nutrients becomes crucial. Indica-dominant autos like the Blackberry tend to have a slightly bigger appetite compared to other varieties. They can handle slightly higher doses of nutrients, but remember, overfeeding can still cause harm. Always monitor their response and provide a well-balanced feeding schedule to keep them happy and thriving.
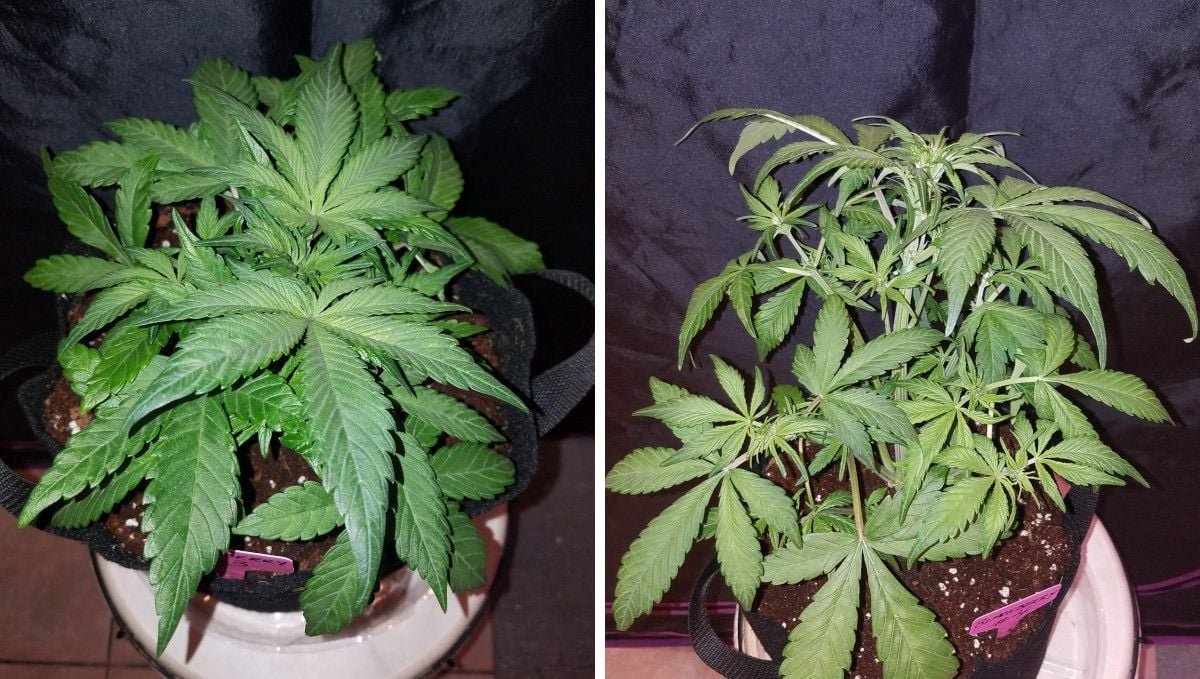
As the vegetative stage nears its end, keep in mind that once the flowering phase begins, new branches won't emerge. This limits the number of bud sites and the ultimate yield. So, be proactive in optimizing your plant's potential by focusing on the effective use of canopy space and providing the right nutrients.
6. Transition (Pre-Flower) | Week 5
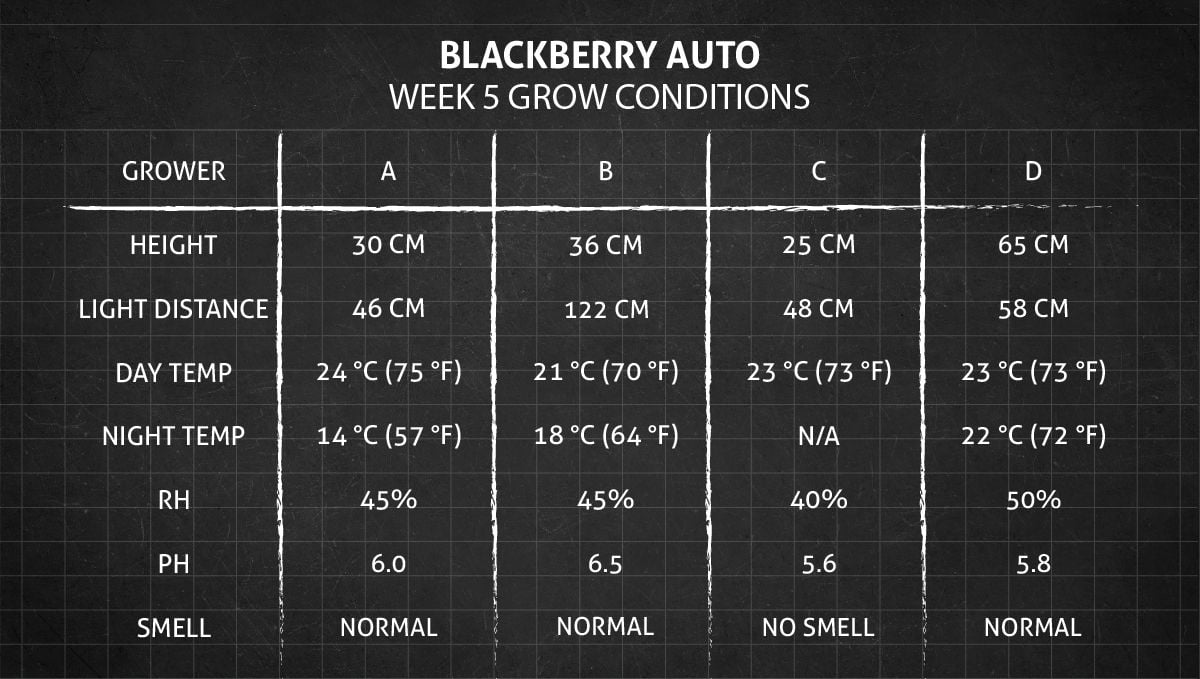
As your cannabis plant moves into the pre-flowering stage, keeping the environment consistent and cozy is the best way to go. Aim for daytime temperatures around 73-77°F (23-25°C) and slightly cooler nights. Don't forget to give your plant some breathing space with a relative humidity of around 40-50%. And keep the lights on for 18-24 hours per day, just like before—autoflowers aren't fussy about changing their light schedule to start blooming.
If you inspect your plants closely around this time, you’ll notice pre-flowers, those cute little white hairs popping up first in the middle of the plant and then crowding on tops to produce a fluffy appearance. In regular strains, this stage can go on forever if you keep them under more than 14-16 hours of light. But with autoflowers, it's a different story—they're quick to jump into full-on flowering mode regardless of the light schedule.
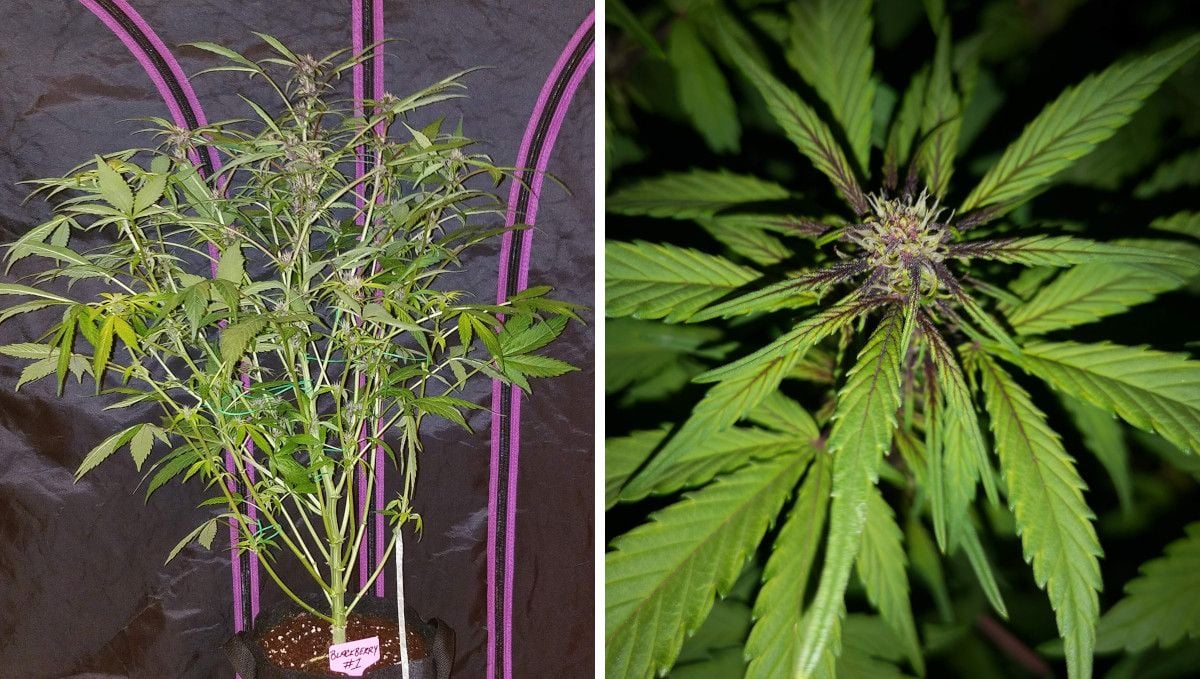
You won't have to wait long before the tops of your autoflower start turning a yellowish hue and become a furry paradise of white hairs and super thin, delicate leaves. Your autoflower is basically saying that it’s getting closer to harvest time.
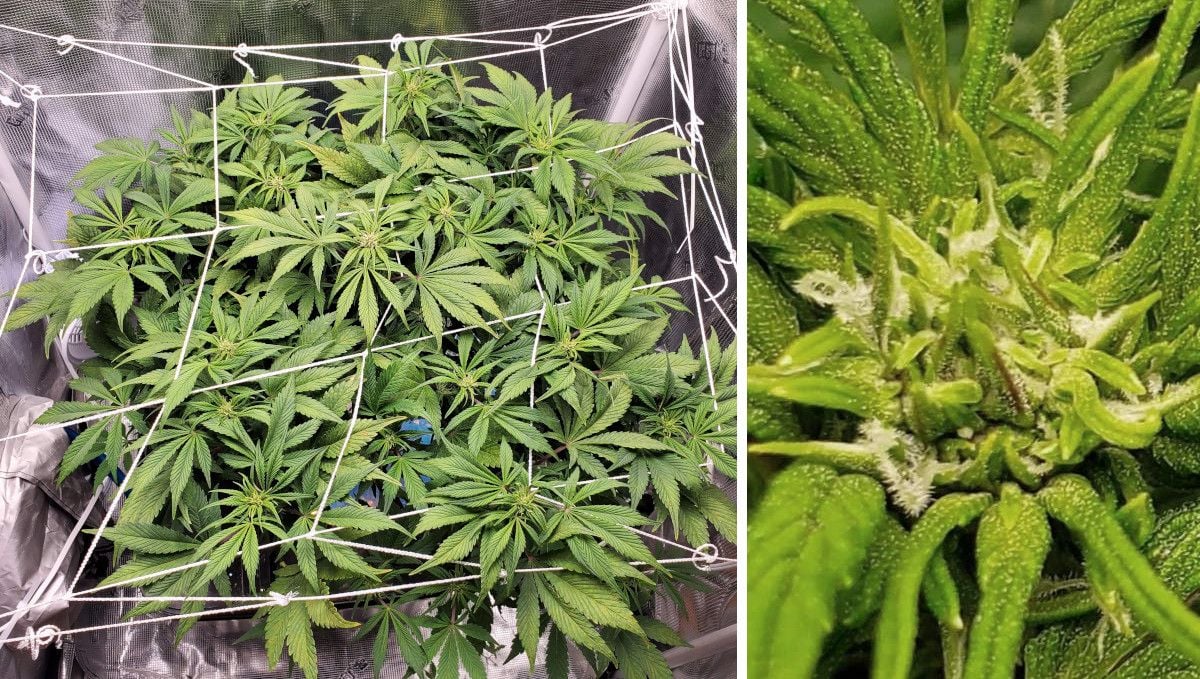
Now, here's a fun fact: modern autoflowers, whether they're Indicas or Sativas (or hybrids of the two), all join the flowering party around the same time. It's like they've got an internal alarm clock set for blooming, thanks to the efforts of breeders who want faster and faster strains.
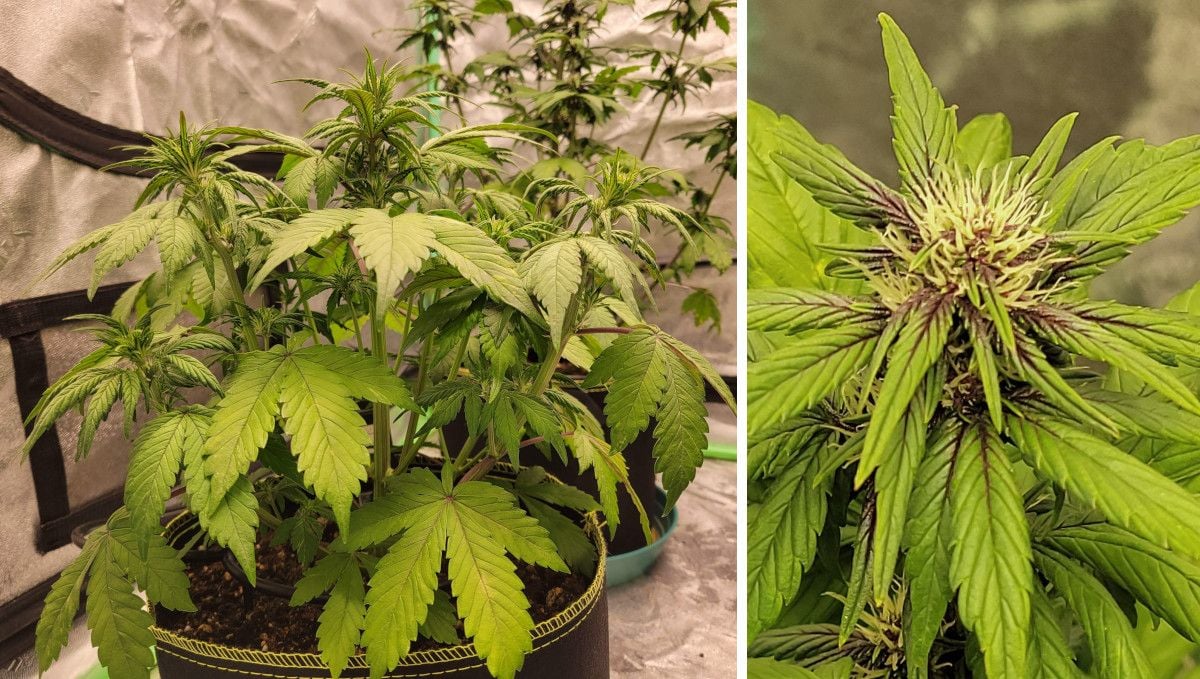
While you don't have to rush into changing your nutrient routine just yet (that comes later), many growers choose to make the switch during this stage. They swap their nitrogen-rich formula for one that packs more phosphorus (P) and potassium (K), which are super important for flower power.
7. Early Flower | Weeks 6-7
Alright, time to dive into the exciting world of cannabis flowering! Weeks 6 and 7 mark the moment when things really start to get interesting. You don't have to be a pro to adjust the environment a bit. Simply lower the temperature a smidge to keep things cozy. And don't forget about the humidity – lower it down as those buds begin to plump up.
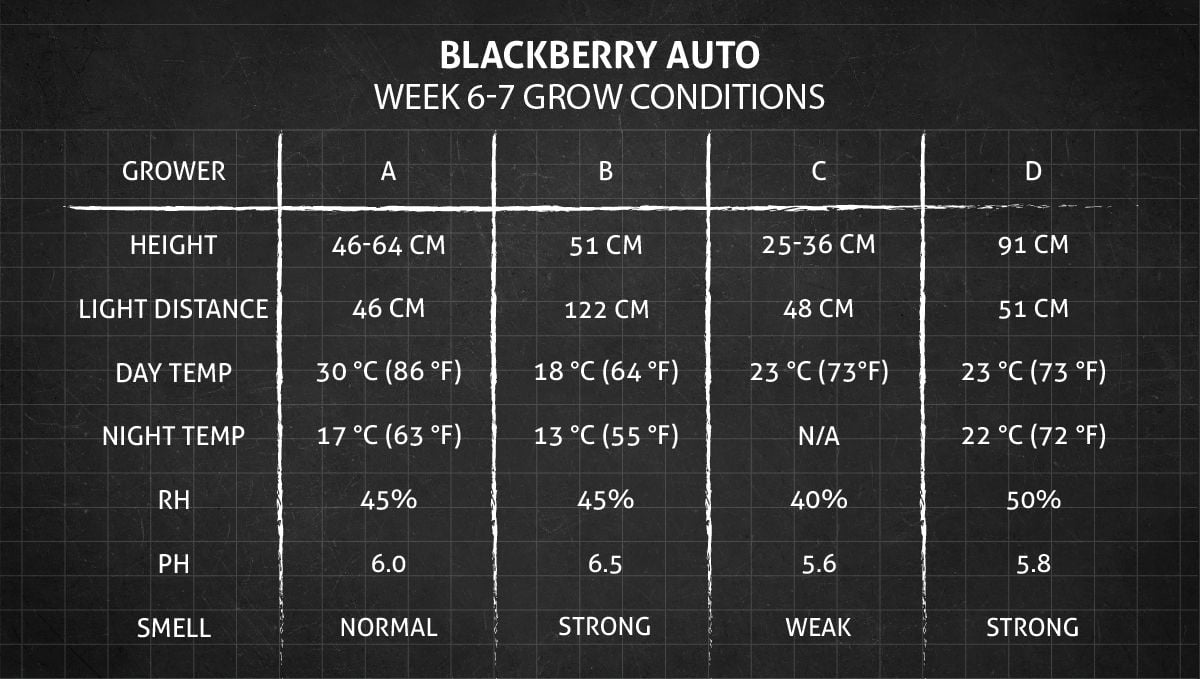
Get ready for some serious growth spurt! When your plant enters the flowering stretch, it's like a superhero, stretching its branches far and wide. It can grow like crazy, sometimes doubling in size within a couple of weeks.
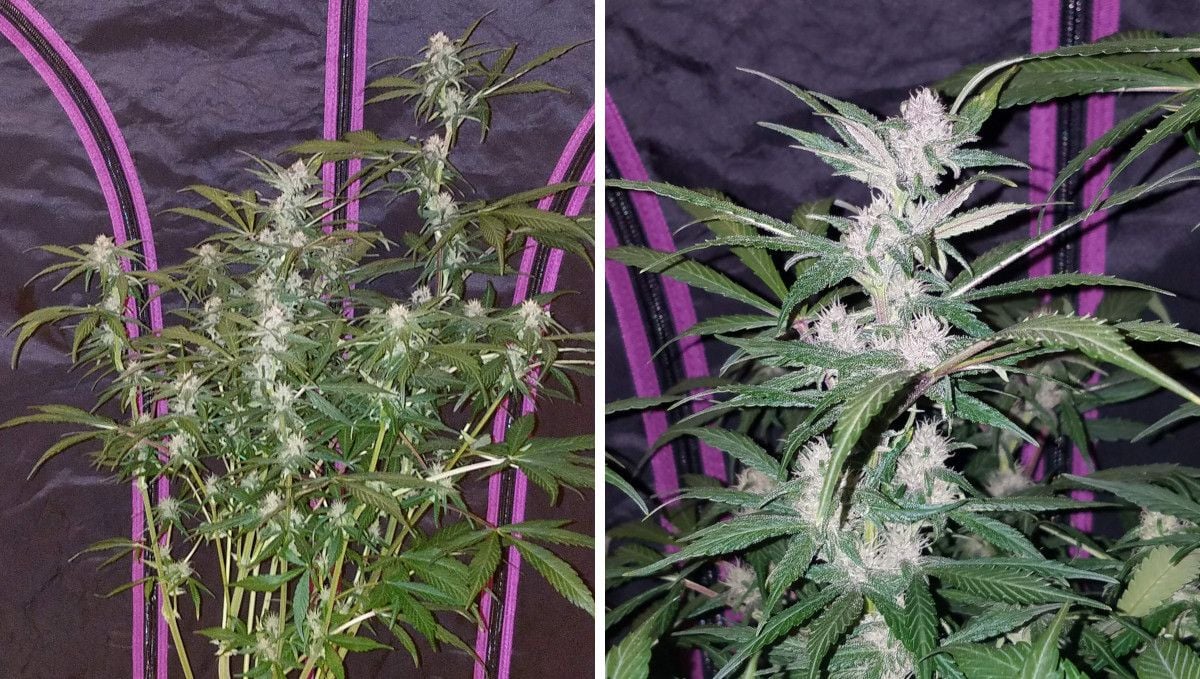
Now, picture this: your plant is getting all bushy and the leaves are blocking airflow or casting shadows on those lower bud sites. No worries, just give it a little trim. Don't go crazy, though! A little snip here and there will do the trick without causing too much stress.
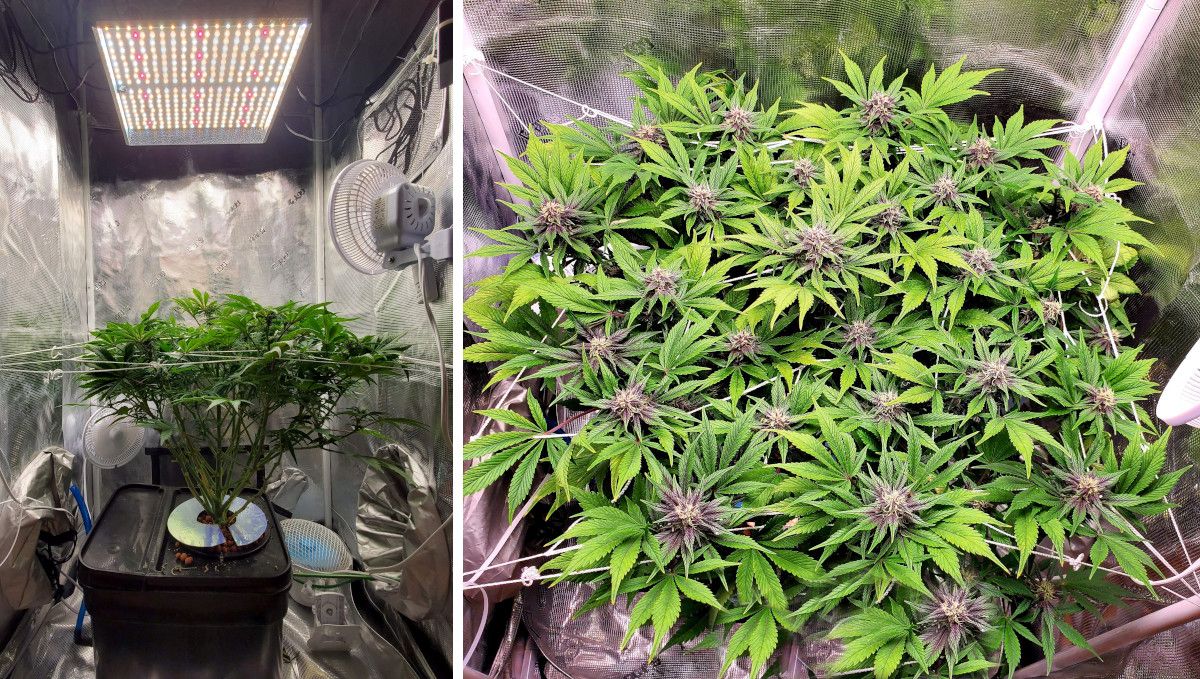
Those flowers might seem small and lightweight right now, but don't let that fool you. They're just getting started. Give them time, and they'll bulk up into those massive, dense colas you've been dreaming of. It's all part of the magic!
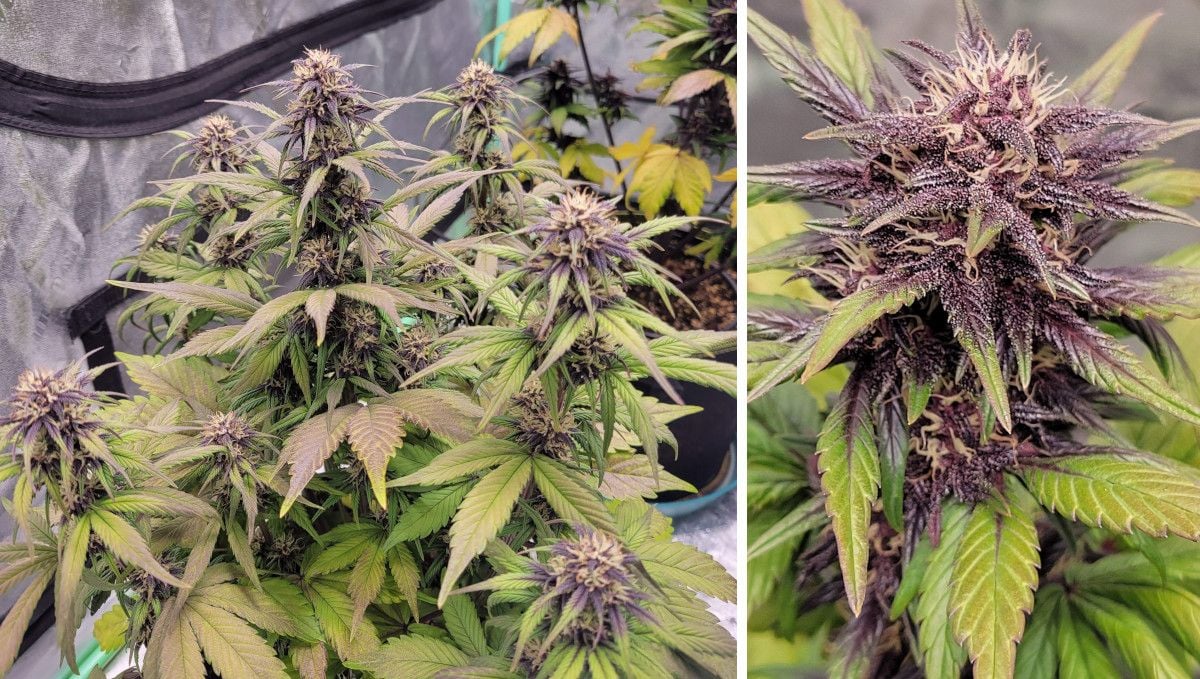
As your green beauty grows bigger, it'll start to get thirstier. Young ones might need a drink every few days, while more mature plants might be thirsty every other day or even daily. Just give the container a little lift – if it feels light, it's time to quench that plant's thirst.
Now, let's talk about food – every plant's favorite topic! Your cannabis is going to have a serious appetite during this flowering phase. Start ramping up those nutrients and giving it fuller doses. Just keep an eye on the plant's health. You don't want to go overboard and overwhelm the poor thing with nutrients.
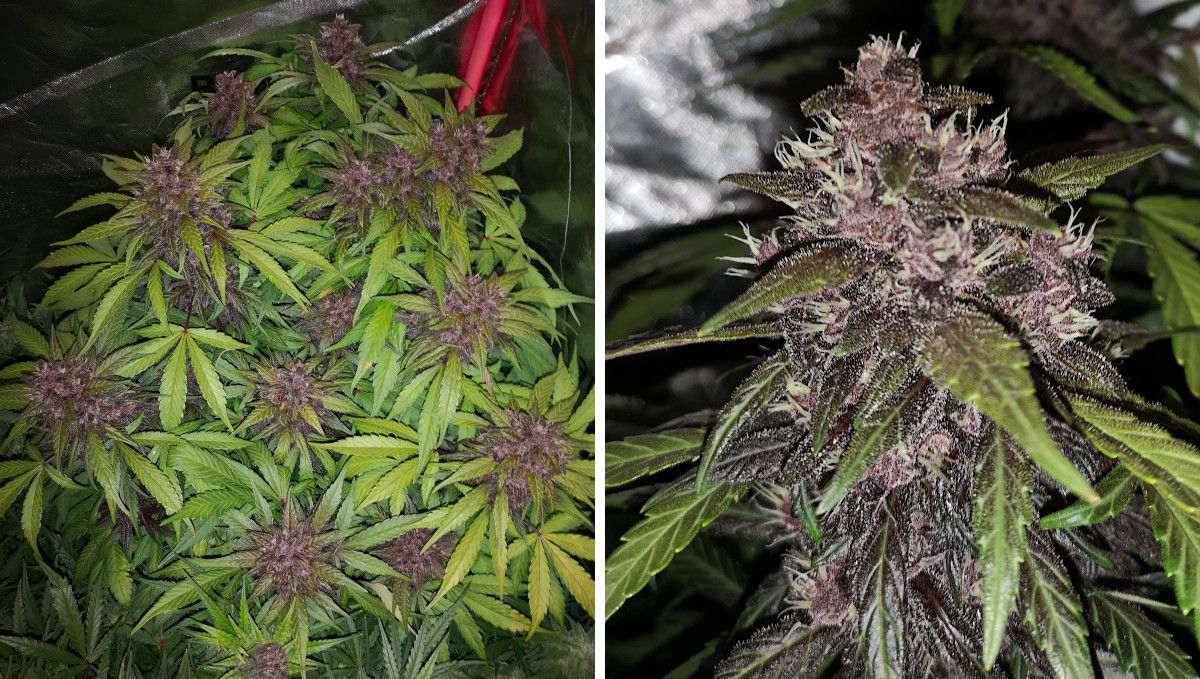
Speaking of nutrients, your plant needs some specific ones for flowering. Think phosphorus and potassium – they're the stars of the show now. Nitrogen takes a bit of a backseat. Too much nitrogen at this stage could cause some trouble, so be mindful of the balance.
8. Mid Flower (Bulk Phase) | Weeks 8-9
Now that your weed plants are finally packing on some serious weight, it's time to pay attention to a couple of important things: airflow and humidity. You can't afford any stale air hanging around because that's like an open invitation for mold, bud rot, and other nasty fungal infections. And trust us, those chunky and dense flowers make the perfect breeding ground for those unwanted guests.
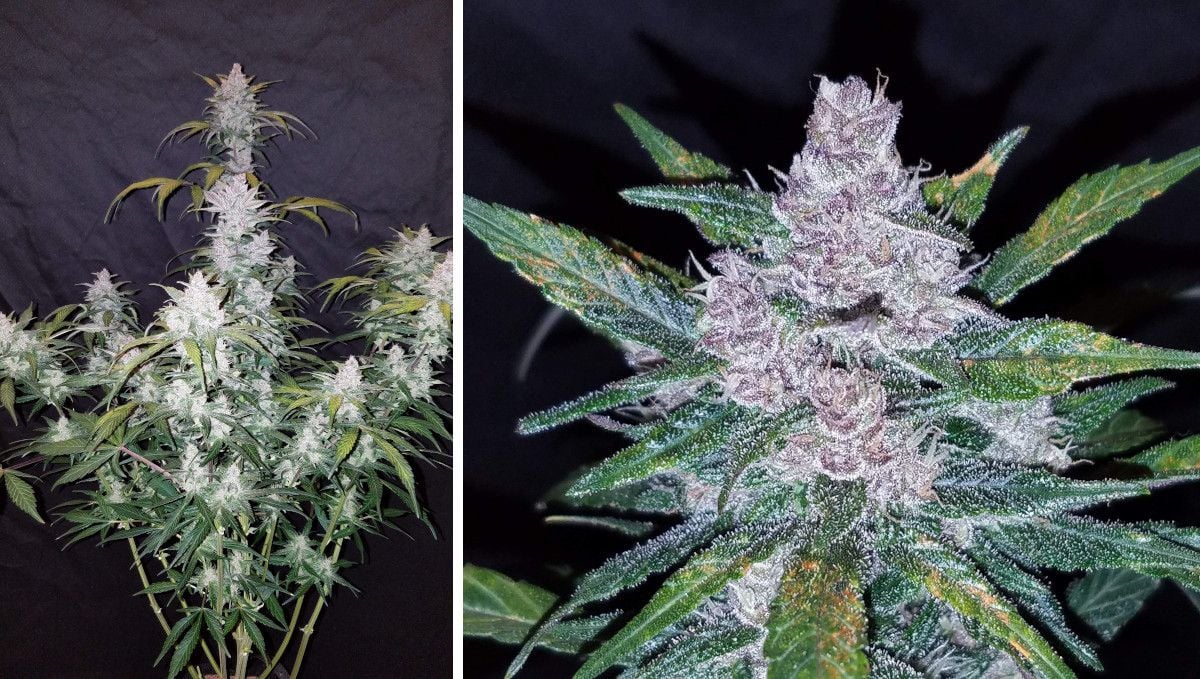
When your cannabis is in a happy place, those little flower buds popping up at the nodes will gradually spread and cover the entire length of the branches. They'll transform into these long and fat colas that we all drool over.
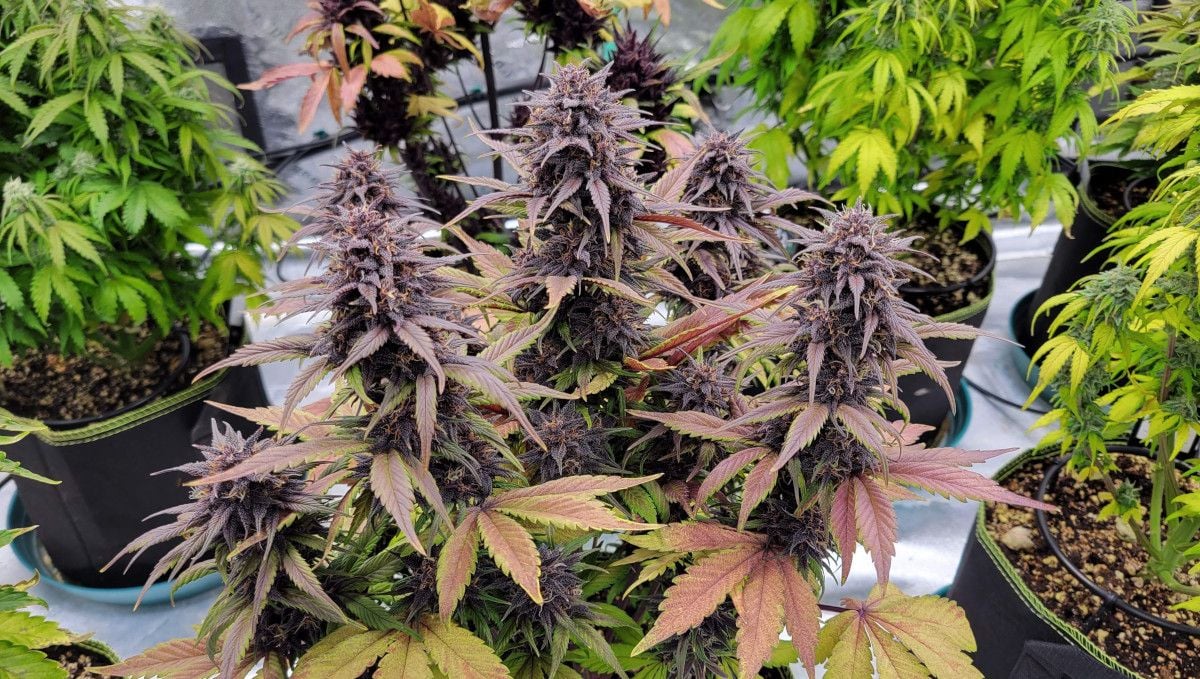
And here's the kicker – they not only grow visibly bigger, but they also get denser on the inside. Just don't get too excited just yet because your Blackberry Auto isn't quite ready for harvest. The pistils, those little hair-like structures, will still be greenish-white and looking pretty immature.
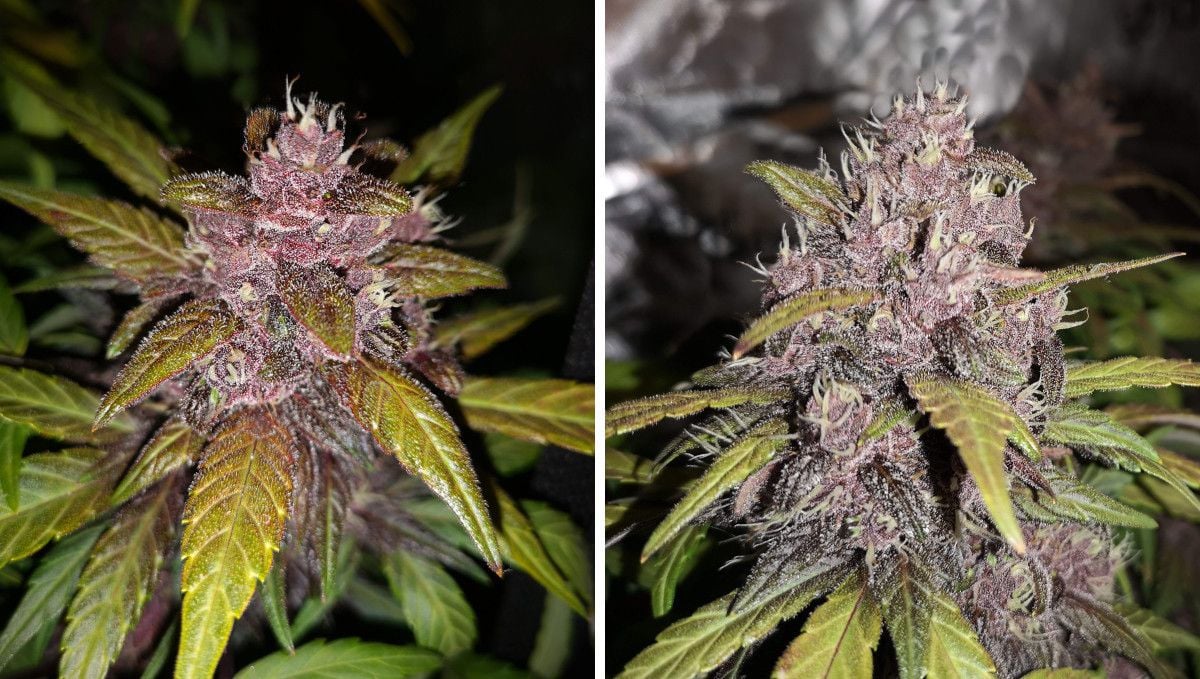
Good autoflowers like Blackberry Auto start getting sticky as they enter this stage. Why? Well, that's when these resin glands called trichomes start showing up on the calyces and those tiny leaves nearby.
These trichomes are like treasure troves filled with THC and other cannabinoids, so when you see that sugary appearance, you know you're in for some serious potency when harvest time rolls around. Trichomes are also packed with terpenes—the aromatic stuff that gives weed its distinctive smell. So get ready for some serious stink in your grow room!
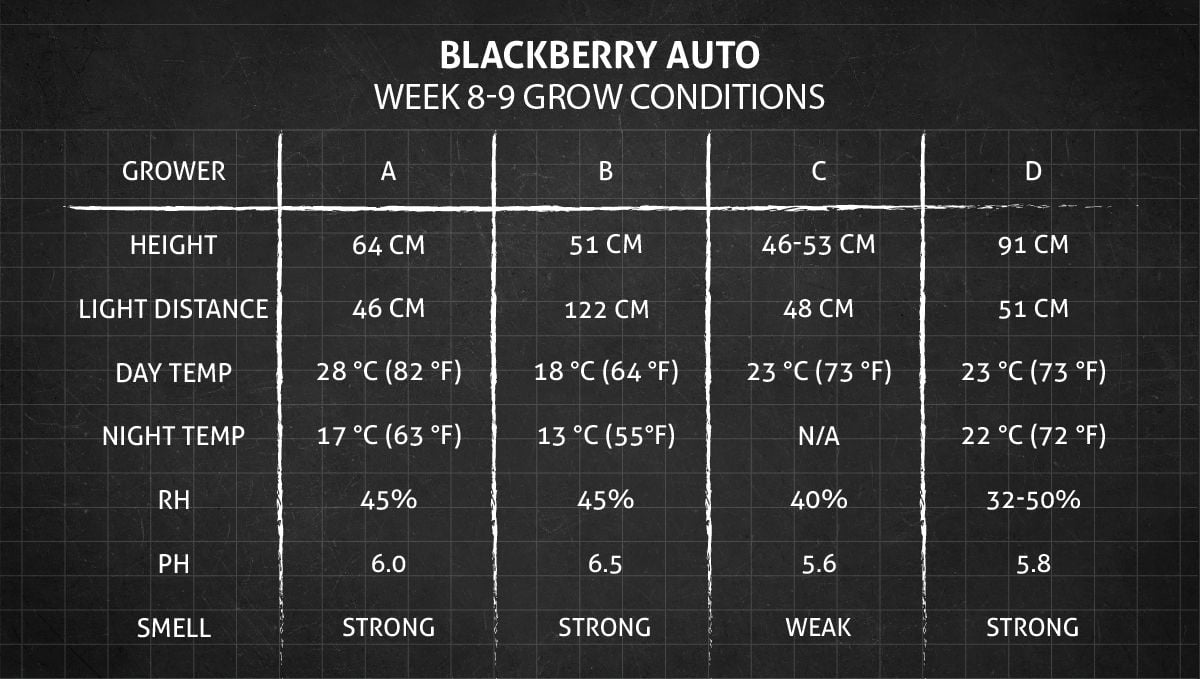
You'll be pleasantly surprised that even before those buds start bulking up, marijuana plants tend to stop stretching. They pretty much stay the same size from here until harvest day. Take a look at the handy table below to get an idea of what to expect from your Blackberry Auto week by week when you're growing it indoors.
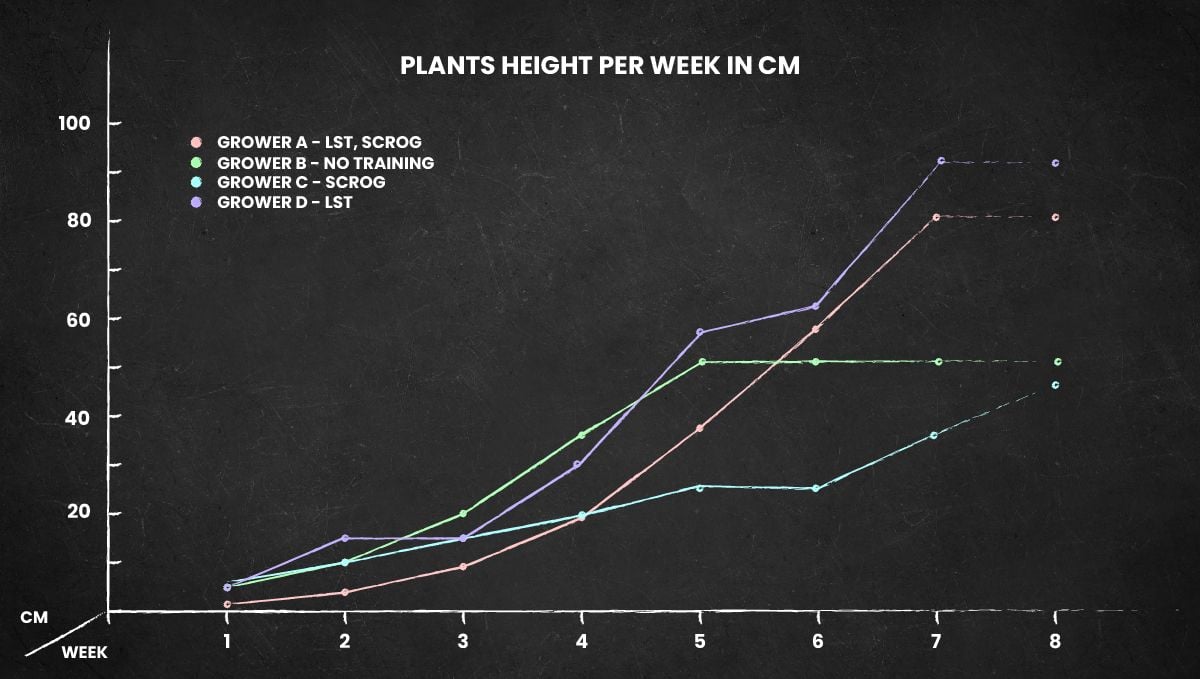
Now, you can set aside all those worries about your auto plants turning into skyscrapers and outgrowing your lights (actually, with Blackberry Auto, that's never an issue). You can finally focus on what really matters: making sure your plants get the right amount of water and nutrients. This is actually the last stage where you'll be feeding your cannabis, so make every meal count.
Pay special attention to phosphorus and potassium—they're the real superstars at this point. You can find them in your regular nutrient mix or even grab a standalone PK-booster if you're feeling fancy. And guess what's coming up next? Yep, you'll be gradually easing off the feeding and eventually switching to plain water only.
9. Ripening And Harvest | Week 10 (And Beyond)
Alright, you're now in the final stretch before harvest time. It's like the grand finale of a fireworks show, where all the buds are gearing up to dazzle your senses. But before you pluck those beauties, there are a few things to keep in mind. So, grab your magnifying glass and let's dive in!
First off, control the humidity and keep things cool. You don't want your precious buds turning into a moldy mess or losing their terpenes. Mold and fungi love stagnant air, and those dense flowers you've been nurturing are the best possible environment for these unwanted guests. So, good airflow and lower humidity are your weapons of choice.
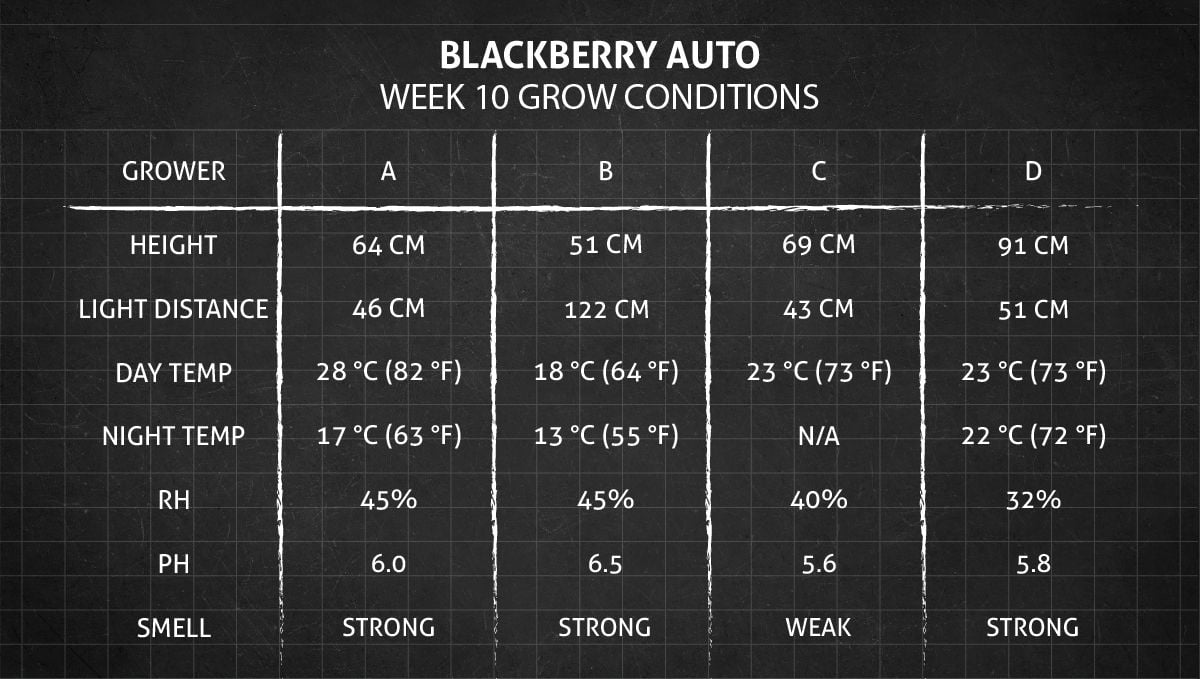
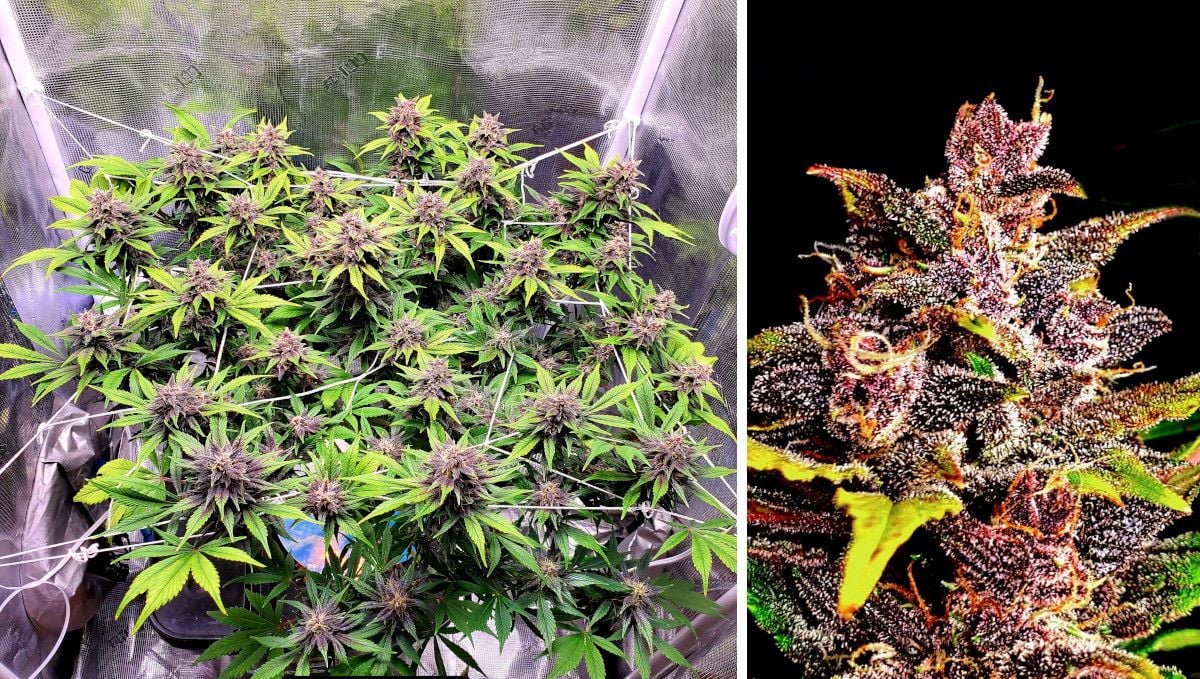
As the clock ticks closer to the breeder's estimated finish line, your buds will start showing signs of maturity. It's like watching kids grow up, except these kids are sticky, resinous, and ready to blow your mind. Keep an eye on those pistils, those little hair-like structures. If they're still displaying a pristine white look, the buds aren't fully ready for the chop. But when those pistils start rocking shades of brown or orange, you know it's showtime.
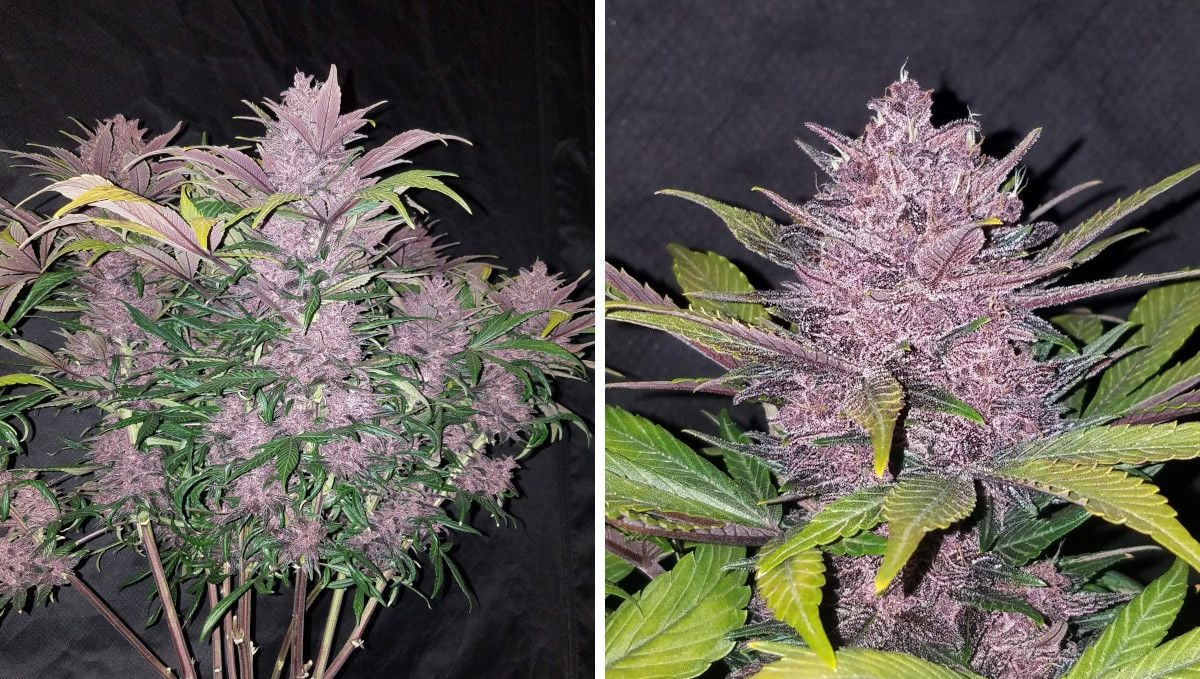
Now, the fun part begins. Grab your lab coat, or at least a jeweler's loupe, and take a close look at those trichomes. Those tiny resin factories are the VIPs of the cannabis world, packed with all the good stuff. Under the microscope, you want to see a milky or cloudy appearance of those resin glands, with a few ambers joining in. That's the sweet spot -- your buds won't get more potent than that.
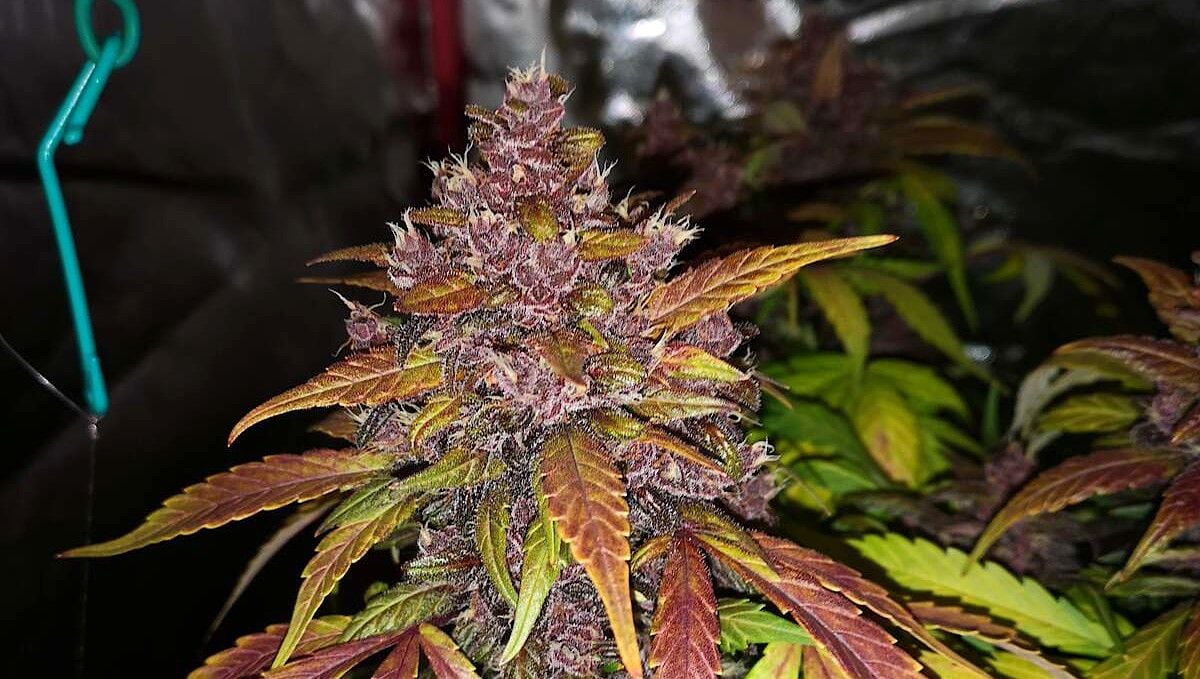
But hold your horses just yet! Sometime before you reach that moment of trichome perfection, it's time to cut off the plant food supply and give your autoflower a thorough flush. Think of it as a detox session, purging all the unwanted elements that might spoil the party. Flushing ensures your buds are as clean as a whistle, ready to deliver the purest flavors and effects.
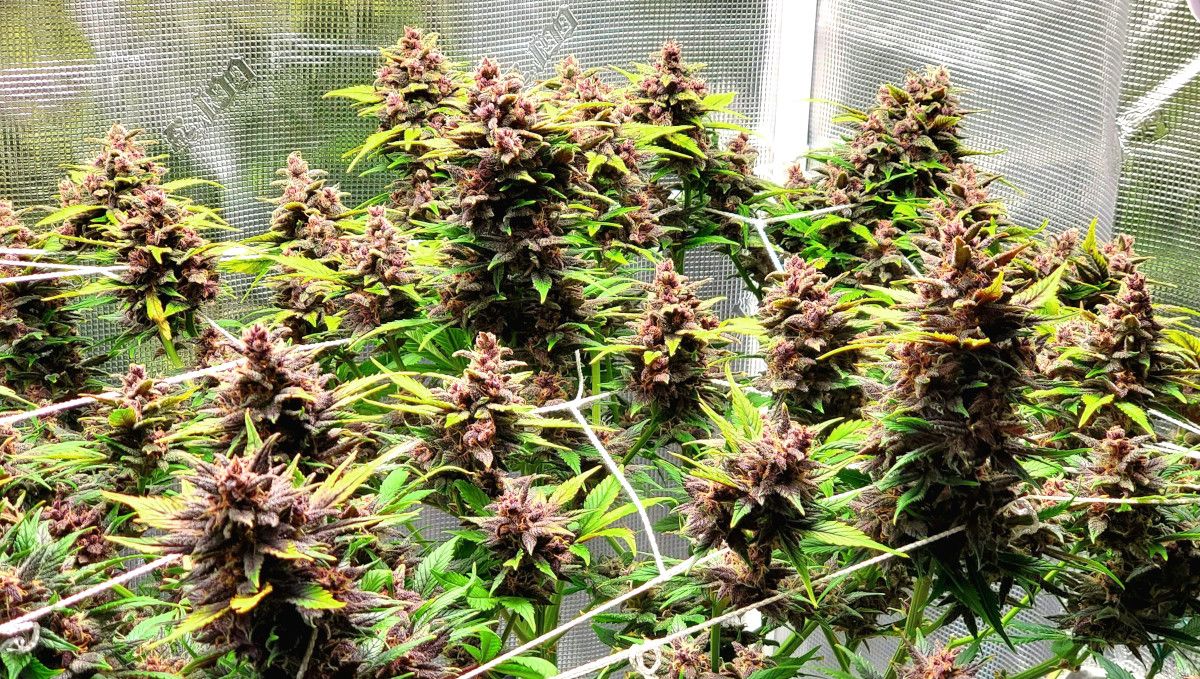
Now, this flushing business takes some time. In soil grows, you're looking at about two weeks of patience. Hydroponic setups speed things up a bit, clocking in at around a week.

Guess what: it's still not the end of the road! Drying and curing are the final acts in this cannabis extravaganza. Don't rush this part; you've come this far, and now it's not the time to cut corners. Hang those branches for slow-drying which will take around 5-7 days to reach the perfect consistency. Then, snip those buds and tuck them into glass jars for a cozy curing session. Pop those jar lids open regularly, letting out escessive moisture and letting in fresh air for your precious buds.
10. The Outcome
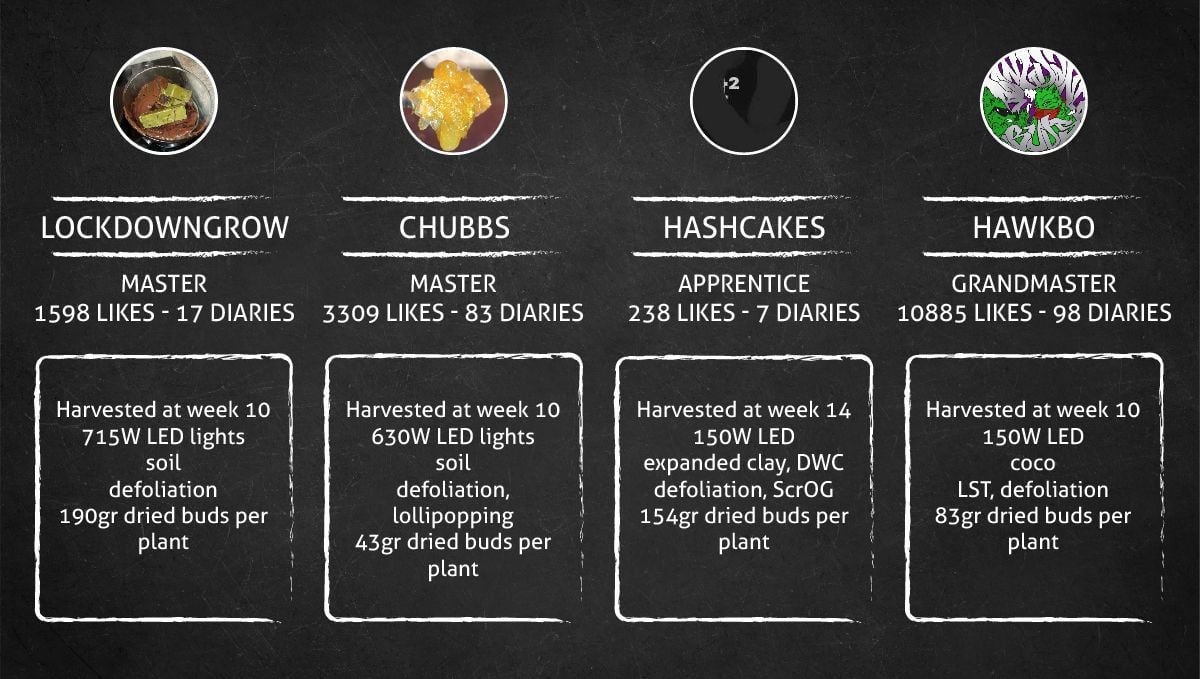
Even with its modest size, Blackberry Auto consistently produces generous yields as all 4 growers in our week-by-week guide have demonstrated. If you study the table below, you will see that DWC is probably the most promising method yield-wise, but even in soil, you can get amazing results if you cleverly train your Blackberry Auto to grow it as a multi-branch plant. If instead you prefer no-training, SOG-style methods, the plants are likely to be smaller and you'll need to place several of them next to each other to make maximum use of available space.
Blackberry Auto Yield
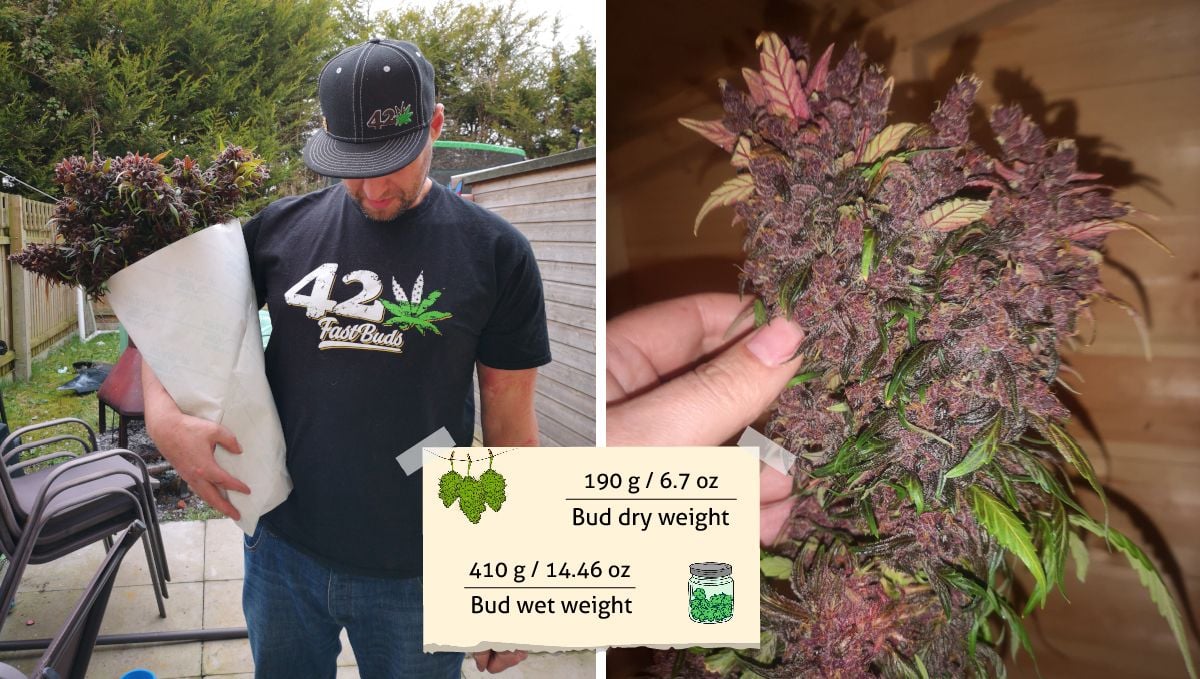
The record-setter in our guide, Grower A got multiple big colas from his one Blackberry plant, and they collectively weighed 190g (6.7 oz) dry.
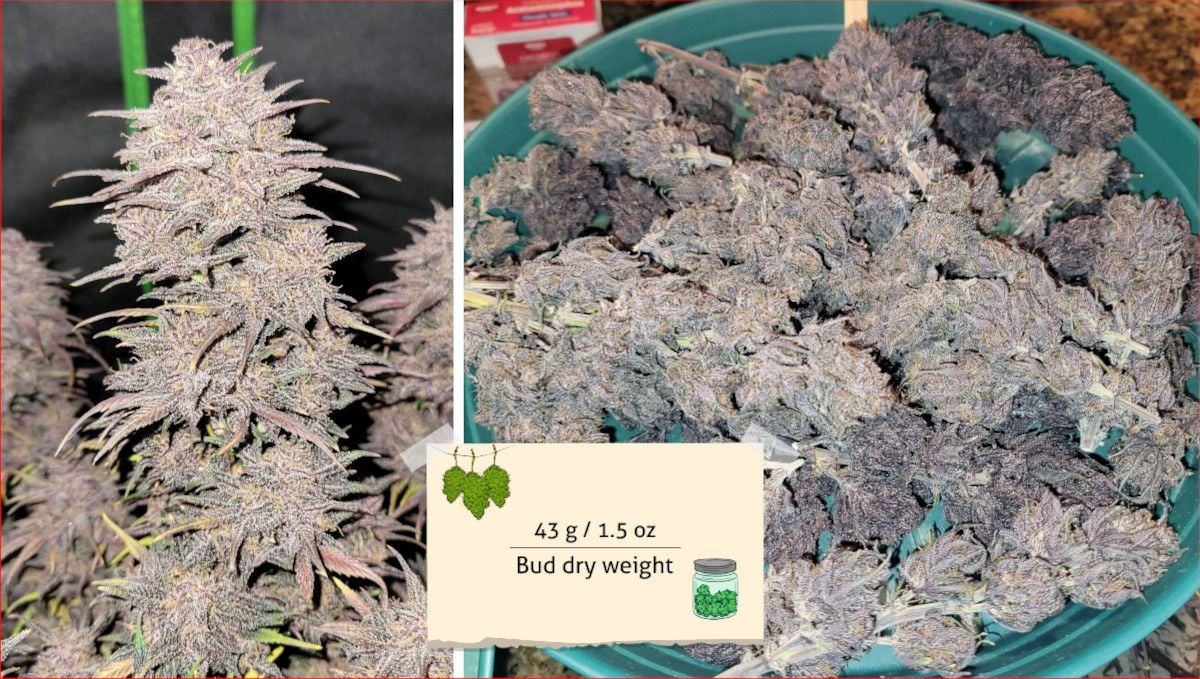
Grower B cultivated 2 Blackberry autoflowers as a part of a much larger SOG grow and got a respectable 43g (1.5 oz) per plant.
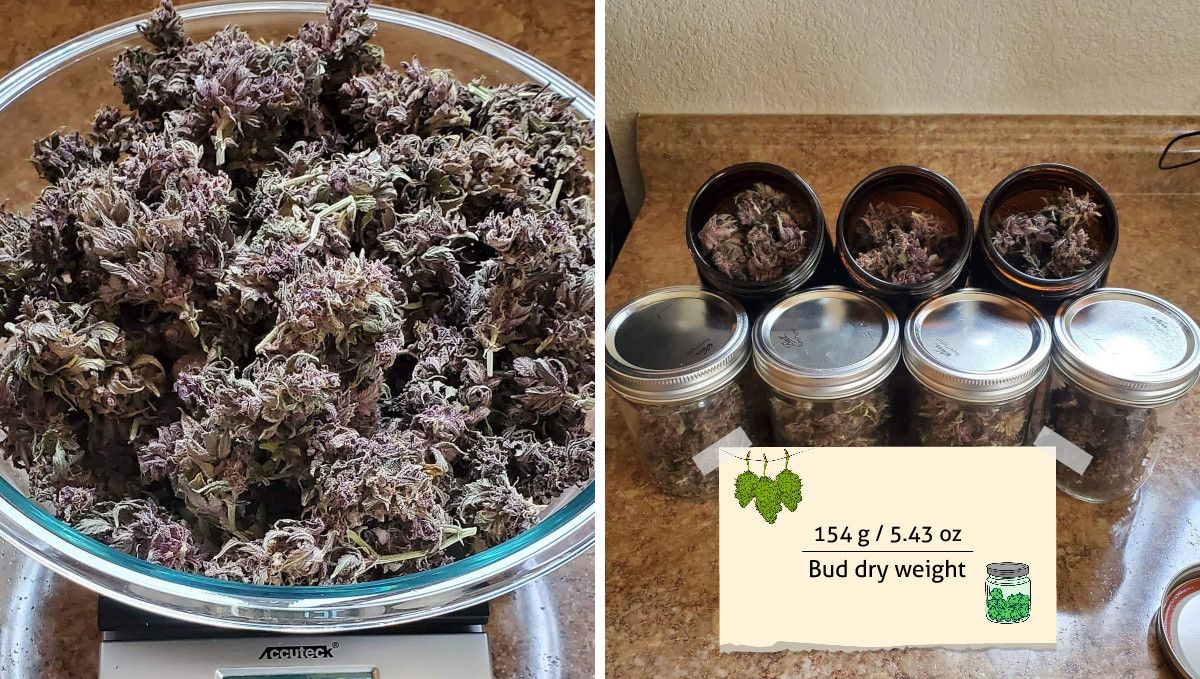
The use of DWC and ScrOG resulted in a big branchy plant for Grower C who harvested 154g (5.43 oz) from his one Blackberry Auto.
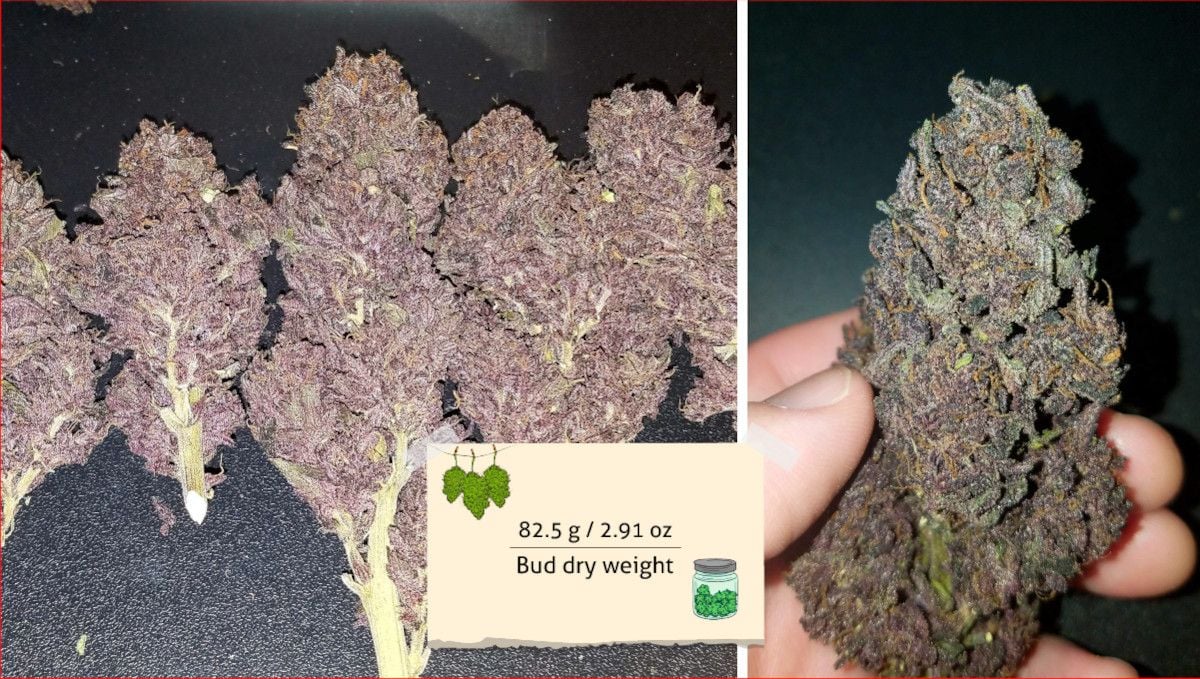
Finally, Grower D's Blackberry, though grown in a sea-of-green setup, produced 82.5g (2.91 oz) of amazingly firm, dense, and big buds with a perfect bag appeal.
Blackberry Auto Smoke Report
According to the many smoke reports we’ve seen, Blackberry Auto is a strain that will make you feel relaxed, happy, and hungry. It has a strong indica effect that is perfect for nighttime use, when you need some sleep and munchies. It has a sweet and fruity flavor and aroma, with some hints of pine and earth. It is a potent strain that will give you a couch-lock and a body high. If you are looking for a strain that will help you unwind, chill, and enjoy some snacks, Blackberry Auto is the one for you.

10. In Conclusion
We can conclude our Blackberry Auto week-by-week review with an assuarance that this autoflower is easy to grow, reliable, versatile, and a consistent producer of top-quality buds. We also have a few comments upon the different growing styles and their results.
Don't waste your time in veg as this phase is very short in the case of Blackberry Auto, and once the flowering starts, the further growth is practically over -- you will see some stretching but don't count on more branches and bud sites emerging. You'll have to make do with what you have.
Grower A deployed a winning combo of leaving his plant alone for the earliest part of the veg and low-stress training it in the second half of it. He got a healthy plant with no signs of stress, and it had a flat canopy and many branches. The result was a scale-bustin yield at harvest.
For Grower B, Blackberry was just two out of a great number of other autoflowers in the tent. It's a perfectly good strategy, but when the genetics are as good as Blackberry, you'd wish you had only them in your grow space and nothing else.
Grower D, also used the SOG method, but in his case -- probably due to the use of coco coir -- the size of the plant and the final result were much more impressive.
Finally, Grower C was the only one in our guide who chose deep-water culture (DWC). This technique has the best yield potential, but you need to dial in your feeding right from the start. Unfortunatelly, the gardener failed to be at his best game at the seedling and early-veg phase. As a result, his outcome was impressive but could have been even better with the genetics of such quality as Blackberry Auto.
That's it, folks! We hope that you find our guide useful and that our tips help you achieve outstanding results in your Blackberry Auto grow.




Comments