Cookies Kush Cannabis Strain Week-by-Week Guide
- 1. Grow specifications
- 2. Grow set up
- 3. Germination and seedling stage | week 1
- 4. Early veg | week 2
- 5. Mid veg | weeks 3-4
- 6. Transition (pre-flower) | week 5
- 7. Early flower | weeks 6-7
- 8. Mid flower (bulk phase) | weeks 8-9
- 9. Ripening and harvest | weeks 10-12
- 10. Yield and smoke report
- 11. In conclusion
Cookies Kush cannabis seeds originated from a wonderful cross between Girl Scout Cookies and the Rolex phenotype of the OG Kush variety. Originally bred by Barney’s Farm, this potent Indica strain has won 1st place in High Time’s 2014 edition of the Cannabis Cup in Amsterdam. It’s an ideal strain for those who want to try strong kushy flavors with subtle mint and apple tastes and get in a feel-good state of mind. This variety offers a nice head high that lifts your spirit and comes hand-in-hand with a deep body relaxation that leaves you mellow and lazy, yet light-headed. So if reading this intro on the Cookies Kush cannabis strain made you want to try it on the next grow cycle, continue reading our week-by-week guide in which we’ll show and explain how the variety grows through all stages and important highlights in the hope that it helps you get a better harvest.
1. Grow Specifications
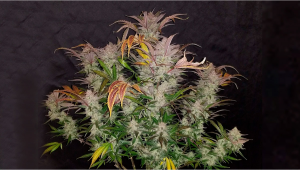
Cookies Kush is a 70% Indica-dominant variety with up to 18% THC and up to 3% CBD, delivering a powerful high with both Indica and Sativa effects. This variety grows around 100 cm tall and with a flowering time of 7-8 weeks, it’s a perfect strain for beginners as it does not only easy to grow but is very forgiving to less-than-ideal growing conditions. This easy-to-grow strain yields up to 650 gr/m2 of olive-green flowers with purple and lime-green patches that give it a beautiful appearance while reeking of a powerful mint chocolate aroma combined with the distinct aroma of the original Girl Scout Cookies.
During the late stage of the flowering phase, several phenotypes of this polyhybrid start to develop a striking and eye-catching purple hue. These colors are a direct result of anthocyanins—polyphenolic plant pigments that fulfill several key functions, including photoprotection against excess UV light. The expression of these molecules partly depends on genetics. However, external environmental factors can also play a role. For example, plants that are grown outside and exposed to the cold will ramp up the production of these colorful molecules. As well as lovely colors, these buds also feature impressive trichomes density that results in a frosty layer packed full of cannabinoid acids and terpenes. Overall, this cultivar serves up a stoning and physical high ideal for evenings and nights when you’re in the mood to kick back and relax.
2. Grow Set Up
This strain was released a few years ago so it’s fairly easy to find multiple grow reports online. For this week-by-week guide, we chose a diary that shows that sometimes keeping it simple may be the best choice. Grower DrJoint only used Sensi Cal-Mag Extra and Bio Grow, and got some beautiful frosty flowers. The grower grew the Cookies Kush plants in an 80x80x180 cm grow tent under two 100 W LEDs and the results are impressive so make sure to take a look at the table below for more detailed information on the grower’s set-up and growing conditions and let’s see how this hard-hitting strain grows!
| Grow Space: | 0.6 m2 (6.8 ft2) | Pot Size: | 20 L |
|---|---|---|---|
| Seed to Harvest: | 12 weeks | Medium: | Soil |
| Flowering: | 7-8 weeks | Nutrients: | Synthetic |
| Light Cycle: | 18/6 - 12/12 | Day Temperature: | 25 °C (77 °F) |
| Light Type: | LED | Night Temperature: | 22 °C (71.6 °F) |
| Watts Used: | 200 | Humidity: | 85 ↘ 50 |
3. Germination and Seedling Stage | Week 1
If you have a couple of grow cycles under your belt, you probably know that cannabis seeds can be germinated using several different methods. Every grower has different preferences and the germination method can vary from grower to grower, so keep in mind there’s no right way to do it. If your seeds are germinating, then you’re doing it right. In this case, the grower used a 7-day pill box (which is a great idea) to germinate the Cookies Kush seed in cotton balls. The process is pretty straightforward, remember that it’s recommended to soak the seed in a glass of water for 12 to 24 hours for the seed shell to hydrate and make it easy for the seed cap to fall off once the seedling has come out of the soil.
| Plant Height: | 3 cm | Day Temp: | 25 °C |
|---|---|---|---|
| Distance to Light: | 30 cm | Night Temp: | 20 °C |
| Humidity: | 85% | Smell: | None |
So once the seed has germinated and the tap root has grown to around 2 to 3 cm, go ahead and plant the seed in the substrate of choice. As you can see, the grower opted for soil and the seedling came out of the substrate with a really nice vibrant green color which means the seedling is healthy and happy.
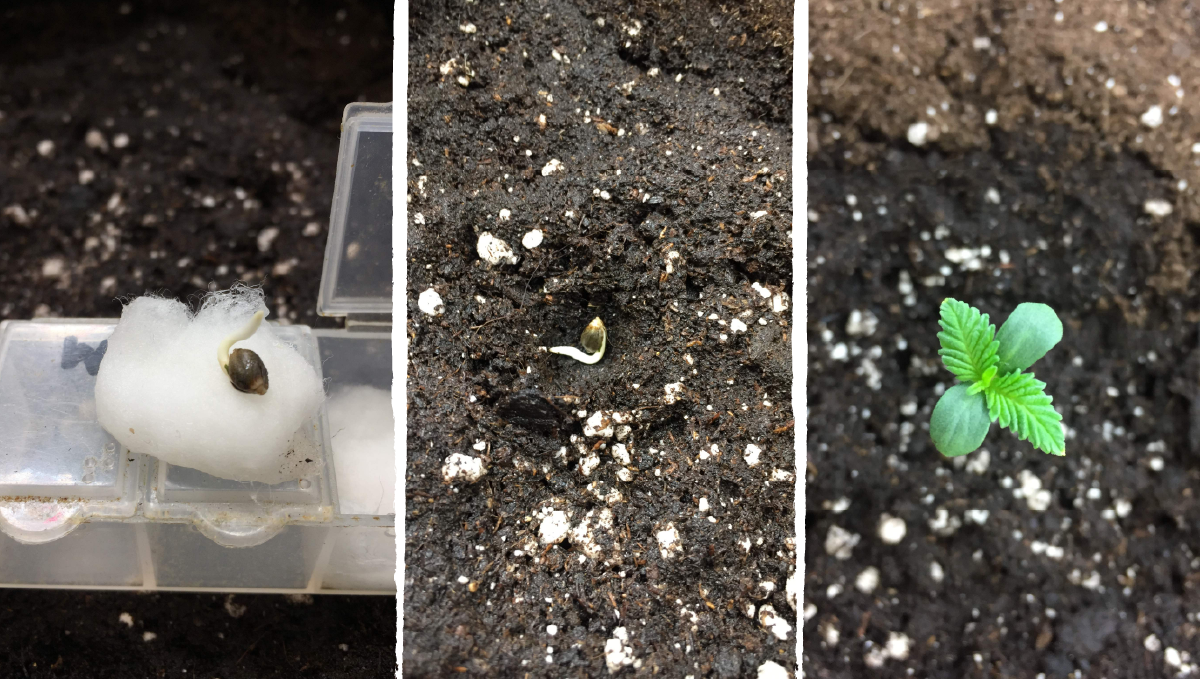
Remember that baby cannabis plants are fragile and sensitive so it’s not recommended to use anything other than mycorrhizae or a mild dose of root boosters. The soil mix used in this report contains enough food for 4 to 6 weeks so there’s no need to feed anything other than plain water.
4. Early Veg | Week 2
How fast a certain strain grows depends on the genetics, Indica-dominant varieties tend to grow shorter, so they usually don’t grow as fast as Sativa-dominant varieties which usually grow a bit quicker. So even if your plant is not growing leaves like crazy, don’t worry, the roots are growing underground and you’ll definitely see your plant developing fast in the next couple of weeks.
| Plant Height: | 5 cm | Day Temp: | 25 °C |
|---|---|---|---|
| Distance to Light: | 30 cm | Night Temp: | 20 °C |
| Humidity: | 85% | Smell: | None |
Once the first pair of 3-fingered leaves has developed, you’re officially in the vegetative stage and your main objective should be to keep the light fixture at the right distance and keep the growing conditions on point in order to provide a warm and humid environment for your plants. This Cookies Kush plant is growing in a pre-fertilized substrate so there’s no need to do anything else other than water them and keep them happy.

Pre-fertilized substrates are great for busy growers because they contain all the nutrients your plants need, so they do all the work for you and there’s no need to mix liquid nutrients or anything, all you need to do is keep the substrate moist. But remember, you don’t necessarily need to buy them as you can make your own super soil or compost at home, for example, without spending a lot of money.
5. Mid Veg | Weeks 3-4
Weeks 3 and 4 mark the beginning of mid-veg, this is when your plant will start growing exponentially and develop 1 or 2 pairs of leaves in one day. Remember that if you’re growing in pre-fertilized substrates you should start with small feedings but if you’re growing in an unfertilized substrate, you can go ahead and start feeding Nitrogen which is the macronutrient cannabis plants need to grow healthy foliage.
| Plant Height: | 20 cm | Day Temp: | 25 °C |
|---|---|---|---|
| Distance to Light: | 30 cm | Night Temp: | 22 °C |
| Humidity: | 50% | Smell: | None |
As you can see in the pictures below, the Cookies Kush plant grew leaves like crazy in 2 weeks, this is why you need to feed higher amounts of Nitrogen during the vegetative stage. Failing to keep your plant well fed will cause your plant to grow weak and underdeveloped.

In this case, the plant is super healthy and growing nice bright green leaves but it has now become super bushy which can lead to mold and also affect light penetration and airflow so whenever you’re leading with a plant similar to this one, make sure to defoliate to prevent any issues.
6. Transition (Pre-Flower) | Week 5
Unlike autoflowers which will start flowering based on age, photoperiods actually depend on the light cycle to start flowering, this means that you have more control over plant growth, which means you can trigger flowering based on plant size to prevent them from outgrowing your grow space.
| Plant Height: | 40 cm | Day Temp: | 27 °C |
|---|---|---|---|
| Distance to Light: | 60 cm | Night Temp: | 22 °C |
| Humidity: | 50% | Smell: | Weak |
In this case, the grower flipped to 12/12 right after transplanting, the plants were relatively short but as you will see further into the week-by-week guide, they ended up with a decent height due to the flowering stretch.
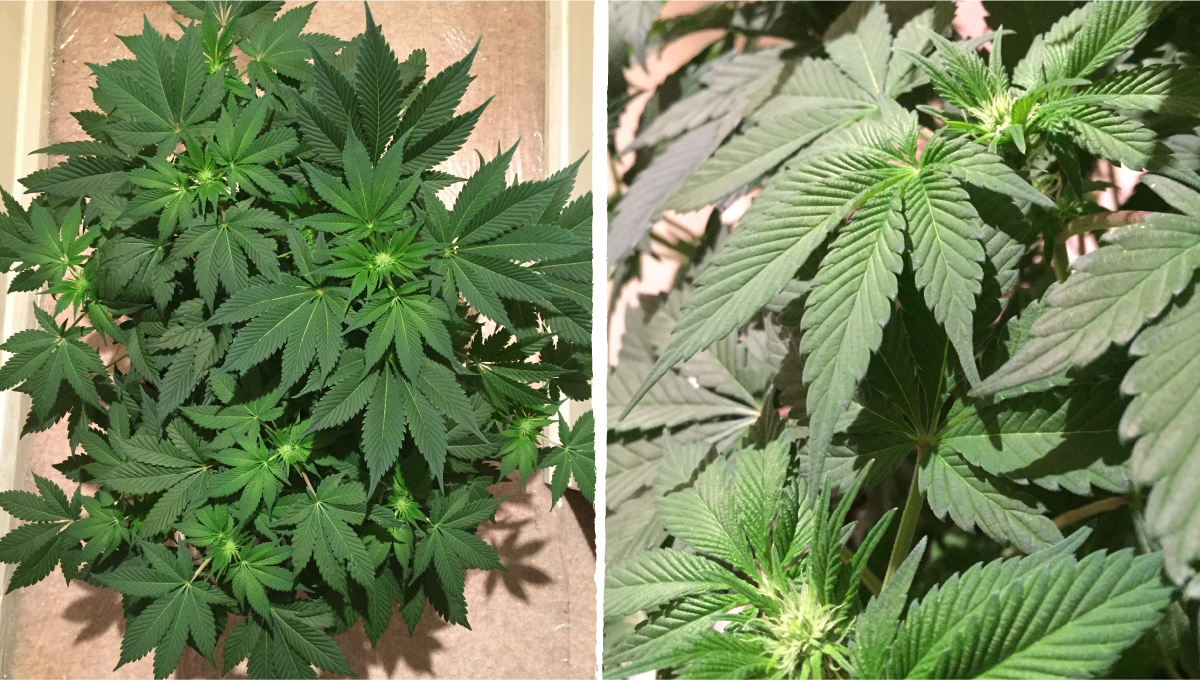
The “flowering stretch” refers to the explosive growth seen during the transition period, during the flowering stretch you’ll see the elongation of the main cola and side branches, in some cases even doubling their size!
7. Early Flower | Weeks 6-7
During the flowering stage, plants will start to grow and bulk up the flowers and as they stack up, the spaces between the nodes will fill in. Soon enough, the flowers will take form and get covered in trichomes from head to toe.
| Plant Height: | 45 cm | Day Temp: | 27 °C |
|---|---|---|---|
| Distance to Light: | 60 cm | Night Temp: | 22 °C |
| Humidity: | 50% | Smell: | Weak |
Trichomes are where cannabinoids and terpenes and produced and stored which means that once flowers start bulking up and producing trichomes, your plants will start to smell.

Remember that during early flower your plant will not continue stretching so you can stop feeding Grow fertilizers and start feeding Phosphorus and Potassium (aka Bloom nutrients) to provide what they need to grow beautiful flowers. In particular, phosphorus plays a key role during the flowering phase. This element helps to facilitate the transfer of energy through plants and buds themselves. There are a variety of ways to ensure your soil contains enough phosphorus, and that your plants have adequate access to this key substance. Past purchasing a bottle of synthetic flowering nutrients, many growers chose to close the loop and make their own inputs. A Korean Natural Farming preparation known as fermented fruit juice (FFJ) uses microbes to ferment fruits in order to unlock phosphorus that can be applied as a fertilizer.
You can also improve phosphorus uptake through actions taken much earlier in the growing cycle—all the way back in the seedling stage. By inoculating seedlings with mycorrhizal fungi, you’ll create a symbiotic relationship that works to vastly expand the root systems. The strands of these fungi, known as mycelium, work to mine and transport phosphorus into plant roots. Simply sprinkling some propagules into your growing medium at the start of the cultivation process will pay off big time when your plants start to churn out resinous buds.
8. Mid Flower (Bulk Phase) | Weeks 8-9
After flowers have started taking form and fattening up, there’s not much to do other than making sure everything is on point. Also, make sure to keep an eye out for mold or signs of pests as you definitely do NOT want to have to deal with pests during the last weeks of flower.
| Plant Height: | 60 cm | Day Temp: | 27 °C |
|---|---|---|---|
| Distance to Light: | 60 cm | Night Temp: | 22 °C |
| Humidity: | 50% | Smell: | Strong |
Remember that as harvest time comes, your plants will start smelling more and more, and depending on where you live, you don’t want to attract unwanted attention so make sure to get your carbon filter ready.

Other than that, just let your plants do their thing and keep them healthy. The “growing” part of growing weed is almost over so just be patient and get your drying space ready, you’ll be chopping down the plants in a few weeks. Look at the chart below to see what you may expect from Cookies Kush in terms of height:

9. Ripening and Harvest | Weeks 10-12
During the last weeks of the grow cycle, there’s no need to do anything other than continue feeding and wait for the right signs that’ll indicate when it’s time to chop down your plants. The best way to know when to harvest is by grabbing a magnifier and looking at the statue of the trichomes, you should harvest when around 20% of the trichomes have turned amber.
| Plant Height: | 60 cm | Day Temp: | 27 °C |
|---|---|---|---|
| Distance to Light: | 60 cm | Night Temp: | 22 °C |
| Humidity: | 50% | Smell: | Strong |
Remember that flushing is optional when using organic nutrients, there’s really no evidence that it improves the aroma and taste of the buds so it comes down to personal preference.
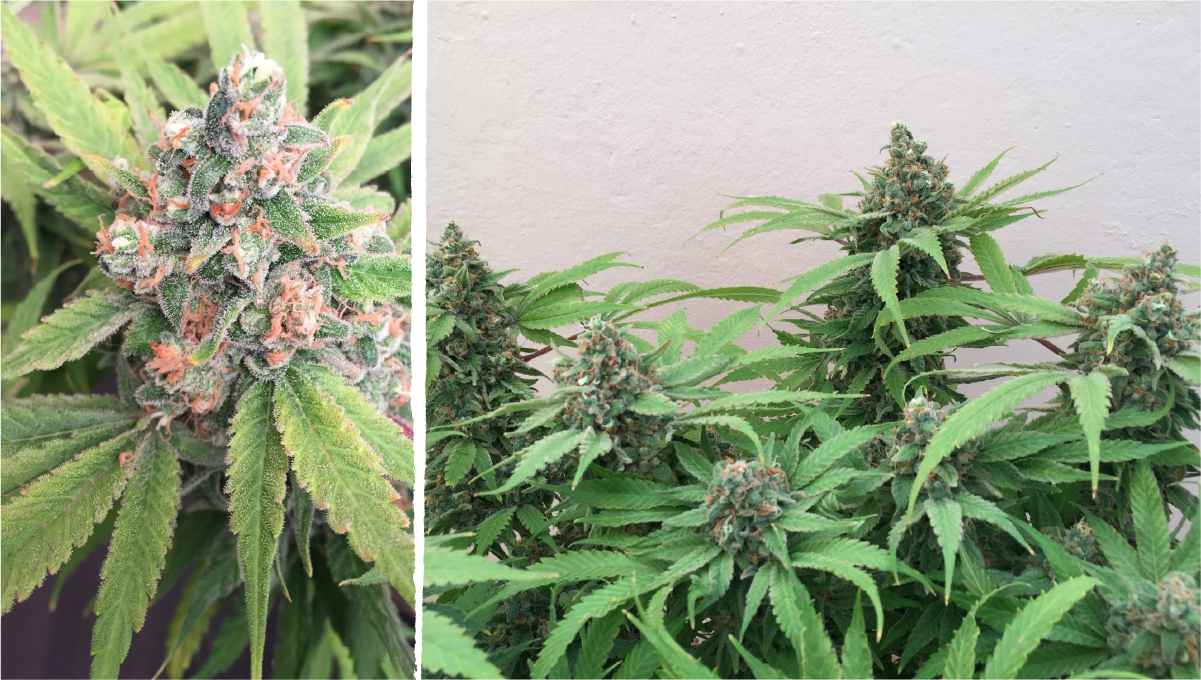
Now keep in mind that you should not chop down plants based on the breeder’s schedule as it can vary because it depends on the growing conditions, so whenever possible, grab a magnifier and check the trichomes!
10. Yield and Smoke Report
After harvesting and finishing the post-harvest processes (aka drying and curing), the grower got an average of 110g per plant (dry weight), which is quite impressive for a 60cm cannabis plant.
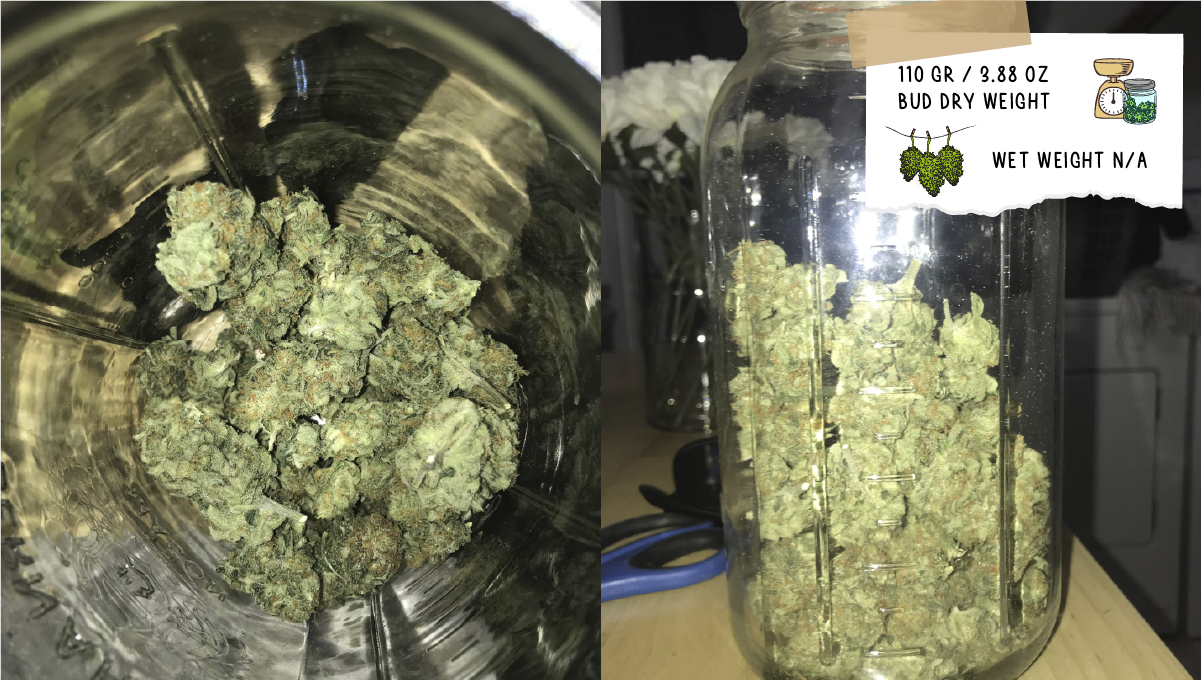
Thanks to its high THC content, expect a powerful high that delivers the boat of both worlds and starts with a euphoric and overall happy cerebral effect that gradually transforms into a strong couch-lock high that’ll leave you with a strong case of the munchies.
11. In Conclusion
This grow report was quite successful, the grower was able to grow a fairly small plant and still get 100g of top-quality flower, obviously, the grower knew what he was doing but always keep in mind that starting with good genetics is a must if you want to get the best quality possible so make sure to always get your seeds from reputable vendors!




Comments