How to Grow Marijuana at Home? Ultimate Guide 2022
- 1. Legal politics: know the rules
- 2. Grow space: indoor vs outdoor cannabis growing
- 3. Before planting your seeds: choosing the substrate
- 4. Watching after your plants: light cycles, growing conditions and feeding
- 5. Get bigger buds and better yields: plant training techniques
- 6. Harvesting weed plants
- 7. What types of strains can i grow? (autoflowers vs photoperiods) - conclusion
If you’ve consumed marijuana before, you have probably consumed different weed qualities and this is probably the main reason why growing your own cannabis seeds is probably the best option for most marijuana consumers. Just like with vegetables where the fresher, the tastier, it’s the same with marijuana; Meaning that growing your own allows you to have any type of weed with different flavors, effects and cannabinoid concentrations at home, and as fresh as your weed can be. So if you’re looking for tips for growing weed at home everything you need to know to grow weed at home for beginners, read along!
1. Legal Politics: Know the Rules
The first thing you should do is read up on the laws in your state and gather all the information on what you can do (how you should do it) and what you cannot do, basically, how much marijuana can you grow at home. If the information is not available online, check with your city’s council and make sure to ask everything you want to know before planting.
For example, in the state of California recreational users 21 or over can have up to 6 marijuana plants and medical patients can have up to 18 plants for personal use. Nevertheless, having one plant over the maximum limit may result in criminal penalties. So if you’re planning on growing weed seeds at home make sure to respect the plant limit and ask how much weed can you grow at home just to be safe!
2. Grow Space: Indoor vs Outdoor Cannabis Growing
Now that you know exactly the do’s and don’ts to grow marijuana at home, it’s time to plan and prepare your first grow cycle. There is a lot of information out there and a lot of things to take into consideration before setting things up so let’s start from the beginning: indoor vs outdoor marijuana growing.
Growing Cannabis Indoors
Growing weed at home indoors refers to growing marijuana in a grow tent. When growing indoors, there’s a basic cost of home growing weed due to the equipment you need for your plants to survive such as:
- Grow tent;
- Lights;
- Oscillating fan and;
- Timer.
Remember that you can always upgrade your grow space and get a carbon filter and extractor. Also, keep in mind that you don’t necessarily need to buy a grow tent, you can always make your own, just make sure you follow the basic checklist above.
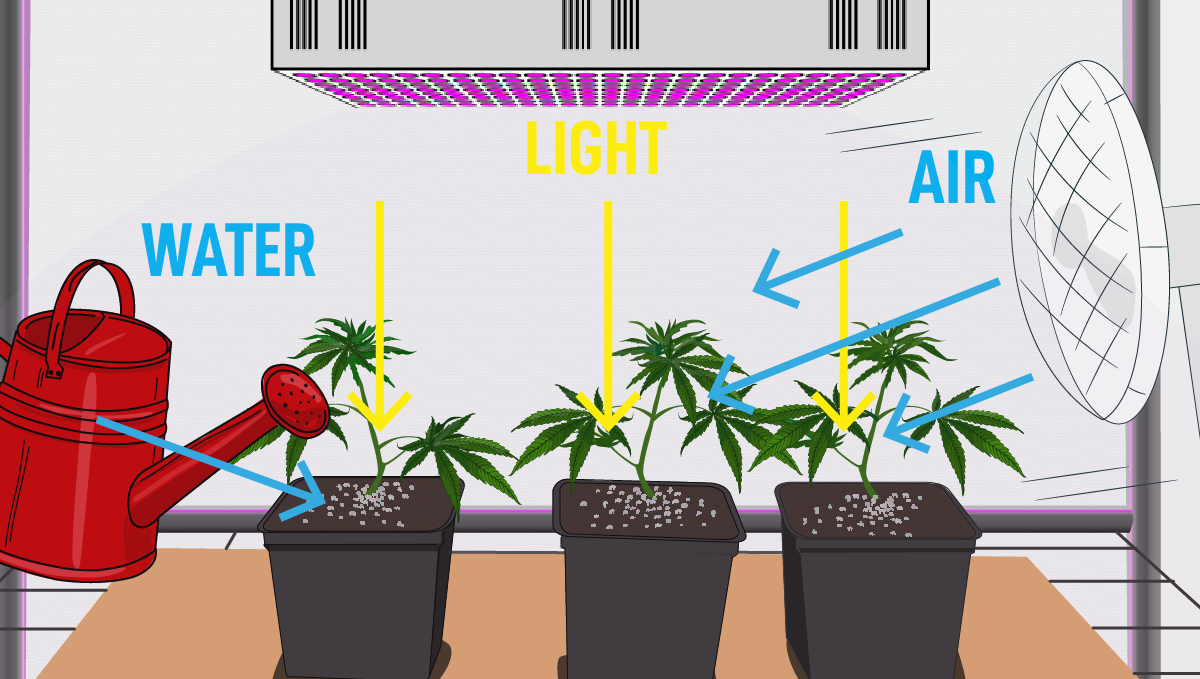
Growing indoors requires time, money, and a bit of knowledge but allows you to grow all year long, regardless of the conditions and other things that may make growing outside impossible. Plus, despite the large initial investment, all of that equipment will give you almost complete control over the growing environment. Not only does this make the entire cultivation process much easier, but it vastly increases the chances of success. The ability to control temperature through the use of fans and air conditions means your plants won’t be exposed to the abiotic stress of heat waves and droughts. Plus, the ability to modulate relative humidity will allow you to keep the air moist through the vegetative stage and less damp during flowering (a period where high humidity can lead to mold formation). This applies to every variable you can imagine, including lighting and nutrients. Your plants will also be much more shielded from pests and diseases—two factors that have the potential to wipe out entire plants if left unchecked.
Growing Cannabis Outdoors
On the other hand, growing outdoors refers to growing in the open air and it’s probably the easiest way to grow marijuana at home. When growing outdoors, there’s no need for growing equipment as nature provides everything your plants need to grow (meaning that you can grow weed at home without lights), so you won’t spend nearly as much as when growing indoors.
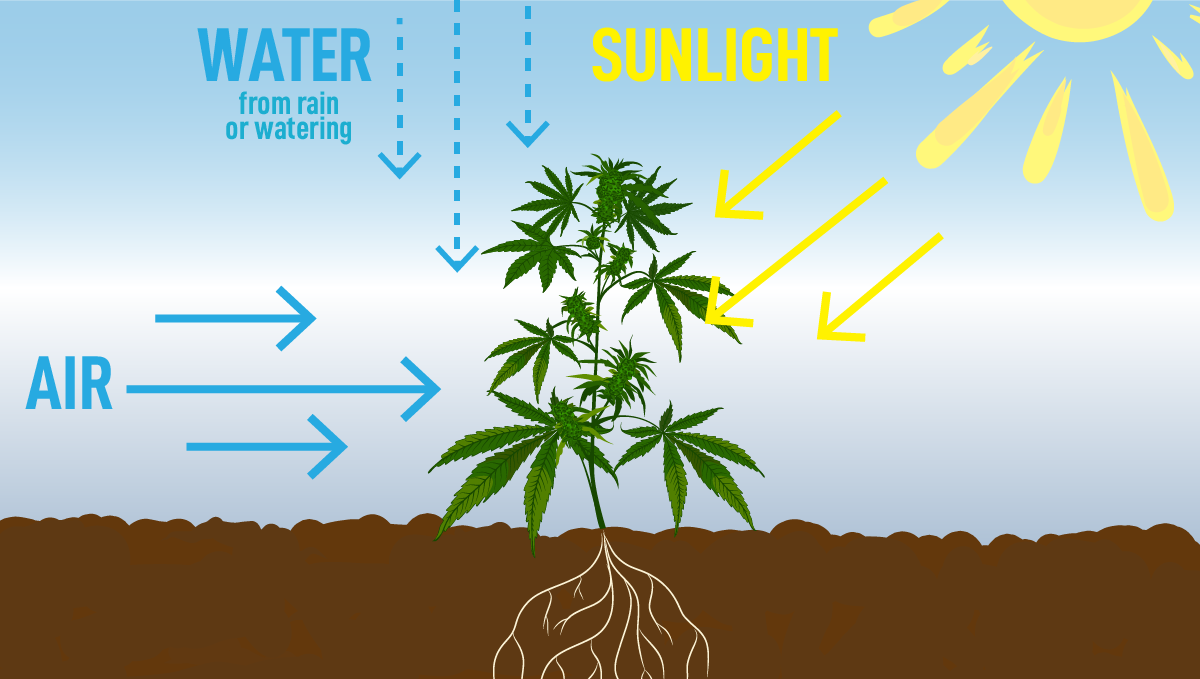
Just keep in mind that this way you won’t be able to grow all year long due to the different seasons. So always try to start your grow cycle at the right time and if you deal with rain, wind, snow, etc. make sure to protect them when necessary. Growers who live further north are much more restricted when it comes to the outdoor growing season. However several factors can expand this vital window of time, including sowing indoors and using greenhouses, polytunnels, and row covers. Choosing genetics suited to such an environment will also give you an upper hand; those with a brief life cycle and resistance to cold bouts will, of course, provide the better option.
Despite the obvious challenges that come with outdoor cultivation, growing outdoors also comes with a host of benefits. More space both above and below the soil gives plants all of the room they need to fulfil their genetic potential. Additionally, growers don’t have to go to many lengths in inoculating their growing medium; the native soil is already crawling with beneficial microbes that enhance plant health and performance.
3. Before Planting Your Seeds: Choosing the Substrate
Now that you understand the differences between outdoor and indoor growing, it’s time to talk about the different ways to grow weed at home, which is where you’ll be planting the seed after germination.
Soil
Growing in soil is probably the simplest way to grow cannabis at home and it’s pretty straightforward. It’s just a matter of going to your local grow shop, getting a bag of good-quality organic soil, and planting the seeds.
Pros
- Cheaper
- Recommended for beginners
- Usually results in better flavors
Cons
- Organic matter attracts bugs
- Prone to diseases
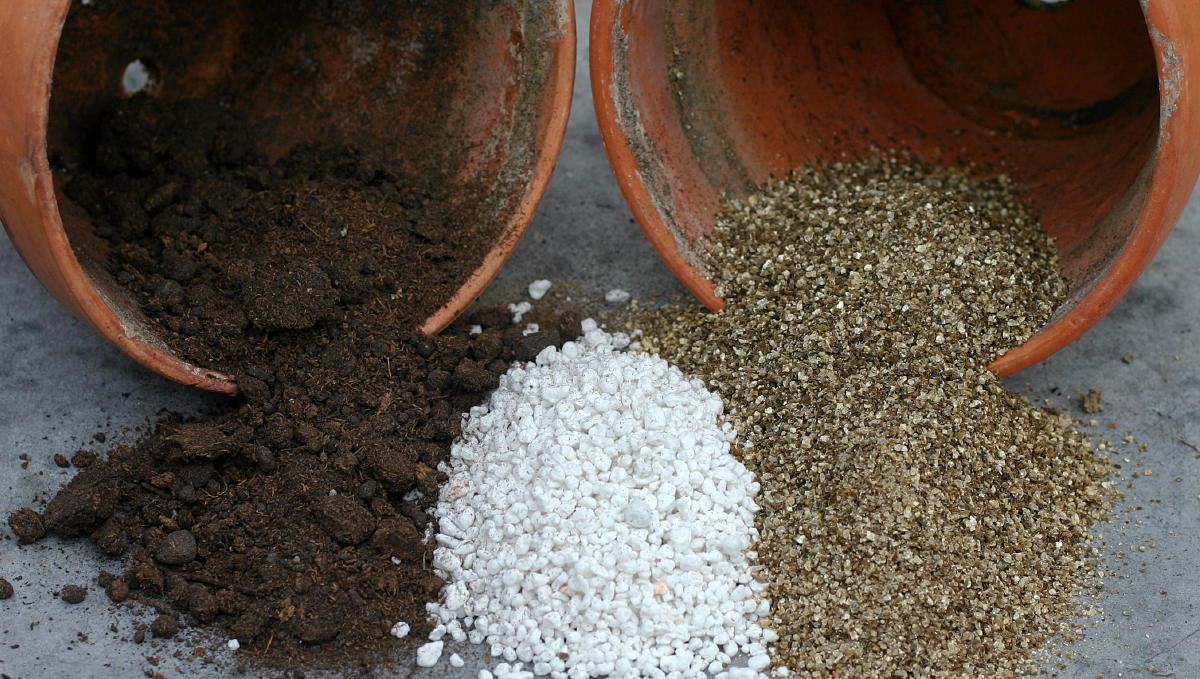
Coco
Coco coir has gained a lot of popularity in the last couple of years. Coco fiber is usually mixed with perlite and it’s sort of in-between soil and hydro so it offers better water drainage and better oxygenation in the root zone.
Pros
- Bigger plants in smaller pots
- Helps prevent overwatering
- Reusable
Cons
- Requires nutrition from the start
- Need to check and adjust pH
- Needs watering more often
Hydro
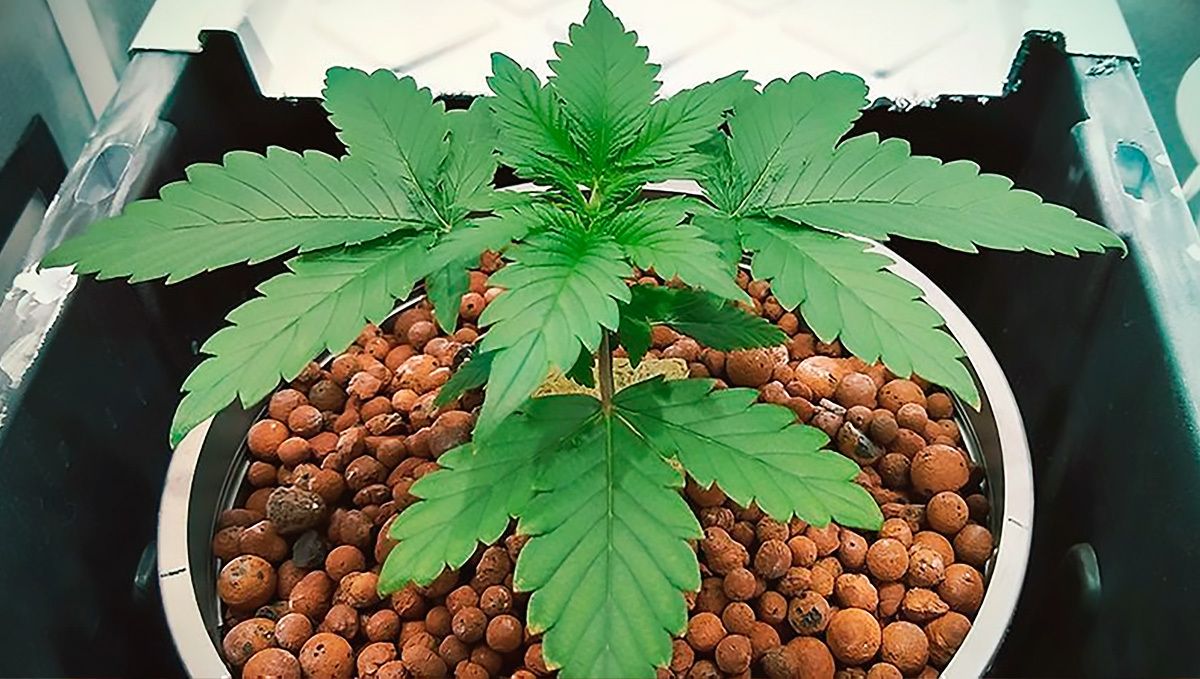
Hydroponics consists of growing soilless, meaning that the roots grow directly in the nutrient solution or in an inert medium such as coco or Rockwool. It’s said that hydro provides the best yields but this type of system must be monitored constantly, so it’s recommended for more experienced growers.
Pros
- Higher yields in smaller spaces
- Reduces chances of pests
- Allows more control over plant feeding
Cons
- Much more expensive than any other grow method
- Must be knowledgeable on growing equipment and how to use it
- Relies on electricity so a power outage can ruin your harvest
4. Watching After Your Plants: Light Cycles, Growing Conditions and Feeding
No matter what substrate you chose, you need to take good care of your plants in order to have a successful harvest, and for this to happen you need to provide the right growing conditions: temperature, humidity, light cycle, and feeding.
Optimal Growing Conditions
There are different types of marijuana plants (such as autoflowers and photoperiods) and they may have different feeding requirements or may need different light cycles, but all of them need fairly similar growing conditions to thrive. So if you want your plants to grow happy and healthy, you should keep the following conditions.
| Ideal Growing Conditions For Cannabis Plants | ||
|---|---|---|
| Plant Stage | Temperature | Humidity |
| Seedlings | 20 - 25 °C | 65 - 70% |
| Vegetative Stage | 22 - 28 °C | 40 - 70% (lower 5% per week) |
| Pre-Flower/Flowering | 20 - 26 °C | 40 - 50% |
| Last 2 Weeks of Flowering | 18 - 24 °C | 30 - 40% |
Light Cycles
There are different types of light fixtures to choose from if you’re planning on growing a weed plant at home and all will serve their purpose, as long as it’s potent enough for the number of plants you’re growing. So it doesn’t matter if you’re growing under LEDs, HPS, MH, or HIDs, the important thing here is to provide the right light cycle.
So apart from the ideal temperature and humidity, you need to maintain the correct light cycle for the different growth stages. For photoperiod plants, the recommended light cycle is 18/6 during the vegetative stage and 12/12 during the flowering stage.

With autoflowers it’s different because they flower automatically, so there’s no need to change the light cycle to trigger flowering. Meaning that autoflowers grow under 18/6, 20/4 or even 24/0 from seed to harvest.
Organic vs Inorganic Feeding
In general, all fertilizers provide the same macronutrients and micronutrients marijuana plants need to grow and develop beautiful buds, but depending on how you’re growing, it may be better to opt for one or the other. In general, when growing in soil or any other organic substrate it’s recommended to go for organic fertilizers. In coco you can go for either organic or inorganic and in hydro, it’s recommended to go for inorganic nutrients specifically designed for hydroponics due to being 100% soluble.
Feeding Schedules
When growing photoperiods you can always follow the manufacturer’s recommendations, which will work just fine although you may have to use a bit more or a bit less depending on the growing conditions and specific strain. Since most products are designed for photoperiods, when you’re growing autoflowers, just follow the manufacturer-recommended schedule but adjust the fertilizer doses using the following as a guideline:
| Plant Stage | Nutrient Dose | Plant Stage | Nutrient Dose | ||
|---|---|---|---|---|---|
| Week 0 | Germination | Plain water | Week 5 | Pre-Flower | ¼ of Grow + ⅛ of Bloom |
| Week 1 | Seedling | Plain water | Week 6 | Flowering | ¼ of Bloom |
| Week 2 | Vegetative | ⅛ of Grow | Week 7 | Flowering | ½ of Bloom |
| Week 3 | Vegetative | ¼ of Grow | Week 8 | Flowering | ½ of Bloom |
| Week 4 | Vegetative | ¼ to ½ of Grow | Week 9 | Flowering | ⅛ of Bloom |
Keep in mind that if you’re growing weed in pre-fertilized soil you should only start feeding around week 3 or 4. Also, if you’re using inorganic fertilizers it’s highly recommended to flush with plain water for at least one week in order to remove nutrient excess and get a much more flavorful flower.
5. Get Bigger Buds and Better Yields: Plant Training Techniques
Up to this point you’re on the right path to a successful harvest but there’s always a place for improvement. If you want to Get Bigger Buds and Better Yields you can use different plant training techniques (like High-Stress and Low-Stress training). All of these techniques will allow for better light penetration which results in denser buds and better yields and helps avoid popcorn buds.
Low-Stress Training Techniques (LST)
If you’re a beginner, it’s recommended to start light and with simple and easy methods. So go for low-stress training methods such as:
- Scrogging;
- Sea of green;
- And the tie-down method.
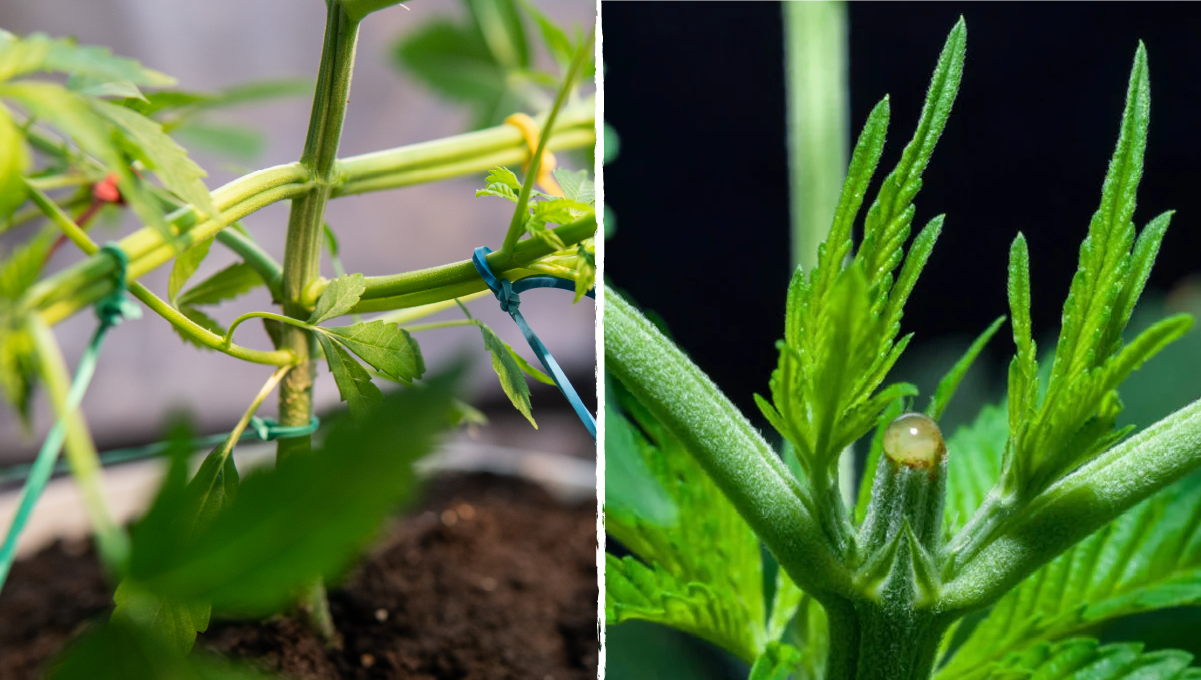
Before going for more aggressive ones. These techniques will have the same result as HST techniques but won’t stress your plant as much.
High-Stress Training Techinques (HST)
If you’ve grown weed before and are ready for more advanced training techniques, there are several high-stress training techniques you can choose from but the most popular amongst growers are topping/fimming and super cropping. Both basically consist in aggressively modifying plant growth during the vegetative stage.
5. Harvesting Weed Plants
Once the buds are ready, it’s time to harvest them. In order to know when to harvest, there are a couple of things to take into consideration.
When is the best time to harvest?
This means that when you think your plants are ready, pay attention to:
- Color of stigmas (hairs on the buds);
- Bud density;
- State of the trichomes.
Keep in mind that the state or color of the trichomes is the standard indication of when to harvest, this means that the color of the stigmas and the size of the bracts will help you but the final decision should be made based on the trichomes.
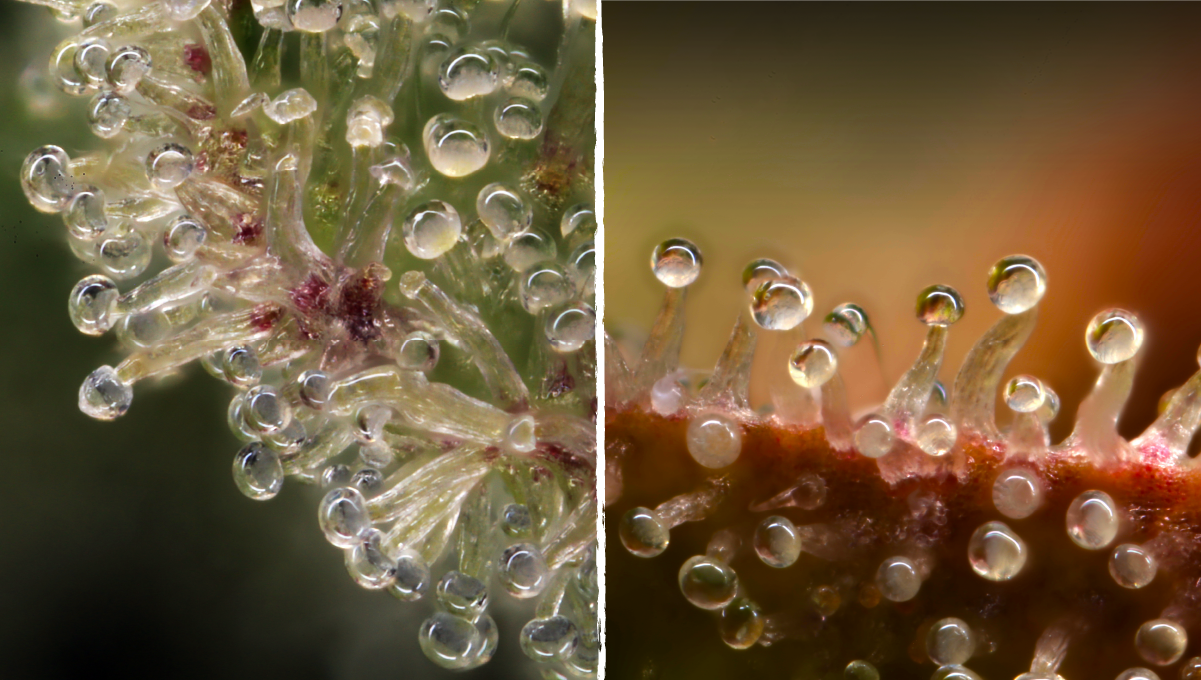
The color of the trichomes also indicates the type of effect you will experience so get a magnifier, jeweler's loupe, or your phone’s macro mode and check the trichomes for the following colors:
- Clear trichomes - not fully mature yet;
- Cloudy trichomes - stronger psychoactive effect and;
- Amber trichomes - stronger body high.
Drying and curing the buds
Once the trichomes are at the right stage, you can go ahead and chop your plant down. Remember that you shouldn’t smoke the buds just yet because you still need to dry, and cure the buds!
Drying your weed is super easy, you just have to hang the plants inside your grow tent or wardrobe and wait for 7 to 15 days. Once this period is over the buds will probably be ready for curing. Keep in mind that the drying process can affect the flavor and aroma of the buds if the drying conditions are out of range, so make sure to keep the temperature around 20 °C and the relative humidity is as close as 60% as possible.
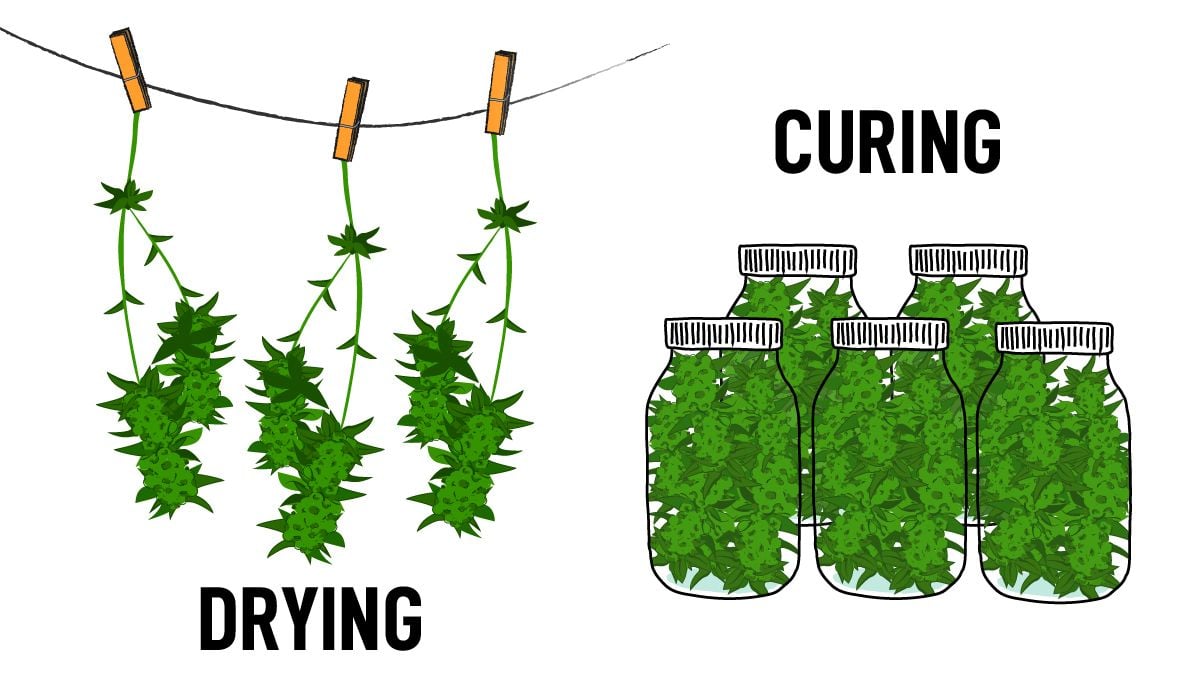
After the drying process is done, it’s time for the curing process. Just place the buds in a glass jar, opening the lid once or twice a day for 1 to 2 weeks, and once the curing process is done, you can now smoke your beautiful flowers.
6. What Types of Strains Can I Grow? (autoflowers vs photoperiods) - Conclusion
Now that you know how to grow weed at home from seed to harvest, it’s time to choose the type of strain you’ll be growing. There are basically 2 types of feminized seeds you can choose from if you’re growing weed for personal use: photoperiods and autoflowers.
Keep in mind that there are also regular photoperiods and autoflowers but this type of seeds also can produce male plants, and this is not what you’re looking for if you’re not a breeder.
If want to know how to grow weed at home, it's important to have in mind that both photoperiods and autoflowers produce weed but there are a couple of main differences to have in mind before going for one or the other. Photoperiodic seeds depend on a 12/12 light cycle to trigger flowering so they have to be planted on specific seasons outdoors, or change the light cycle indoors. Photos also grow super big, ranging from 150 up to 300 cm or more (if you have the space) and taking +16 weeks from seed to harvest.
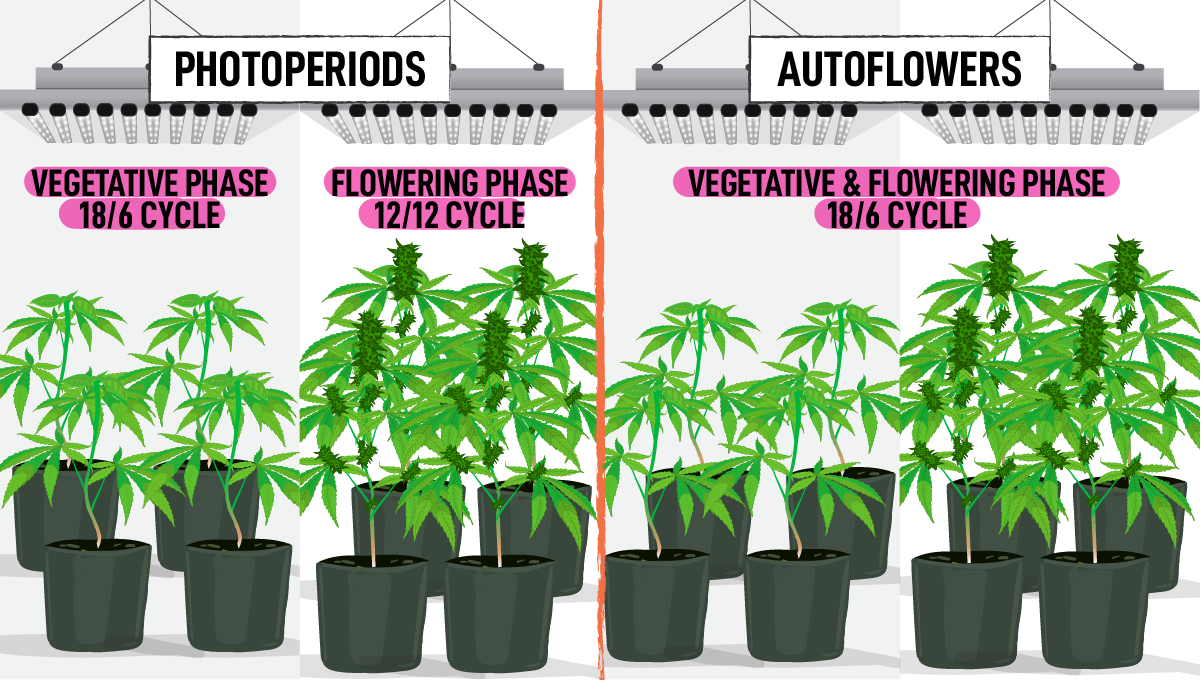
On the other hand, autoflowers (as the name says) flower automatically so you can grow them outdoors in any season without having to worry about light cycles or indoors under the same light cycle. Unlike photos, most autoflowering seeds grow relatively short, ranging from 60 - 150 cm in height and taking 8 - 10 weeks from seed to harvest. So if you were looking for how to grow a small weed plant at home or grow cannabis at home faster, autos are the way to go.
If you’re not sure where to start, look for an easy-to-grow autoflower with delicious flavors such as our Orange Sherbet Auto.
Now that you know the steps to growing weed at home, from seed selection to drying and curing, it’s just a matter of choosing the right strain and get growing!


