Watermelon Zkittlez Auto Cannabis Strain Week-by-Week Guide
- 1. Grow specifications
- 2. Grow set up
- 3. Germination and seedling stage | week 1
- 4. Early veg | week 2
- 5. Mid veg | weeks 3-4
- 6. Transition (pre-flower) | week 5
- 7. Early flower | weeks 6-7
- 8. Mid flower (bulk phase) | weeks 8-9
- 9. Ripening and harvest | week 10 (and beyond)
- 10. Yield and smoke report
- 11. In conclusion
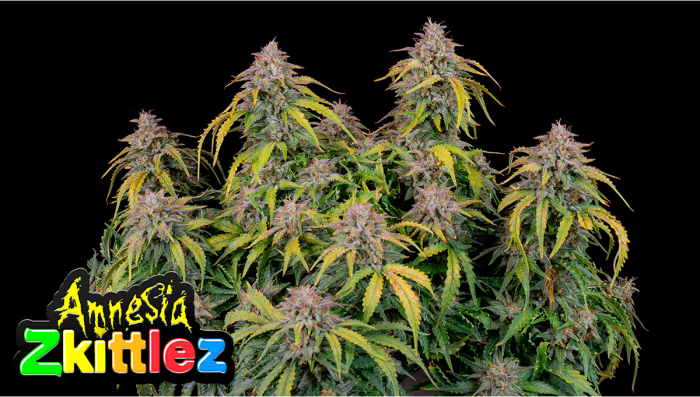
Watermelon Zkittlez Auto is an absolute gem among strains, offering a delightful experience for both growers and smokers. Its exceptional trichome-rich buds produce a burst of distinct fruity flavors that dance on the taste buds with every inhale. As a grower, you'll find it a joy to cultivate, whether you're a seasoned pro or just starting out. With its impressive yields, this autoflowering beauty rewards experienced hands while remaining fuss-free for beginners.
While you aren’t likely to face any issues cultivating Watermelon Zkittlez Auto, knowing a little about it in advance will take your experience and outcome to the next level. So, read our week-by-week guide to get acquainted with the strain’s progress from seed to harvest and its timeline.
1. Grow Specifications
You’re in for a remarkable growing experience if you choose Watermelon Zkittlez Auto. With its well-balanced Sativa/Indica composition, boasting 40% Sativa and 60% Indica genetics, this autoflowering wonder reaches a manageable indoor height of 120-140cm, making it an excellent choice for growers with limited space. In just 70 days from seed, you'll be rewarded with bountiful yields of up to 550g/m² indoors and an impressive 600-700g outdoors. Whether you're a seasoned cultivator or a beginner, this strain's easy-to-grow nature and generous harvest make it an absolute joy to nurture.
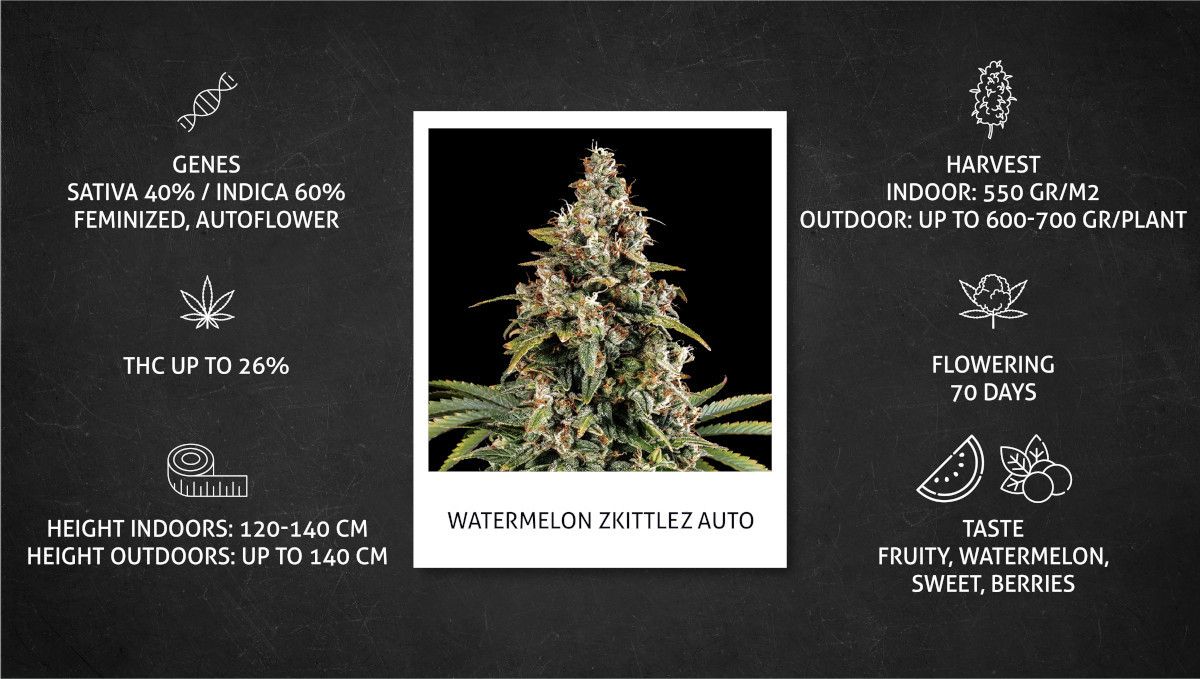
When it comes to the product quality, Watermelon Zkittlez Auto truly shines with its exquisite taste and aroma. Brace yourself for an explosion of fruity watermelon and sweet berries, creating a mouthwatering delight with every toke. As you savor this strain's uplifting relaxation effect brought about by 26% THC, you'll be transported to a state of blissful contentment, making it a must-try for anyone seeking a harmonious balance of potency and flavor.
2. Grow Set Up
There's no shortage of Watermelon Zkittlez Auto grow diaries online. We have chosen several from among them as a source of pictures and other data, such as height and the use of nutrients, but for other week-by-week data, we have focused on just one grow. You can see the setup characterostics and some other details of this grow in the table below.
| Grow Space: | 1.2 m2 (10.76 ft2) | Pot Size: | 7 gal (26.5 l) |
|---|---|---|---|
| Seed to Harvest: | 13 weeks | Medium: | Soil/Perlite |
| Flowering: | 9 weeks | Nutrients: | Organic |
| Light Cycle: | 24/0 → 18/6 | pH Levels: | 6.5 |
| Light Type: | LED | Day Temperature: | 25°C (77°F) |
| Watts Used: | 200 | Humidity: | 35-55% |
Of course, you don't need to replicate any of this in your own Watermelon Zkittlez Auto grow as this strain is as versatile, adaptable, and easy-to-cultivate as is required from modern autoflowering genetics.
3. Germination And Seedling Stage | Week 1
As an indoor grower, it's up to you to provide the right environmental conditions for your cannabis plant, so pay extra attention to them from day one. A good environment is especially important for a young plant which hasn't yet had a chance to develop an extensive root system and can easily wilt and die if the temperature is too low or too high, or if the air is too dry. The figures in the table below provide a good benchmark, although we'd recommend keeping RH at 70-80% for the first week.
| Plant Height: | 10 cm | Humidity: | 55% |
|---|---|---|---|
| Distance to Light: | 64 cm | Water per Day: | 0.01 gal (0.03 l) |
| Day Temp: | 25°C (77°F) | pH: | 6.5 |
| Night Temp: | 22°C (72°F) | TDS: | 100 ppm |
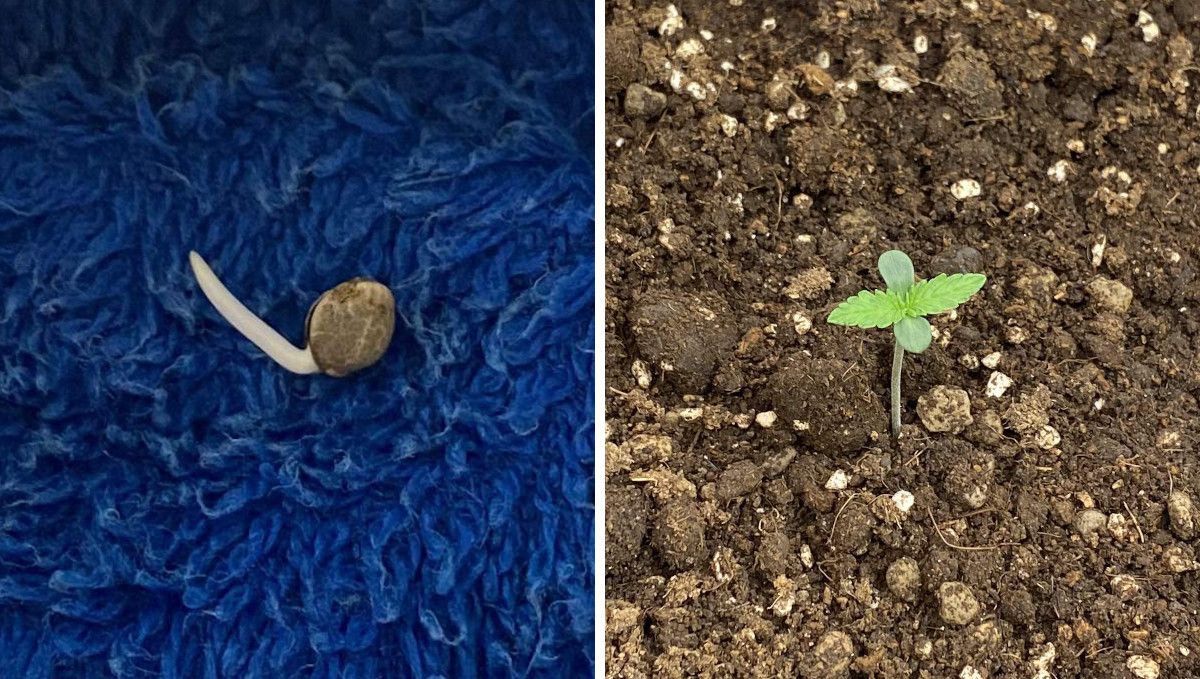
The seeds sold by major breeders as souvenirs are all viable, and you only have to give them a little push to make them sprout. The three things that you need to make a cannabis seed germinate are warm temperatures, moisture, and darkness. There are many methods that allow you to germinate cannabis seeds the easy way, and one of the most straightforward ones is to place the seed between wet paper towels. When the taproot emerges from the seed hull and gets to be about 1 cm (half an inch) long, you can plant it into the medium of your choice.
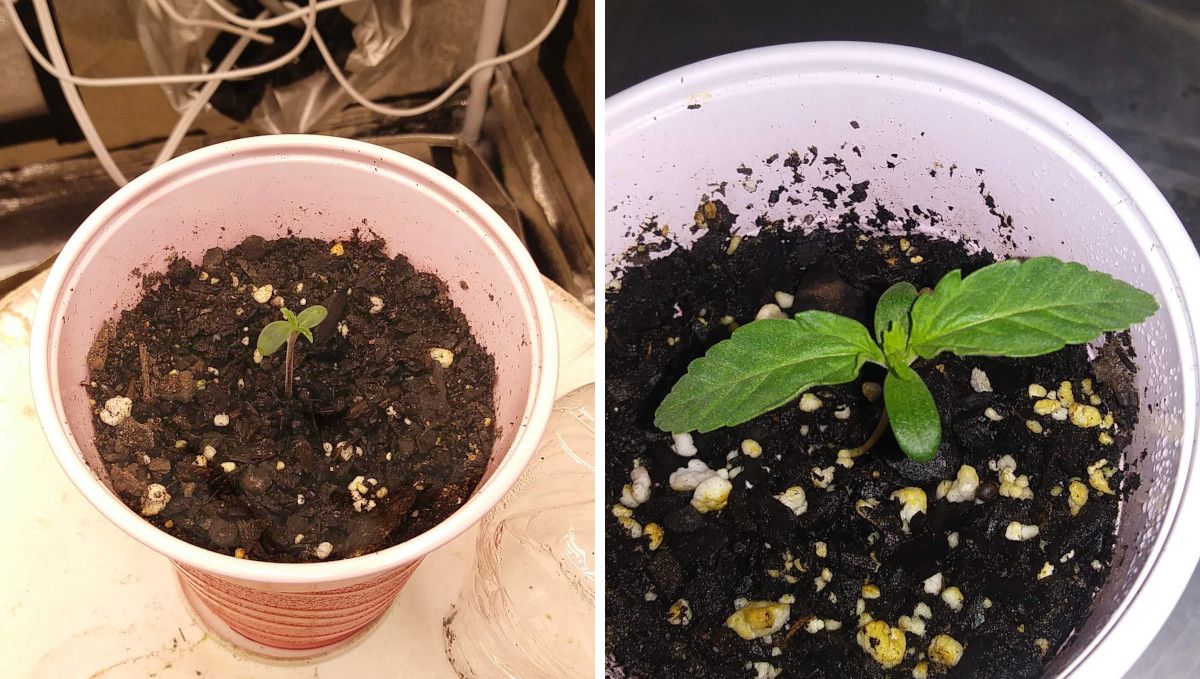
In the first days of its life cycle, the sprout doesn't require much medium. This means that you can safely plant it into a solo cup filled with soil, coco, or whatever medium you prefer. This makes watering very easy indeed. Just water about 30-50 mL each morning, and it will be enough for your little one to thrive.
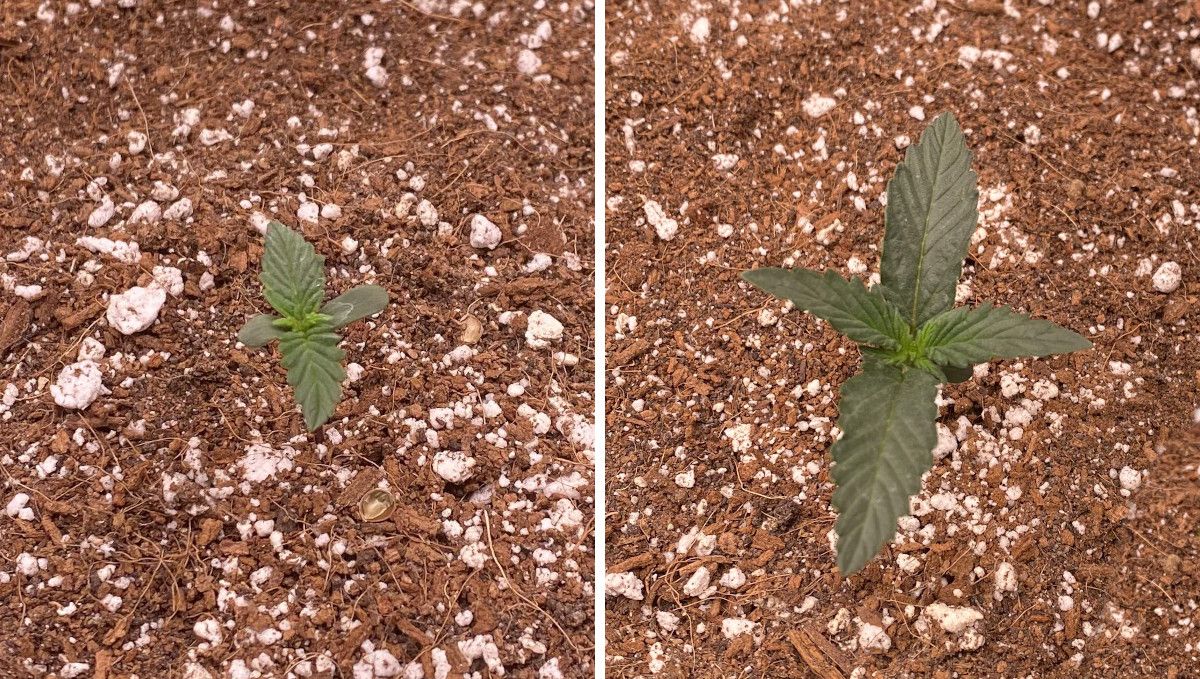
However, using small starter containers has its disadvantages. In about a week or two, you'll have to transplant the young plant into a bigger pot, and while doing it, you may shock and even stunt the growth of your cannabis. This happens especially often for newbies, who don't know yet how to handle delicate root systems of their babies. So, it's a safer approach to plant weed straight into the final container. This is especially true for autoflowers, whose life cycle is very short, so every day matters.
4. Early Veg | Week 2
In the second week from seed, your Watermelon Zkittlez Auto is still young and vulnerable and requires your constant attention to the environment. As in the previous week, keep the day temperatures in the warm range of about 25-28°C and the relative humidity at about 60-70%. This will free the seedling from the extra stress of dealing with adverse conditions, allowing it to channel its energy into growing the underground part, meaning the root system.
| Plant Height: | 15 cm | Humidity: | 50% |
|---|---|---|---|
| Distance to Light: | 64 cm | Water per Day: | 0.11 gal (0.42 l) |
| Day Temp: | 25°C (77°F) | pH: | 6.4 |
| Night Temp: | 21°C (70°F) | TDS: | 250 ppm |
While the root ball continues to develop unseen by you, the visible, above-ground part of the plant starts to grow actively too. You will see more and more sets of true leaves emerge, and every new pair should be bigger than the previous one – it means that your autoflower is growing fine.
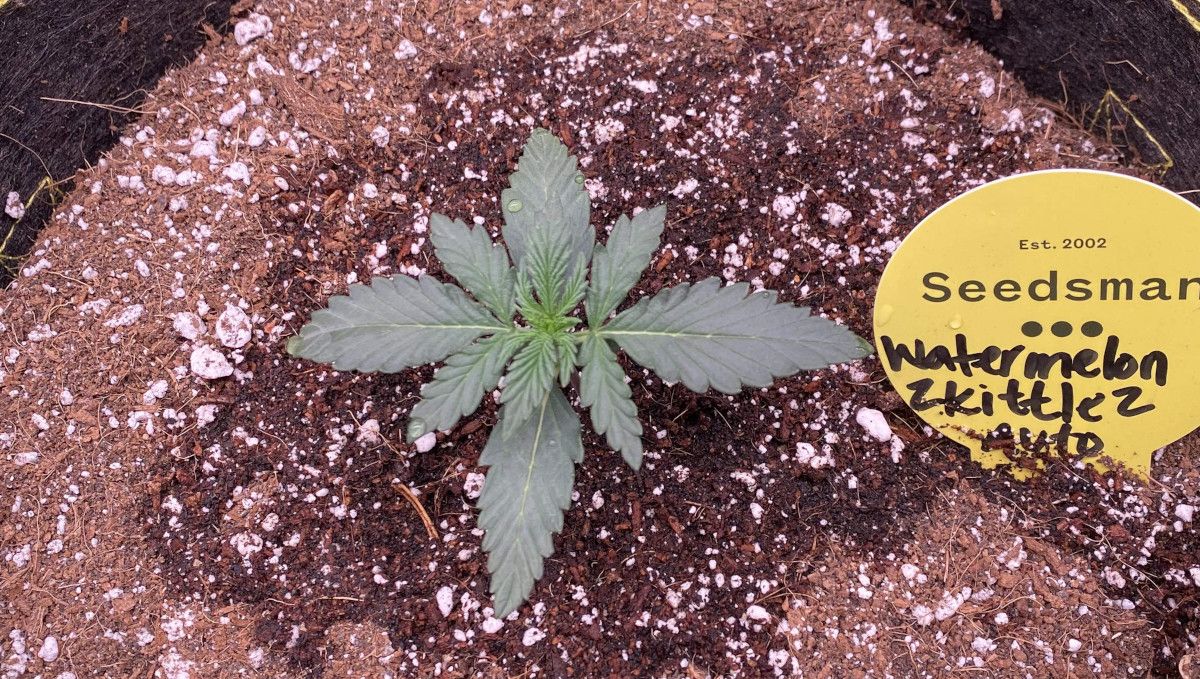
Many newbie growers choose to cultivate their weed in soil as it's a much more forgiving medium compared to coco coir or hydroponics. If you have also chosen soil as your growing medium and use a big container, your weed plant will probably require no extra feeding yet – it will have enough nutrients within the soil. However, if you have chosen coco coir or hydroponics, you'll need to provide nutrients from day one.
5. Mid Veg | Weeks 3-4
It's a common adage that cannabis plants like more or less the same conditions as humans, meaning temperatures around 25°C and relative humidity between 40 and 60%. If you manage to keep your environmental conditions within these ranges throughout the whole lifecycle, your plant will thrive. However, as your experience grows, you can adapt the conditions slightly according to the stage you're currently in. In mid-veg, the temperatures can be a degree or two lower than before, and the same goes for the RH – it needn't be as high as in the previous weeks. Anywhere between 50 and 60% will be just fine.
| Plant Height: | 30-38 cm | Humidity: | 40% |
|---|---|---|---|
| Distance to Light: | 64 cm | Water per Day: | 0.26 gal (1 l) |
| Day Temp: | 24°C (75°F) | pH: | 6.5 |
| Night Temp: | 20°C (68°F) | TDS: | 350 ppm |
Weeks 3 and 4 mark a period of especially rapid growth. Many experienced growers know that this could lead to problems with excessive height later on. To address this issue in advance, they begin to train their plants. If you're an indoor grower with limited vertical space, we suggest training your plants as well. In most cases, Low-Stress Training (LST) is the safest option. Topping, FIMming, or other high-stress techniques should be attempted at your own risk and only if you have previous experience with autoflowers.
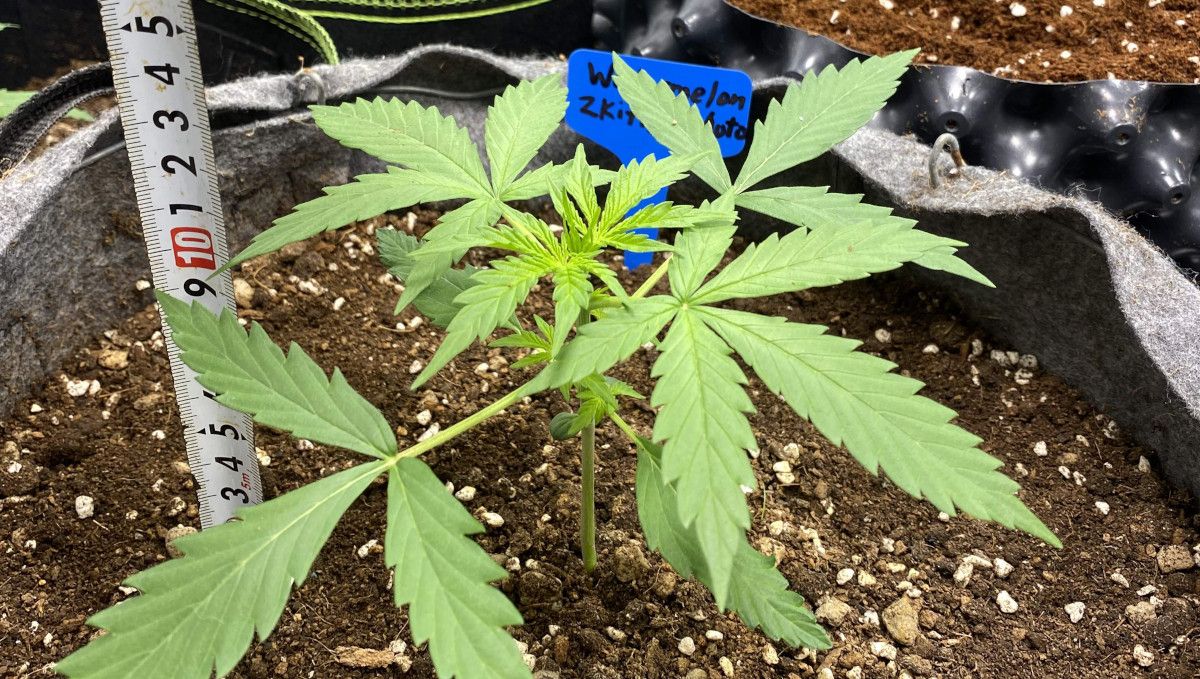
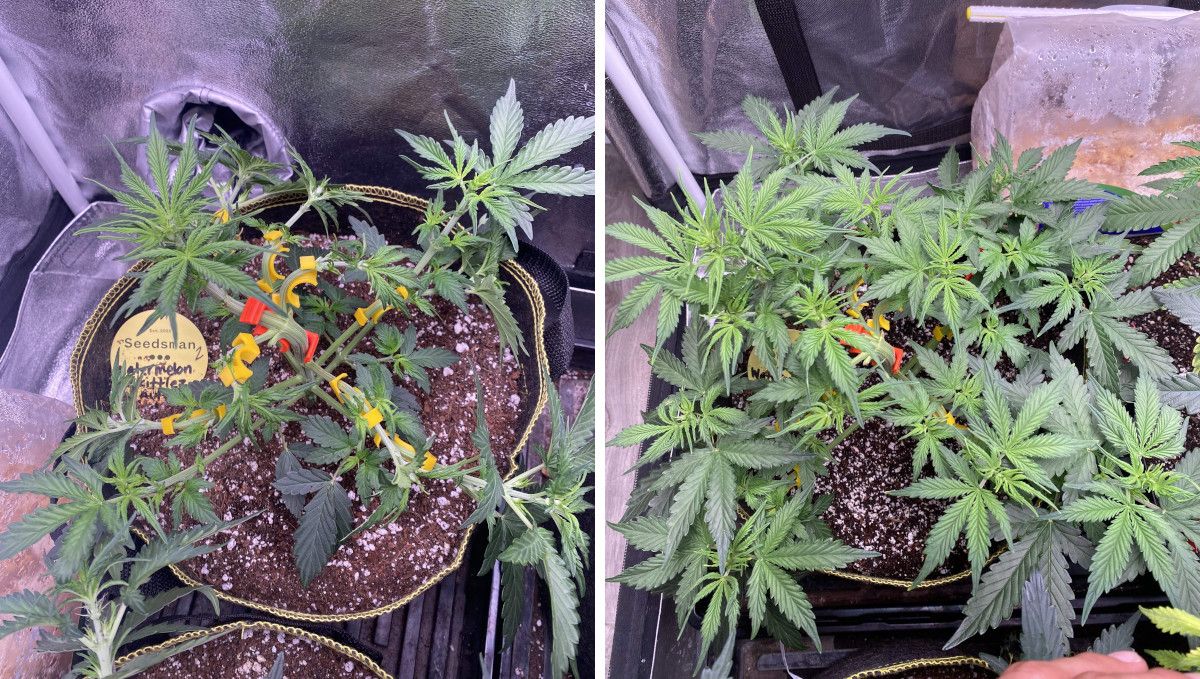
Even the simple tie-down method can, at times, appear to cause significant stress to your autoflower. Surprisingly, such a straightforward technique is enough to redirect the flow of energy from the main shoot to the side branches, causing the plant to bush out. In the picture below, you can witness low-stress training in action, complemented by defoliation. The purpose of defoliation is to ensure every potential bud site receives ample exposure to light.
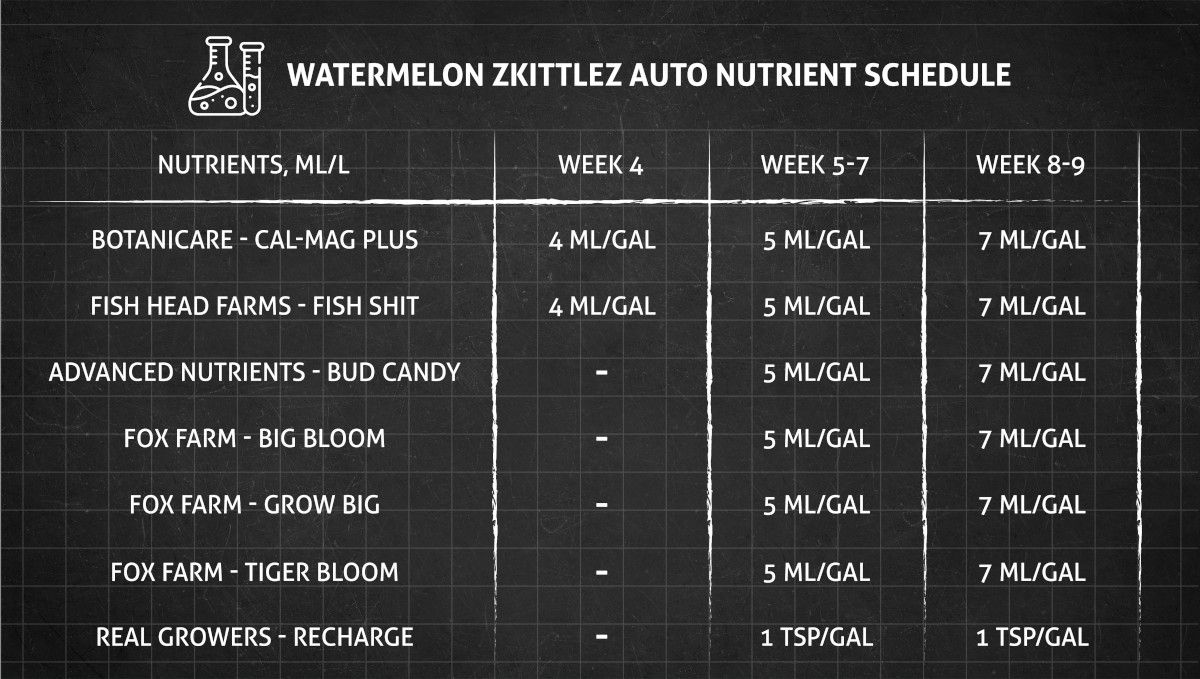
You cannot hope to support all that active growth on a lean diet, so you need to give your plants plenty of nutrients, specifically those rich in nitrogen (N). Even in large amounts of soil, the nutrients that were originally there have depleted by this time, and you should take a bottle of appropriate nutrients and start adding some to every watering or every other watering.
Below, you can see just one example of a nutrient schedule used on a cannabis plant throughout the whole grow.
6. Transition (Pre-Flower) | Week 5
When your autoflower starts to transition to budding, pay attention to its increased appetite for plant food and water. Also, mind the distance between the plant tops and the light. At this point, your weed will start to stretch, so the light can get dangerously close. Make sure the distance is within the optimal range so that it doesn't cause burn.
| Plant Height: | 38 cm | Humidity: | 40% |
|---|---|---|---|
| Distance to Light: | 64 cm | Water per Day: | 0.4 gal (1.5 l) |
| Day Temp: | 25°C (77°F) | pH: | 6.5 |
| Night Temp: | 20°C (68°F) | TDS: | 500 ppm |
It will become obvious to you that your plant has started to flower when you notice some small white hairs first at the middle nodes and then at the very tops. At the same time, the color of the tops will change to a more yellowish tint. Your plant is also likely to gain height, and the side branches will extend as well.
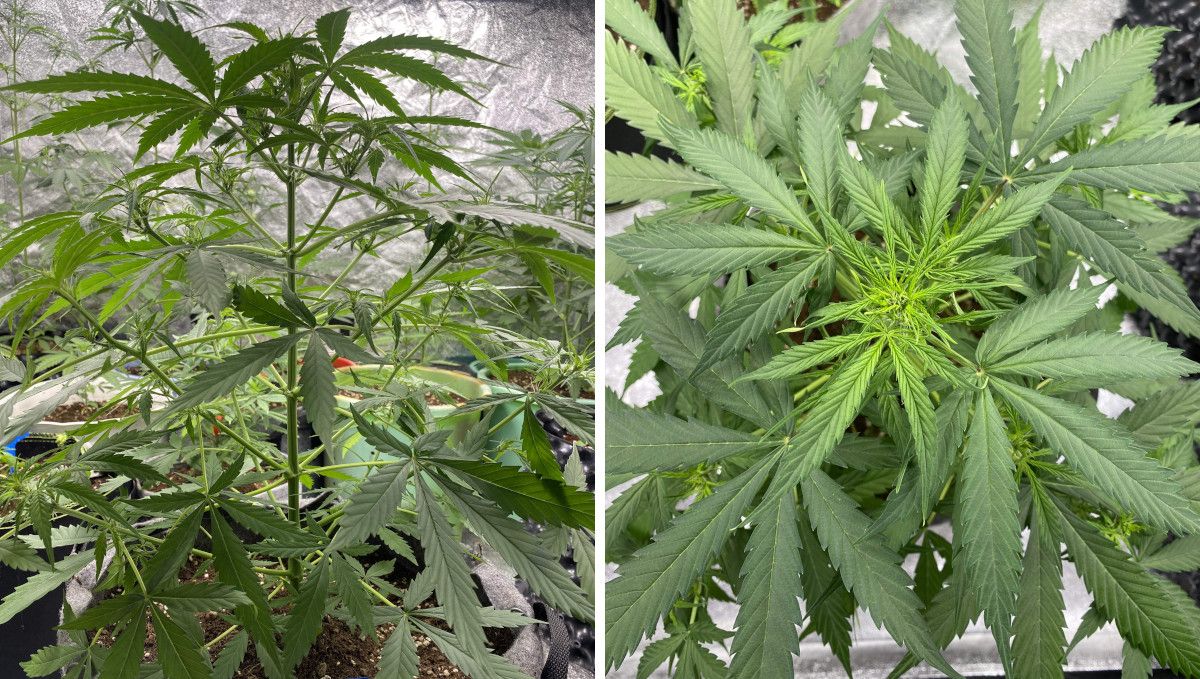
If you're struggling with vertical space, you'll be better off keeping your plant's canopy short and flat. In this case, every future bud site will be at about the same distance from the light, will receive the same amount of energy, and have the same size and texture at harvest.
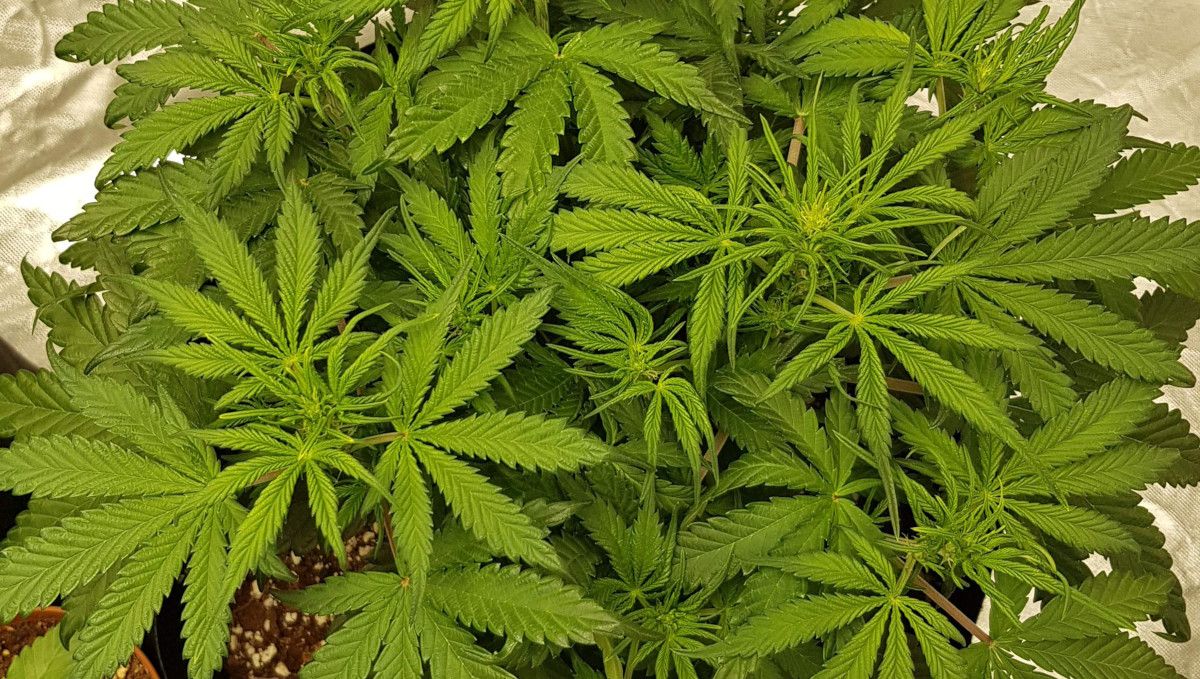
If you haven't yet achieved all your objectives of training, now is the right time to finish what you started. Later, in just a week or two, the plant will stop stretching, will stop building any new bud sites, and so further training will be impossible. As for removing excessive foliage, it's best not to stress your plant with defoliation in the advanced stages of flowering. If you need to defoliate, do it now.
7. Early Flower | Weeks 6-7
As the flowering progresses, keep in mind that cannabis plants prefer slightly cooler temperatures when they start to form buds. This means that you may consider lowering the day temperature by a degree or two at every stage of flowering. Do the same for the relative humidity too – it needs to be lowered from anywhere between 50-60% to something like 35-40% by harvest.
| Plant Height: | 51-64 cm | Humidity: | 40% |
|---|---|---|---|
| Distance to Light: | 51 cm | Water per Day: | 0.4-0.5 gal (1.5-1.9 l) |
| Day Temp: | 25°C (77°F) | pH: | 6.5 |
| Night Temp: | 20°C (68°F) | TDS: | 600-700 ppm |
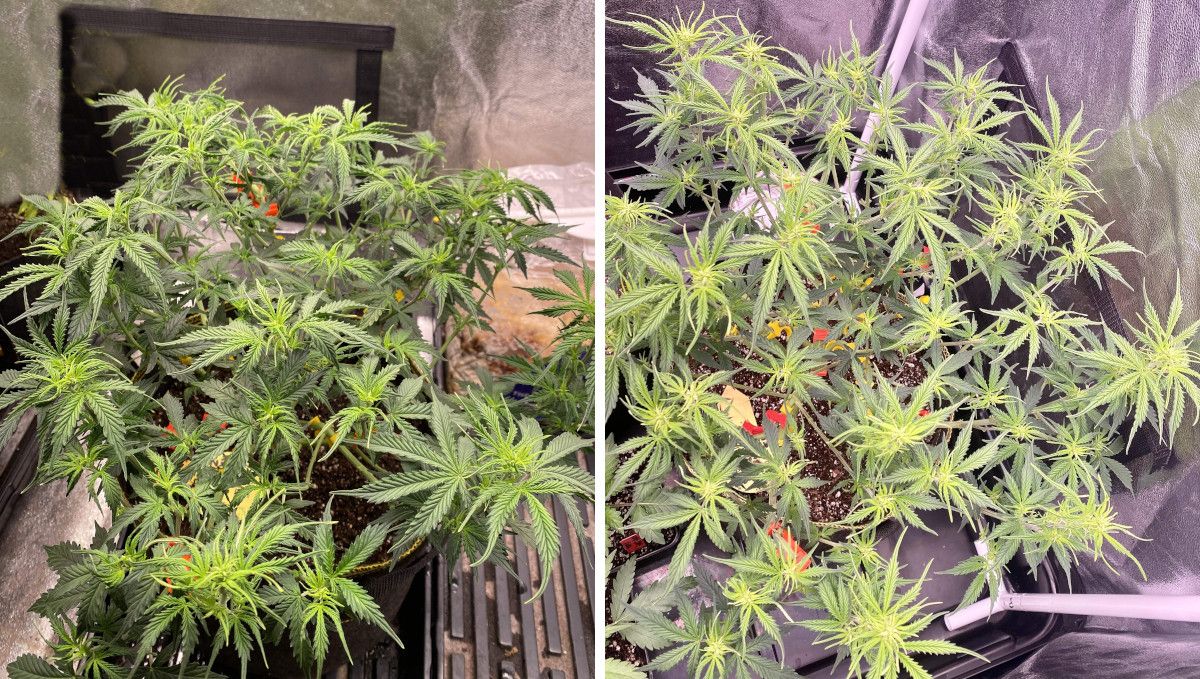
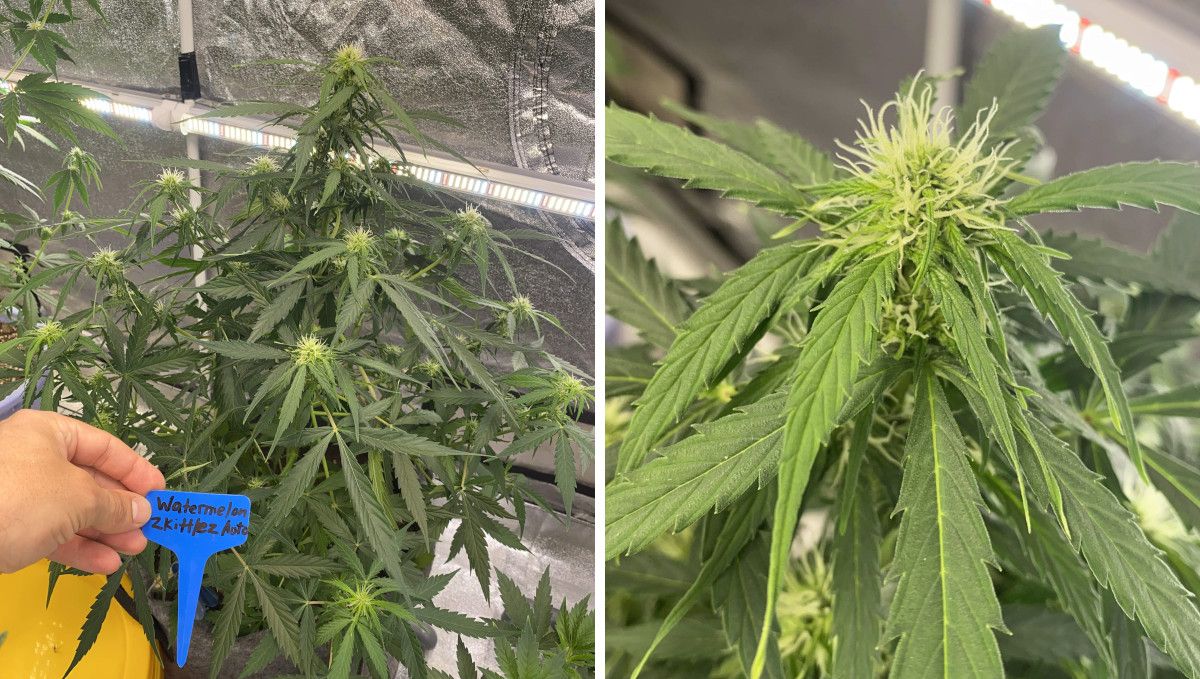
When the flowering is only beginning, the flowers look very insubstantial and nothing like the fat, dense buds that we are accustomed to. You'll just see bunches of greenish-white hairs at the tops and the nodes and hardly anything else. Moreover, these proto-flowers will be spaced by wide gaps, and it won't seem likely to you that the coveted long, continuous colas will appear any time in the future. However, give your plants some time and they will turn into something that resembles the product pictures in the breeder's catalog.
Try not to be too aggressive in using canopy management techniques such as training and defoliation. Every such procedure causes a certain amount of stress to your autoflower and may slow down or even stop its growth. Your goal now is not to distract your auto from the serious business of building up buds.
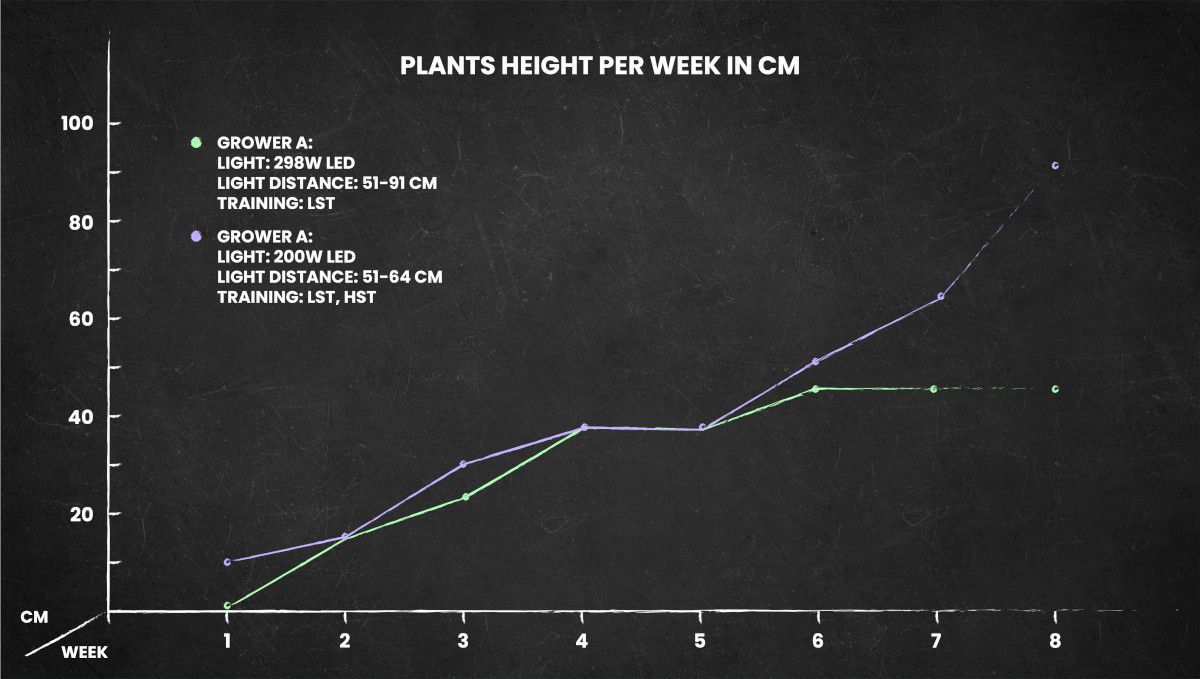
The final height of your autoflower will depend on a lot of factors, with training being one of the main ones. As you can see from the graphic below, a trained Watermelon Zkittlez Auto stays quite short, but if you let it grow more naturally, it will become taller, and most of this growth will happen during the initial stages of flowering. So, be aware of that and plan for your autoflower to stretch at least 50% compared to the end of the vegetative stage.
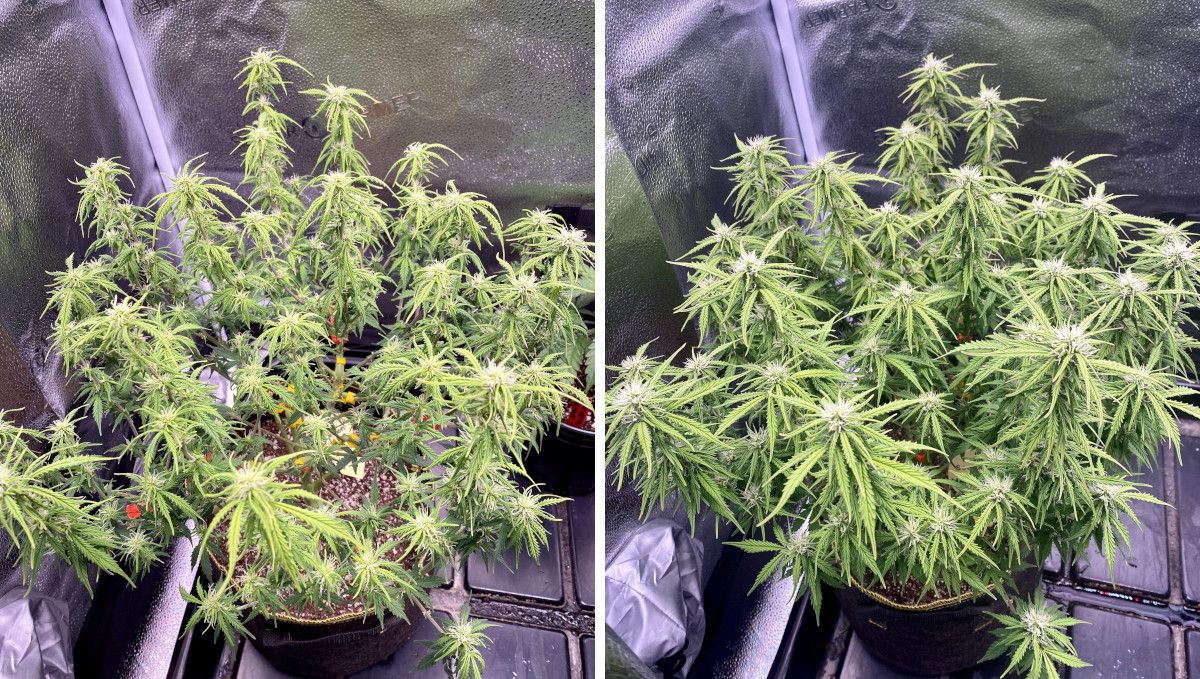
The stretch will be the main and most noticeable development during this stage, but eventually, it will slow down, and most of the energy the plant will spend will go to the formation of flowers. You will be excited to witness their stacking up and filling out considerably. However, the buds will still look very immature, which you can judge by the white color of their pistils.
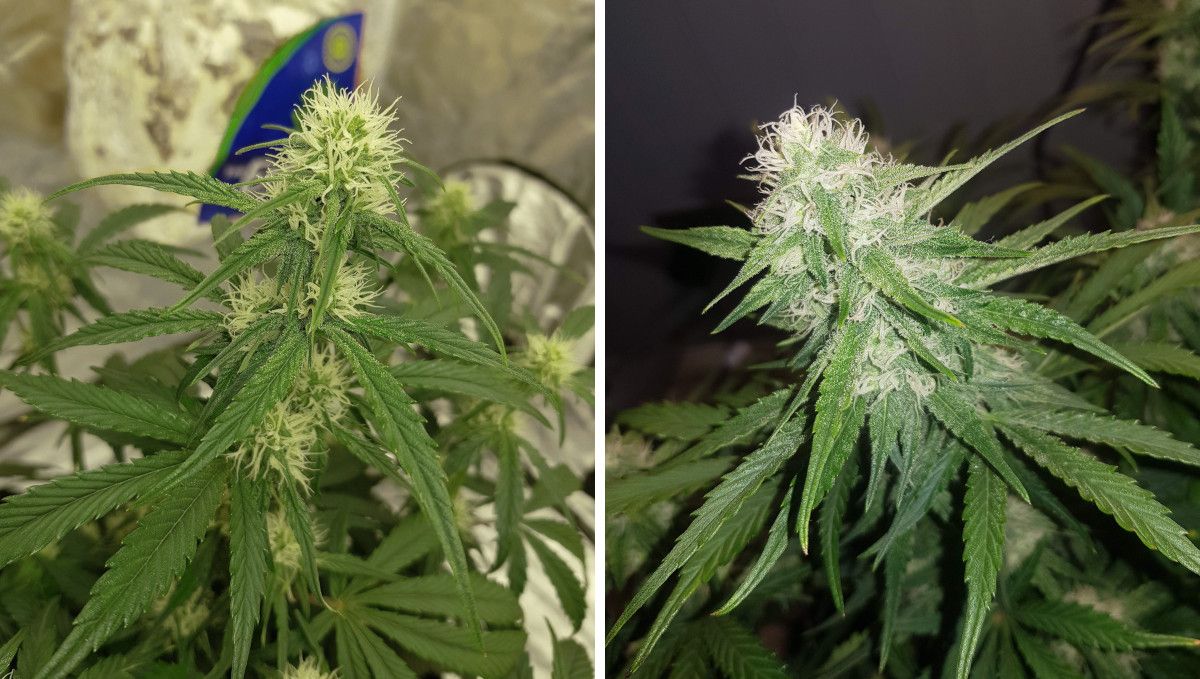
Naturally, all those gains in the mass of flowers will require extra amounts of water and nutrients. At this time, the main macronutrients that the plant needs are phosphorus and potassium, while the plant's appetite for nitrogen will diminish. The best moment to change the feeding regimen from veg to flower is probably week 5.
8. Mid Flower (Bulk Phase) | Weeks 8-9
As your weed plants get taller, they'll grow closer and closer to the lights, and this may exacerbate the problem with excessive heat. So, pay extra attention to the temperature in your grow room, especially during the day, and be sure to measure it at the level of the tops. As for the night temperatures, you may want to lower them too, as this allows you to get some purple colors in your buds if your strain has the relevant 'purple' gene. Also, protect your plants from fungal infections such as bud rot, mold, and powdery mildew by lowering the relative humidity, ideally to 35%.
| Plant Height: | 81-91 cm | Humidity: | 35% |
|---|---|---|---|
| Distance to Light: | 61 cm | Water per Day: | 1.06 gal (4 l) |
| Day Temp: | 25°C (77°F) | pH: | 6.5 |
| Night Temp: | 19°C (66°F) | TDS: | 400-900 ppm |
This is the time when the most impatient of growers start thinking about whether they should cut their plants already. However, even if the buds appear big enough and dense enough to you, it's still too early to think about harvest. The buds will still gain in size, and more importantly, the concentration of THC and other cannabinoids in them will keep increasing.
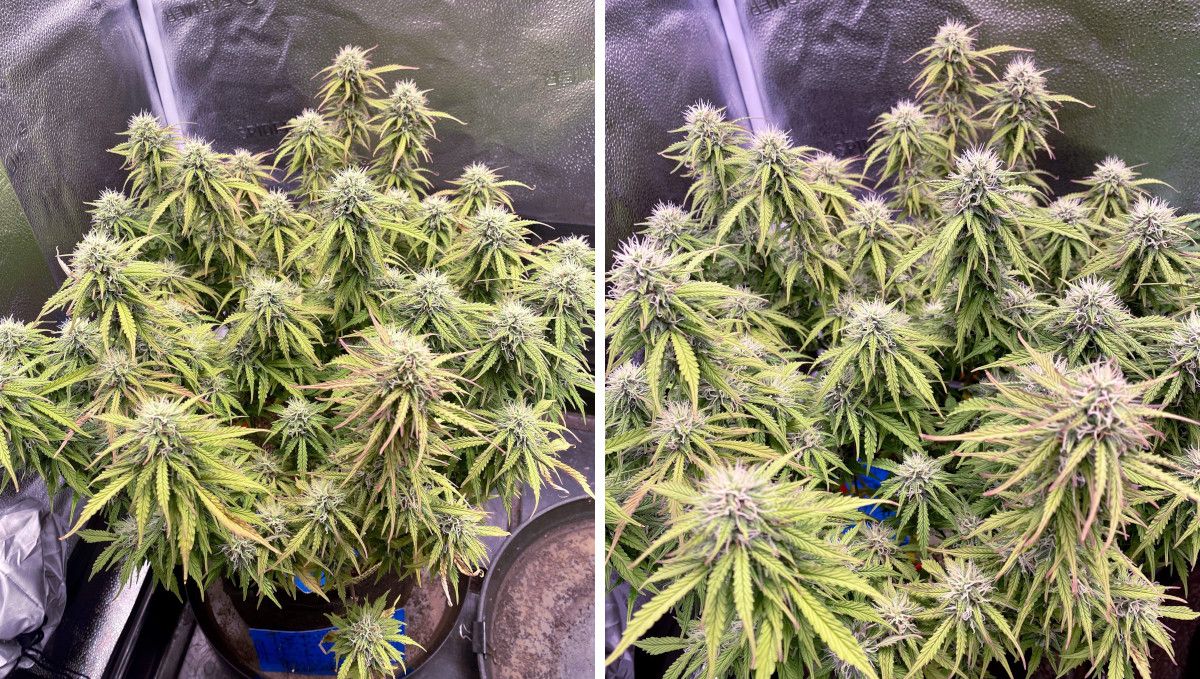
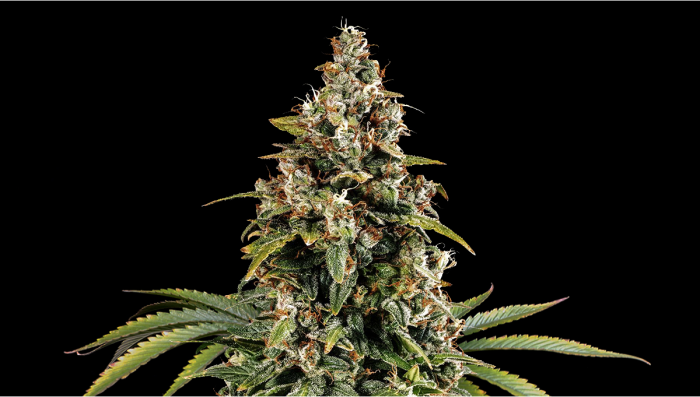
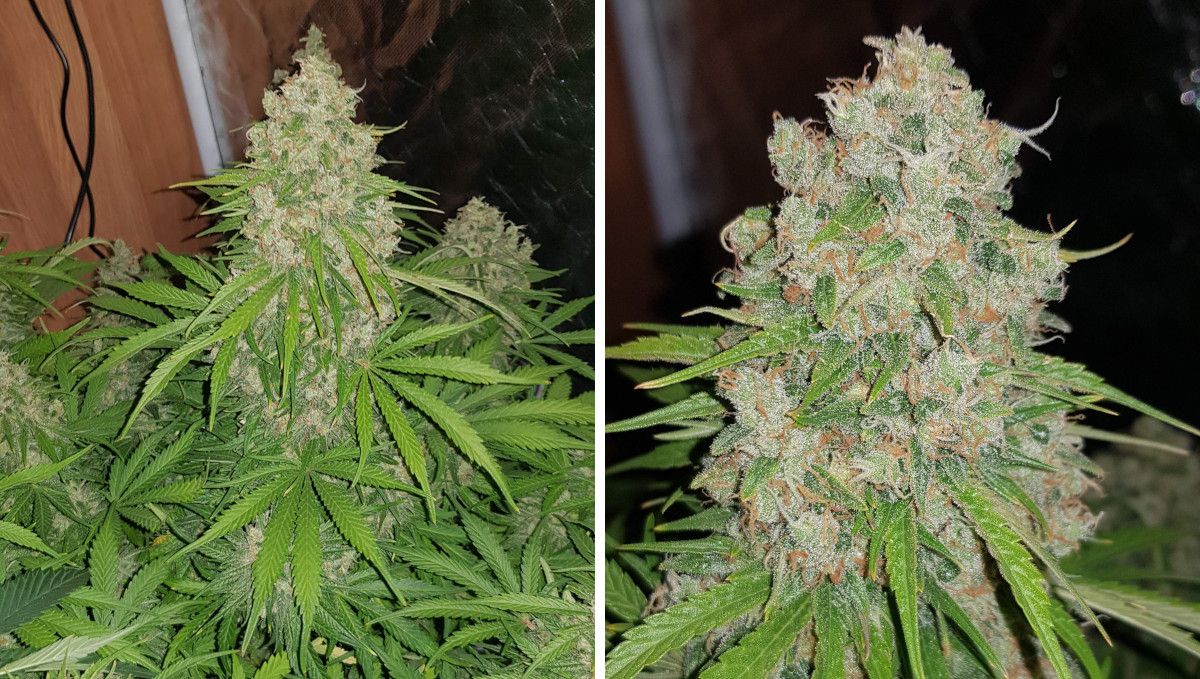
When the flowers start bulking up, they also become resinous. The main receptacles of resin are the so-called trichomes, tiny glands that cover calyces and sugar leaves (also known as trim leaves) which grow among the flowers and give them a frosted appearance.
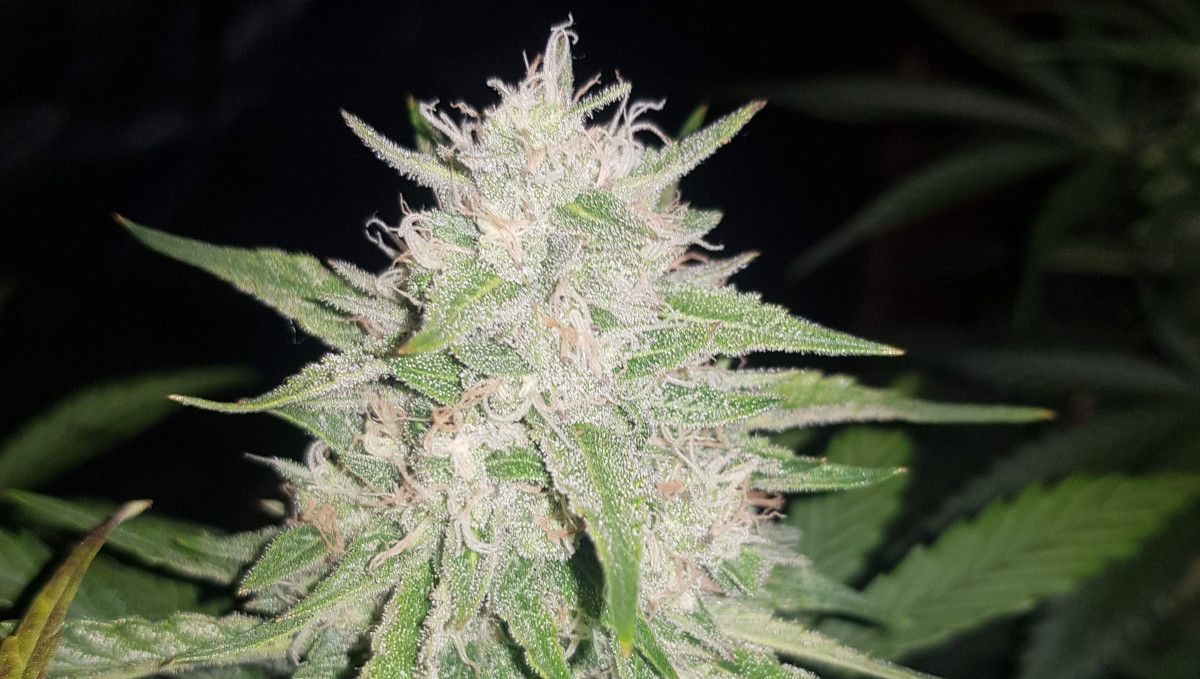
Besides this 'frost', you'll also notice that the pistils, those hair-like structures that cover the flowers, change their color from white to brown or orange. This change in color indicates that the buds are starting to mature.
Looking at the flowers in the pictures above, you can imagine their strong smell. Even one plant emits a potent aroma during the flowering stage, filling your whole house with its distinctive scent and even reaching your neighbors' place. That's why odor control is so important now. If you haven't done so already, install a carbon filter to effectively neutralize the smell.
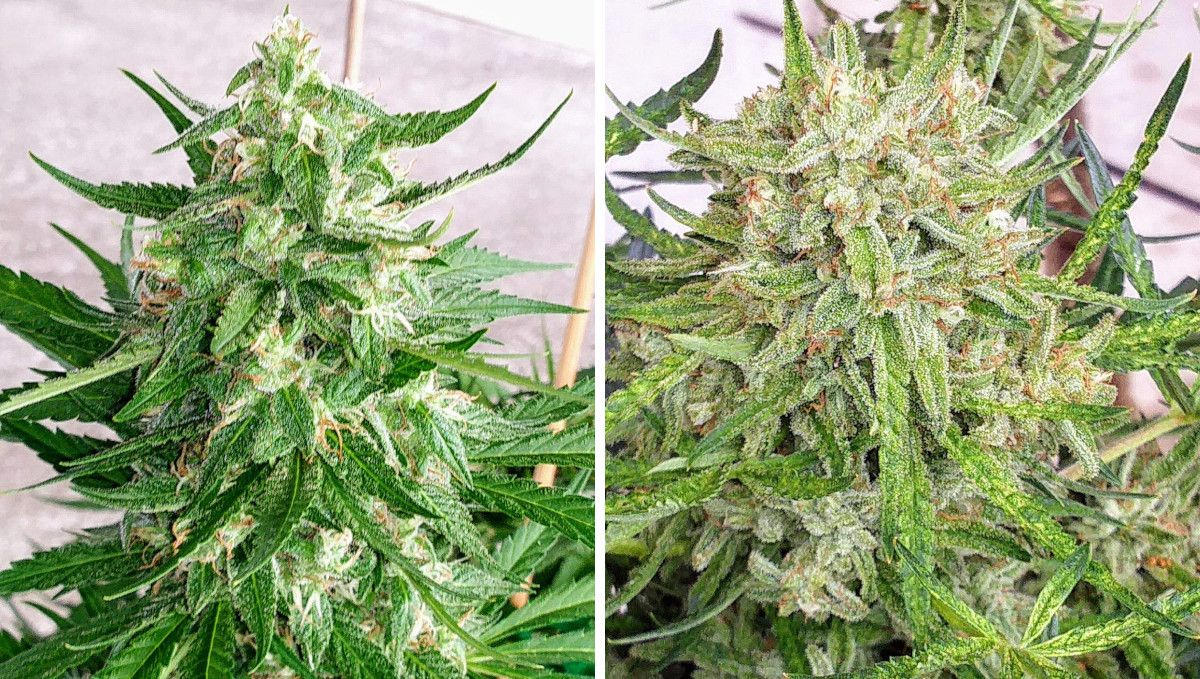
Although your autoflower has stopped getting taller, it spends so much energy on the buds that it consumes more water and nutrients than ever before. You'll probably need to water your pots every morning, and sometimes even twice a day, to keep up with their increased thirst. The concentration of your nutrient solution should be the highest now. Of special importance are phosphorus and potassium, so make sure you add plenty of both to your feeding regimen.
9. Ripening And Harvest | Week 10 (And Beyond)
As your Watermelon Zkittlez is nearing the end of its life, be ready to taper off the use of nutrients and start the so-called flush. During the flush, you only give your plants pure water and nothing else. This process helps to remove any excess nutrients and salts from the plant, resulting in a cleaner and more flavorful smoke.
Keep the temperatures mild and the air dry to prevent any potential issues with mold or other fungal infections. Maintaining optimal conditions during this stage ensures that your plants stay healthy and potent, and you can harvest the best possible buds.
| Plant Height: | 91 cm | Humidity: | 35% |
|---|---|---|---|
| Distance to Light: | 51 cm | Water per Day: | 1.6 gal (6 l) |
| Day Temp: | 25°C (77°F) | pH: | 6.5 |
| Night Temp: | 19°C (66°F) | TDS: | 230 ppm |
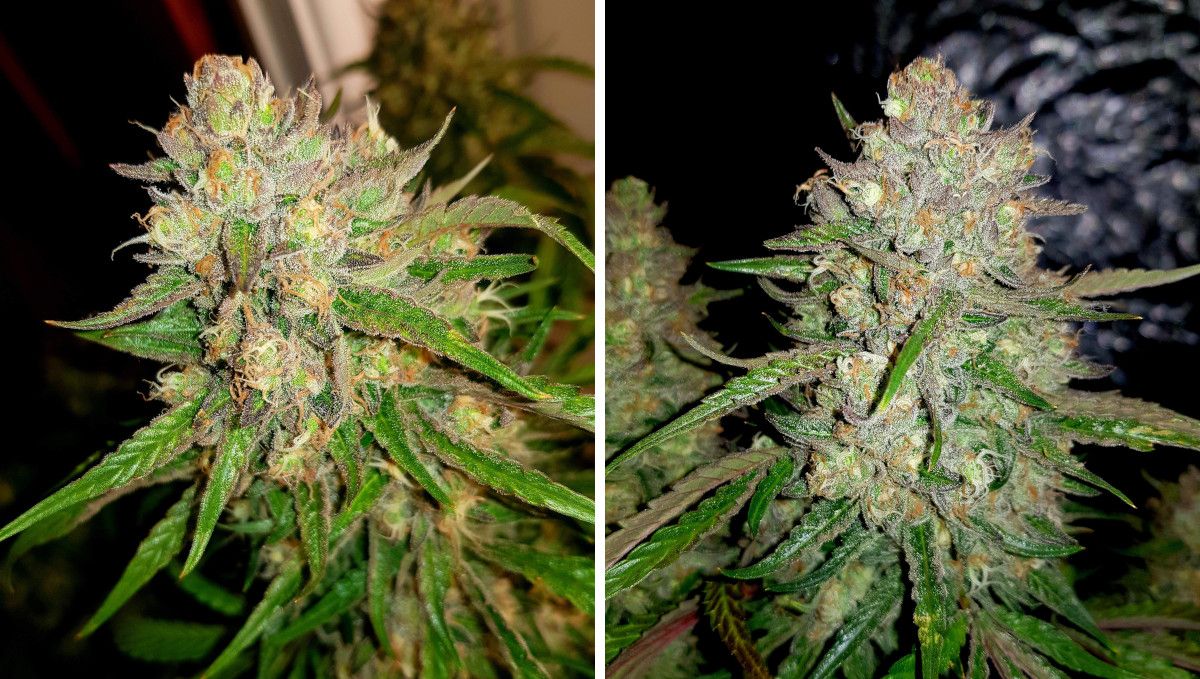
The lifecycle of Watermelon Zkittlez and other autoflowers is so short that in only 10 weeks, you'll arrive at that point in the timeline where you should start thinking about harvest. Your main concern now is not to miss the perfect window for cutting down your plants. Start by paying attention to the color of the pistils. If most of them have turned brown and withered, it means that the harvest is near.
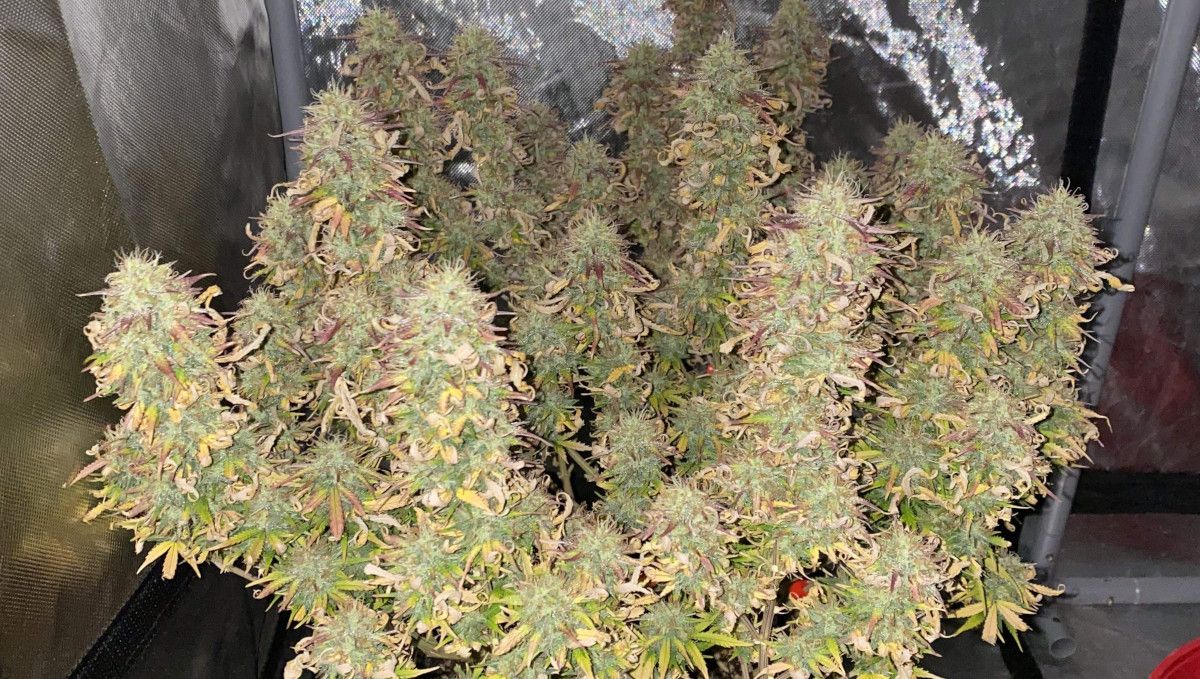
Another thing that you'll see a lot of is the fading of the leaves. Sometimes, they may become dry, brittle, and scorched like in the photo below. If you see something like this, it means something's wrong either with the conditions in your grow room (temperature, humidity, and the proximity to the light), or the plants are too far along to look green and vibrant. The harvest is either coming or even overdue.
Please keep in mind that none of the above are reliable signs of the impending harvest. The only sure way of telling if your cannabis is mature or not is to look at the trichomes under a microscope. If the trichomes are all cloudy and some of them are amber, they are at the peak of their potency and should be cut immediately.
When your autoflower is cut, the no-less-important stages of drying and curing begin. You should slowly dry your cannabis branches in a dark, well-ventilated room with a comfortably cool temperature for 5 to 10 days. Then try to bend a branch, and if it snaps instead of bending, cut the buds from the branch and put them into the glass jars to cure for another 2 to 3 weeks. This ensures the best aroma, flavor, and potency of your smoke.
10. Yield and Smoke Report
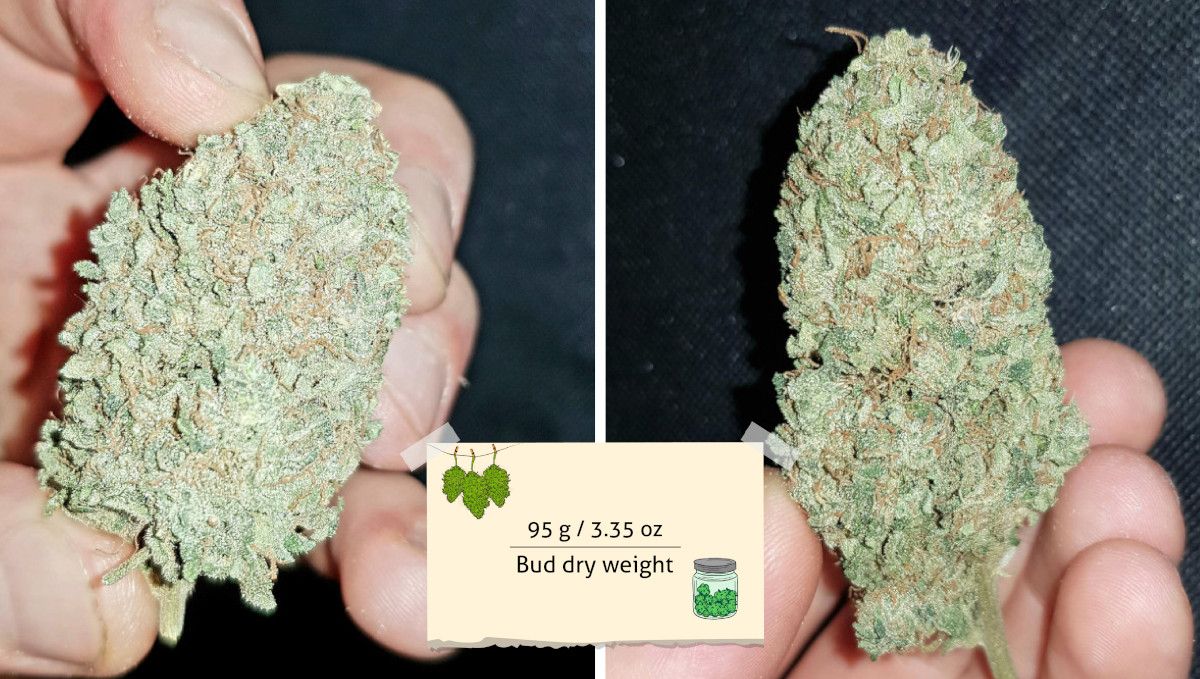
The first grower featured in our week-by week guide harvest 95g (3.35oz) of top-shelf bud of epic firmness and bag appeal.
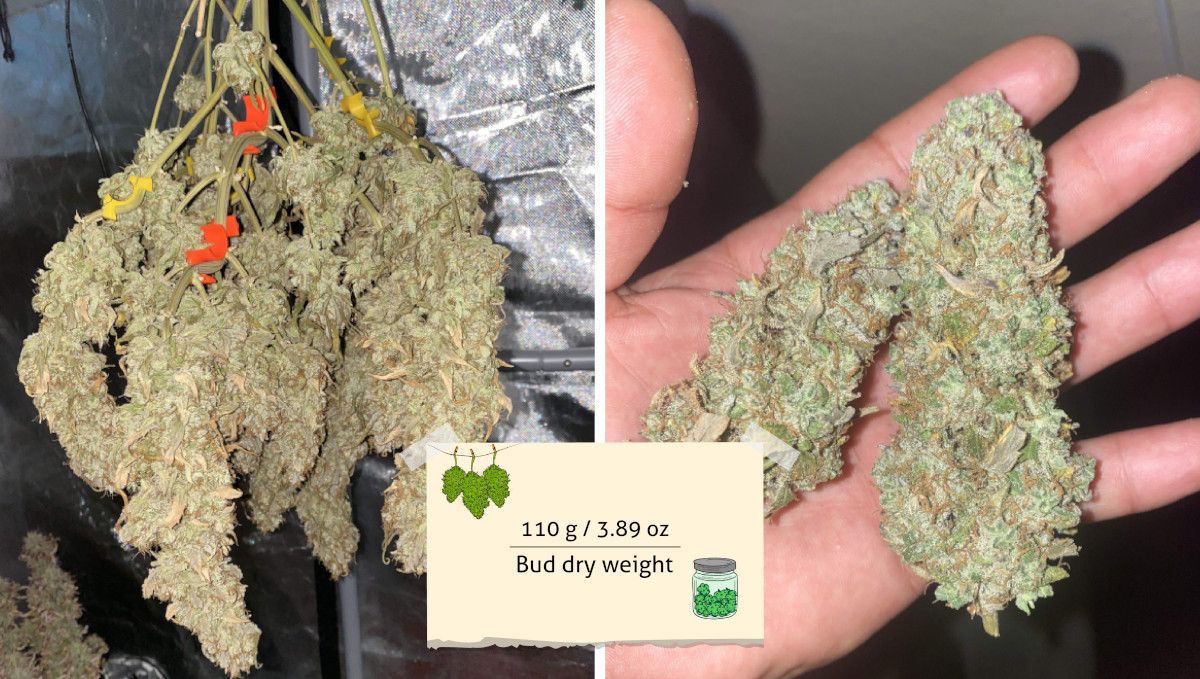
The second grower we've been following achieved an even better result, harvesting 110g (3.89 oz).
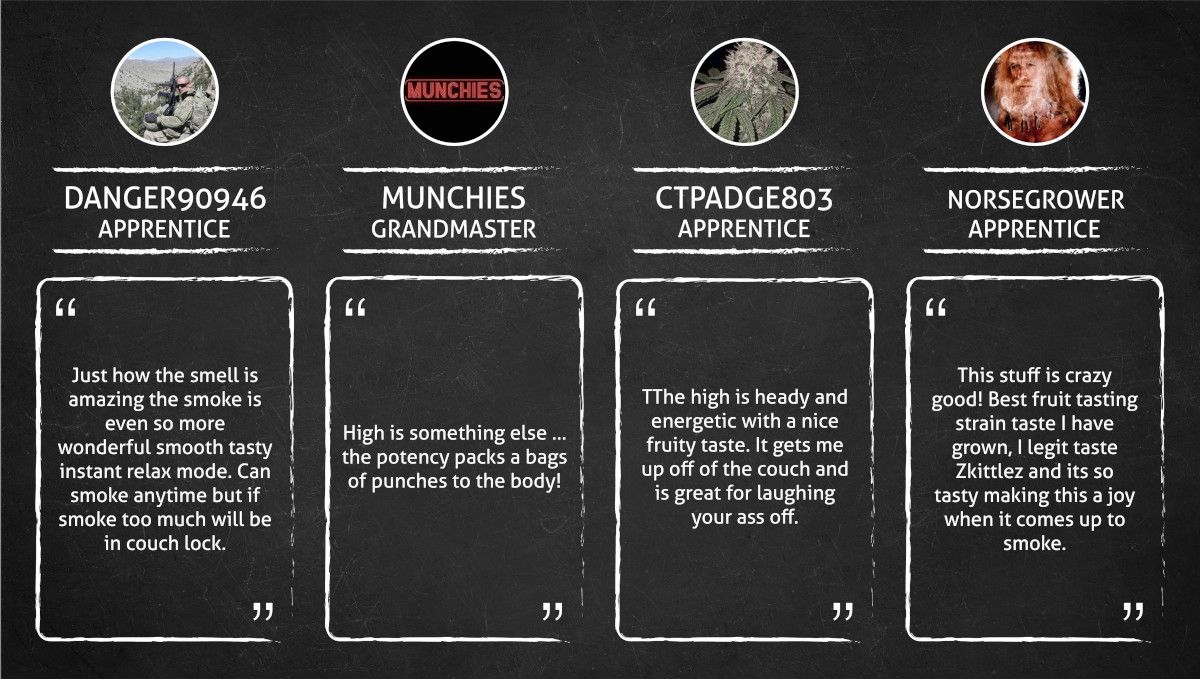
According to several smoke reviews we’ve seen online, Watermelon Zkittlez Auto delivers a delightful smoking experience with its smooth, earthy taste and hints of sweetness. The buds have a frosty appearance and alluring watermelon aroma during late flower. The high is heady and energetic, perfect for daytime or nighttime indulgence. Smokers appreciate its potent effects, which can lead to relaxation and laughter, but may also result in couch lock if overindulged.
11. In Conclusion
With Watermelon Zkittlez Auto, you can use the most straightforward method of growing -- employing no training techniques and generally taking a low-maintenance approach -- and get a vigorous plant that looks healthy and vibrant all the way to the harvest and yields buds of top quality. This is the route the first grower took, and in his case the plant's height didn't exceed 100 cm, which would be acceptable for most indoor setups.
The second grower in our guide preferred to keep the canopy extremely low and to make sure every bud site was exposed to light at every stage. This approach called for constant defoliation, and at the end of the grow the plant looked stressed out and even scorched. However, the final yield was better, so it's up to you -- whether you prefer more work and more stress for the plant for a slightly better harvest or not. We would recommend taking the simplest and most natural approach if you don't have much experience and save advanced techniques for later.
In any case, Watermelon Zkittlez Auto is a hardy and beginner-friendly strain, and we hope you'll have fun cultivaing it regardless of your experience level. Happy growing, everyone!
